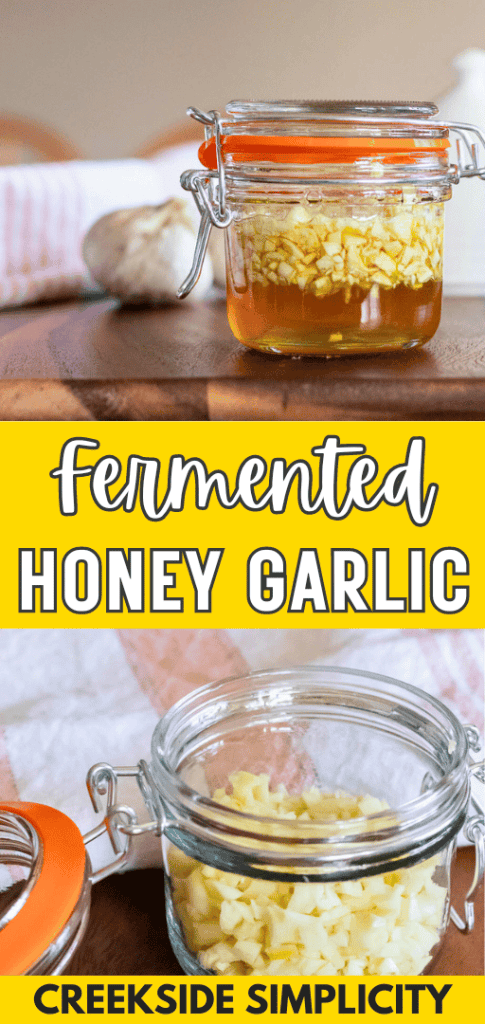
Fermented Honey Garlic (Whole or Chopped)
Fermented honey garlic is made with 2 simple ingredients: raw honey and garlic. It creates a delicious garlic-infused honey that can be used both medicinally and as food.
If you’re new to fermentation, this is an extremely easy ferment to start with!
Our family strives to live as naturally as possible.
We grow and preserve as much of our own food as possible.
We use essential oils for our health and wellness needs.
We make our own cleaning supplies and soap.
We even stick to natural fibres for our clothing and household textiles.
So learning how to make simple herbal remedies at home, was a no-brainer decision.
I’m also a big fan of fermented foods, so when I learned about this simple honey garlic ferment, I knew immediately that I needed to try it!
This tasty fermented garlic in honey, is both food and medicine (just as it should be!).
What Is Fermented Honey Garlic?
Fermented garlic is made from fresh garlic that has been fermented in honey.
The honey draws the liquid out of the garlic, which is what causes the honey to ferment.
The fermentation process also draws the spiciness out of the garlic, making it more mild, and infuses the honey with the garlic juices, making the honey have a bit of a kick.
Not only does this process change the flavor of the honey and garlic, it also makes it more bioavailable, which helps improve digestion.
If your’e new to fermenting, fermented honey garlic is one of the easiest ferments to start with.
You don’t need any special equipment or tools. Just a jar, some raw honey, and some garlic.
History of Fermented Honey Garlic

There is evidence of fermentation dating back thousands of years.
Fermentation was one of the primary methods of food preservation; long before the advent of canning.
Of course, fermentation has always been used to make alcohol.
Garlic and honey have both been used medicinally for millennia.
Garlic was used as medicine by Hippocrates, the Ancient Greek physician who was considered the father of modern medicine.
It was also used medicinally by the Egyptians, Babylonians, Romans and Chinese.
The ancient Egyptians used honey on wounds, as a natural antibiotic. Honey naturally contains a minute amount of hydrogen peroxide. When not sealed in a jar, honey also draws liquid out of other items (which is exactly how it is used to ferment garlic), so for first aid, it can help draw out infections.
Although there isn’t much documentation available on the history of fermenting honey and garlic, it likely has its roots in folk medicine, where it was used for healing and preserving.
Health Benefits of Fermented Garlic
Honey and garlic separately each have tremendous health benefits. When you both combine them and ferment them, it creates a powerful synergistic effect.
- Can help detoxify heavy metals, which in turn reduces our susceptibility to cold and flu-like symptoms
- Reduces the risk of heart disease by lowering cholesterol and blood pressure
- The probiotics created in the fermentation process helps support digestive health
- Can help regulate blood sugar
- The antioxidants present in garlic ferments can inhibit the growth of cancer cells
- natural antibiotic
This post may contain affiliate links, which means if you make a purchase through one of these links, I make a small amount of commission at no extra cost to you. As an Amazon affiliate, I earn from qualifying purchases. See full disclosure here.
Ingredients
To make this fermented honey garlic, you need just 2 simple ingredients. But make sure you choose them correctly, as pasteurized honey will not ferment.
1. Local Raw Honey
Pasteurized honey has been heated to high temperatures to kill any bacteria. Some may think this is a good thing. But guess what? It’s that healthy bacteria that provides all of the health benefits that honey has to offer. Not to mention, bacteria and yeast are required for fermentation.
So if you’re using store-bought honey (that doesn’t specify that it’s raw or unpasteurized), your honey garlic will not ferment.
You definitely want raw, unpasteurized honey, and local is even better. That’s because local honey can even help with symptoms of seasonal allergies.
Find a local beekeeper to purchase your honey from.
Plus there are tons of benefits to supporting your local economy, so I try to buy local whenever possible.
I’m actually hoping to get my own bees this year, so I can harvest my own honey! (My back yard is ultra-local).
2. Raw Garlic Cloves (Local and Organic if Possible)
Garlic is one of the foods that is often sprayed with sprout inhibitors.
Sprout inhibitors prevent the garlic from sprouting, giving it a longer shelf-life.
Once garlic sprouts, it wants to be planted in the ground! And if it isn’t planted, it rots. But you definitely don’t want sprout inhibitors sprayed on your food, especially food that you intend to consume for health purposes.
I don’t have a huge amount of trust in the ‘organic’ label, mainly because every country has different standards when it comes to ‘organic’.
I prefer to buy my garlic from local suppliers, whom I can speak to directly, and I have never encountered a local garlic grower who sprays anything on their garlic crop.
Even better would be to grow your own garlic (it’s my favourite crop to grow – it’s so easy, and since you’re just re-planting garlic cloves, you will never buy garlic again! Plus, I love that it gets planted in the fall, and pops up in the spring. It’s so fun when you go out in the spring, and you already have a crop growing!).
Whatever garlic you choose, make you have fresh garlic cloves, and hasn’t started to sprout or dry out. (This is why fall is the ideal time to make this honey-fermented garlic, since the garlic has been freshly harvested).
The garlic needs to contain enough liquid to activate the ferment, so once it has started to dry out, it’s no longer good for this purpose.
(But this is the perfect time to make some dehydrated garlic powder!).
Supplies
One of my favourite things about fermentation, is how little you need in the way of tools/supplies.
For this simple ferment, you just need a jar and a glass or plastic lid (or a one-piece flip-top style jar).
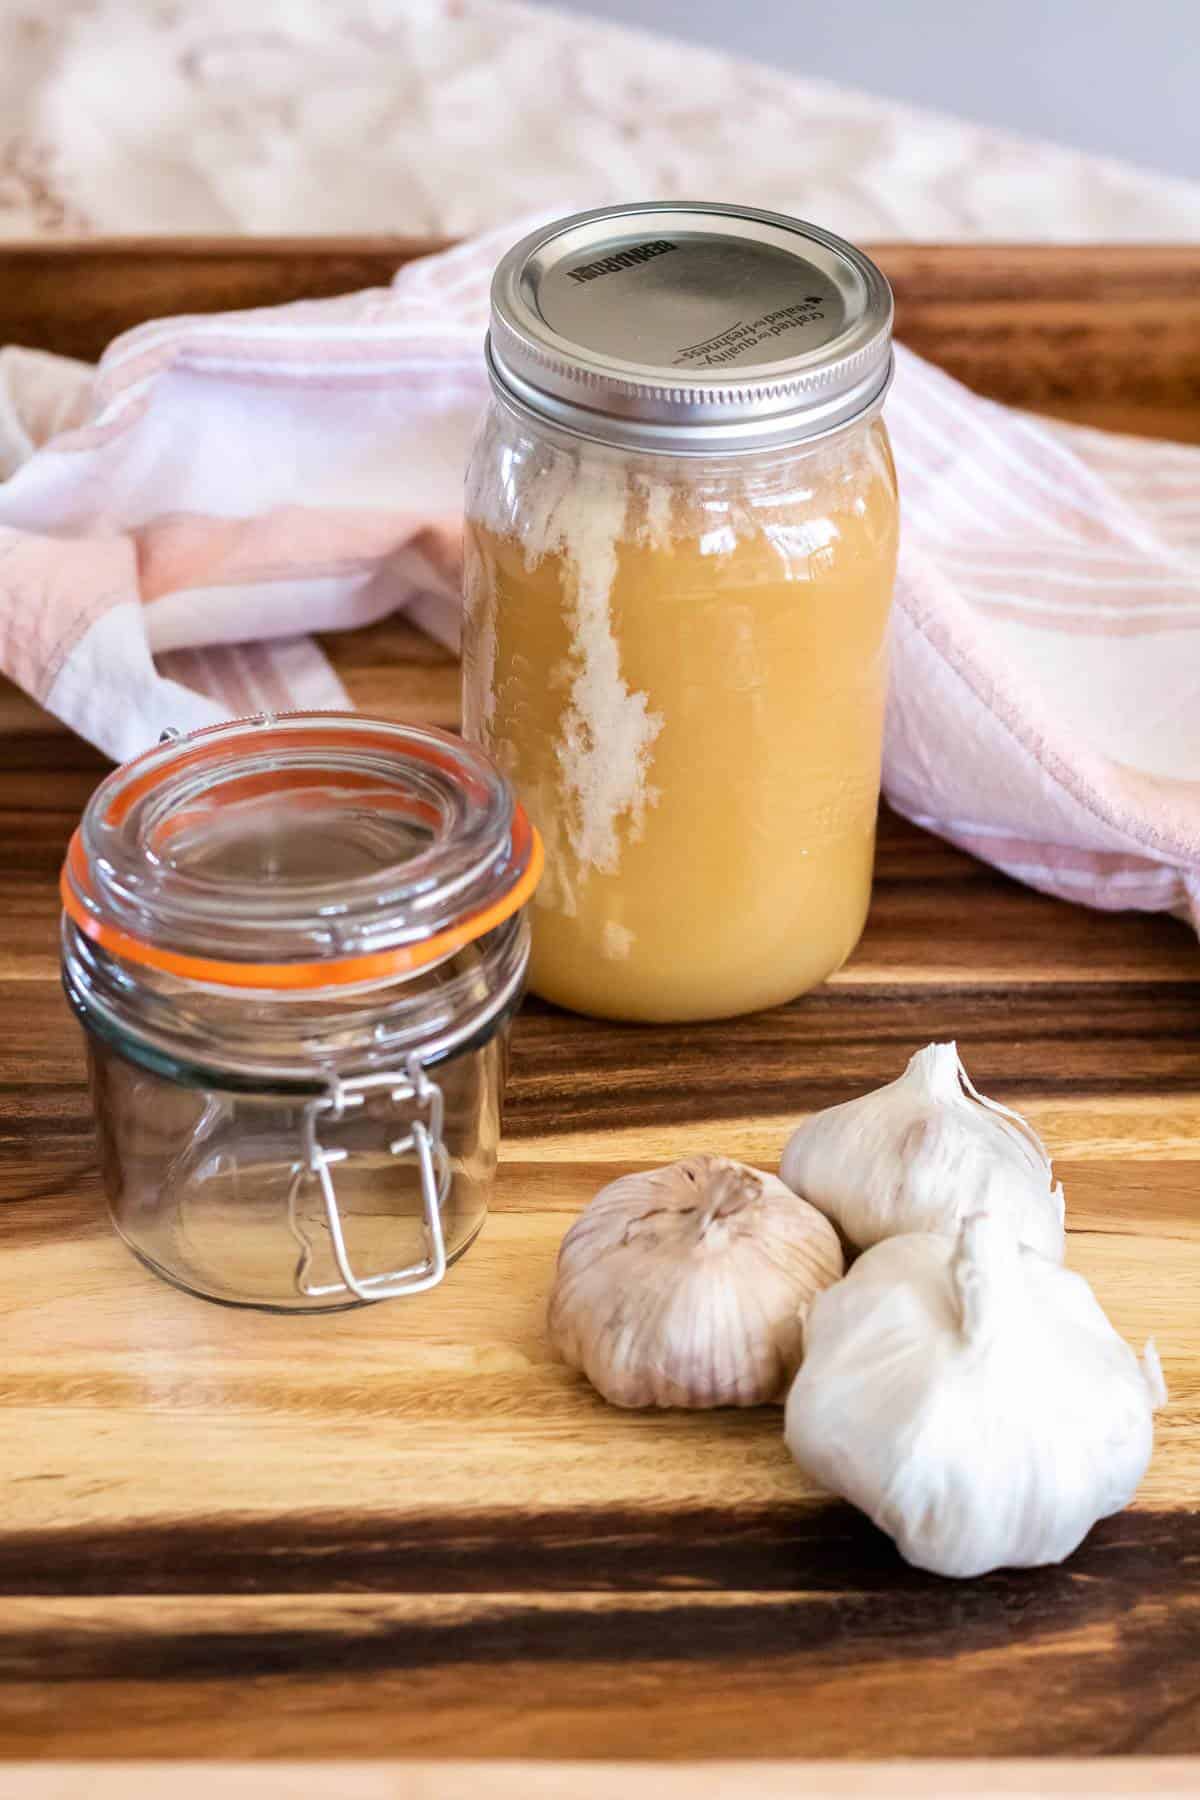
1. Glass Jar
I like to use a pint sized, or 500 ml jar for my fermented garlic honey.
You can also use a quart sized jar if you think you will use a lot of this honey ferment.
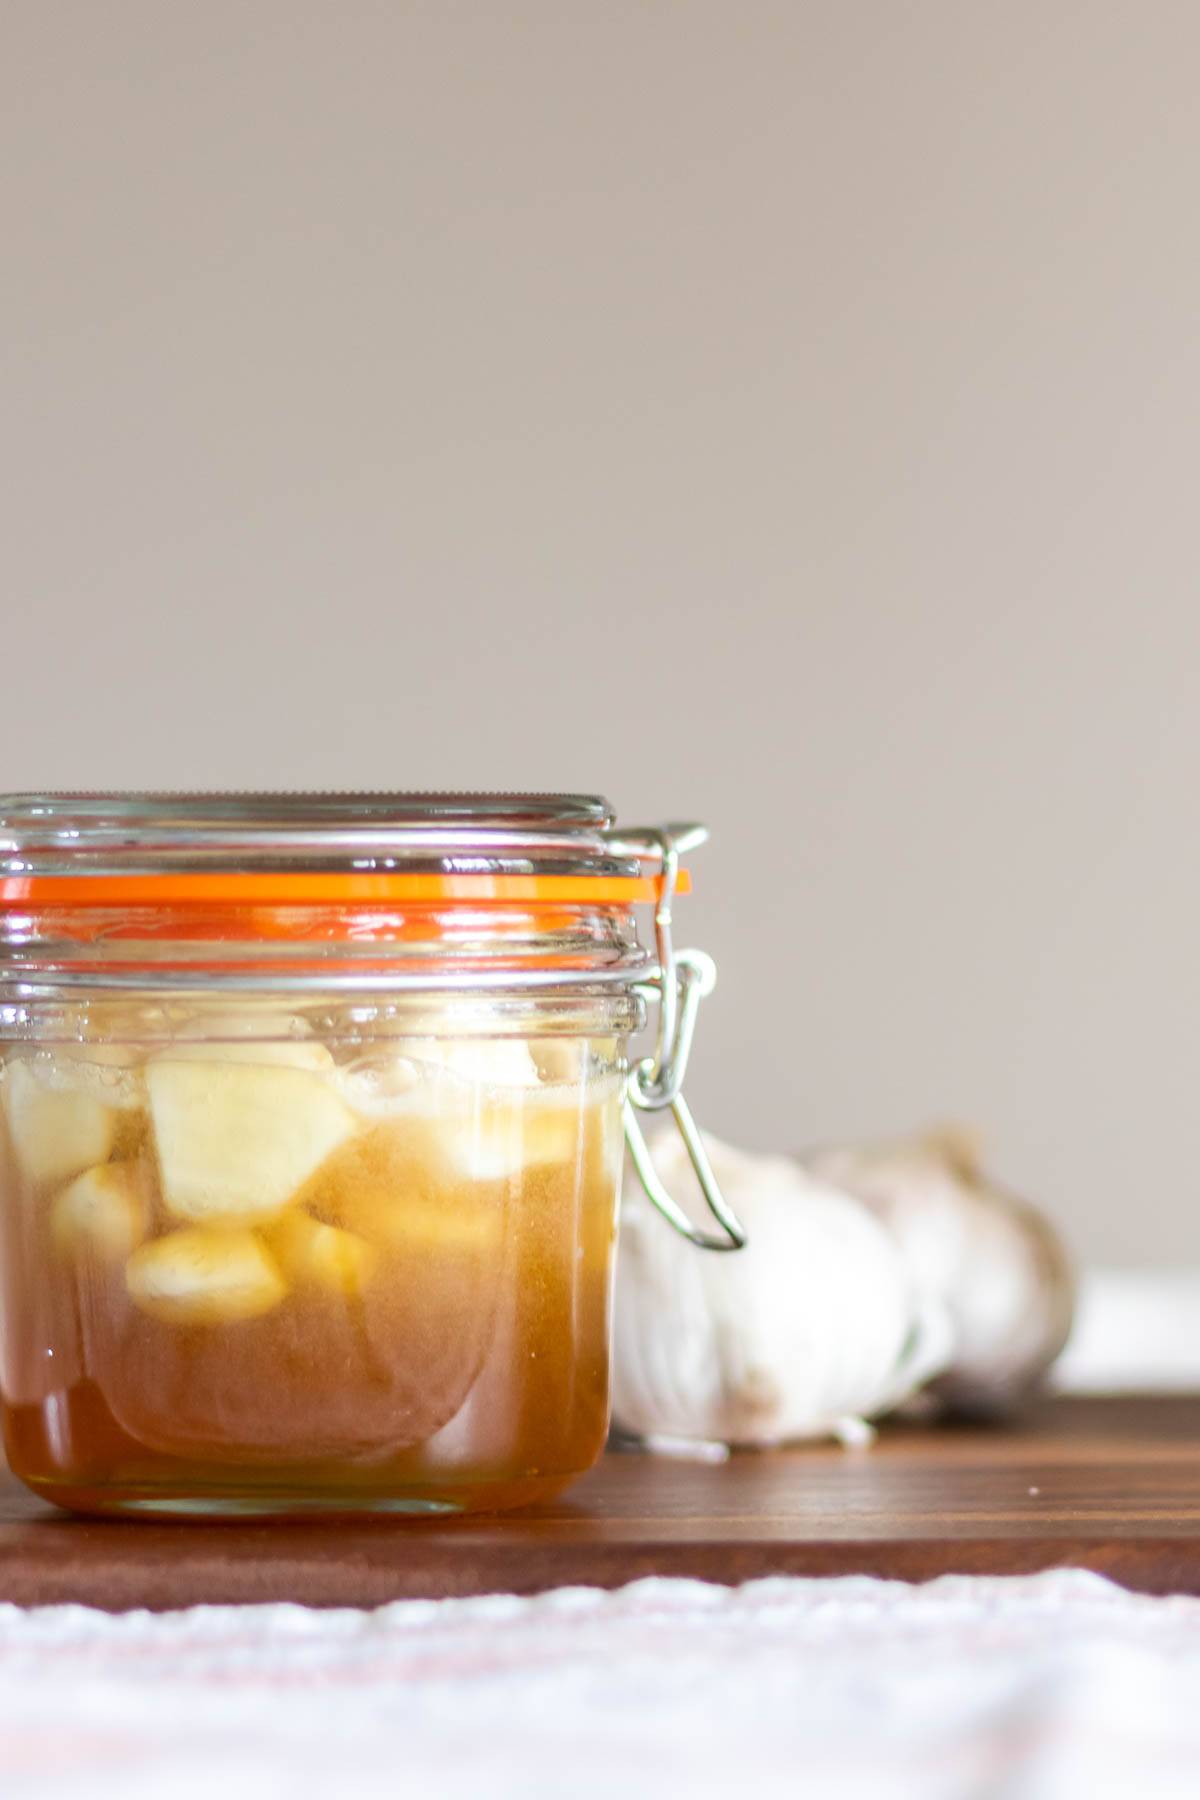
For this ferment, I have used a flip-top style jar (only because I think it’s pretty!), but you can certainly use any jar you have on hand.
2. Glass or Plastic Lid
It’s a good idea to use a glass or plastic lid, since metal will often react with the fermentation process and cause the lid to rust.
While the rust isn’t harmful, it often freaks people out, and they end up throwing their ferment away because they are worried about the rust.
I hate to see someone throw away a perfectly good ferment (especially considering the cost of food right now), so I’d much rather see you use a glass or plastic lid and prevent the rust issue altogether.
I love the look of these flip-top mason jars, but I often just use a regular canning jar with one of these Ball plastic lids.
Unlike more traditional vegetable ferments, you don’t need a fermentation weight or lid.
That’s because the honey is so thick it will easily coat your garlic, so you don’t have to worry if it doesn’t stay submerged.
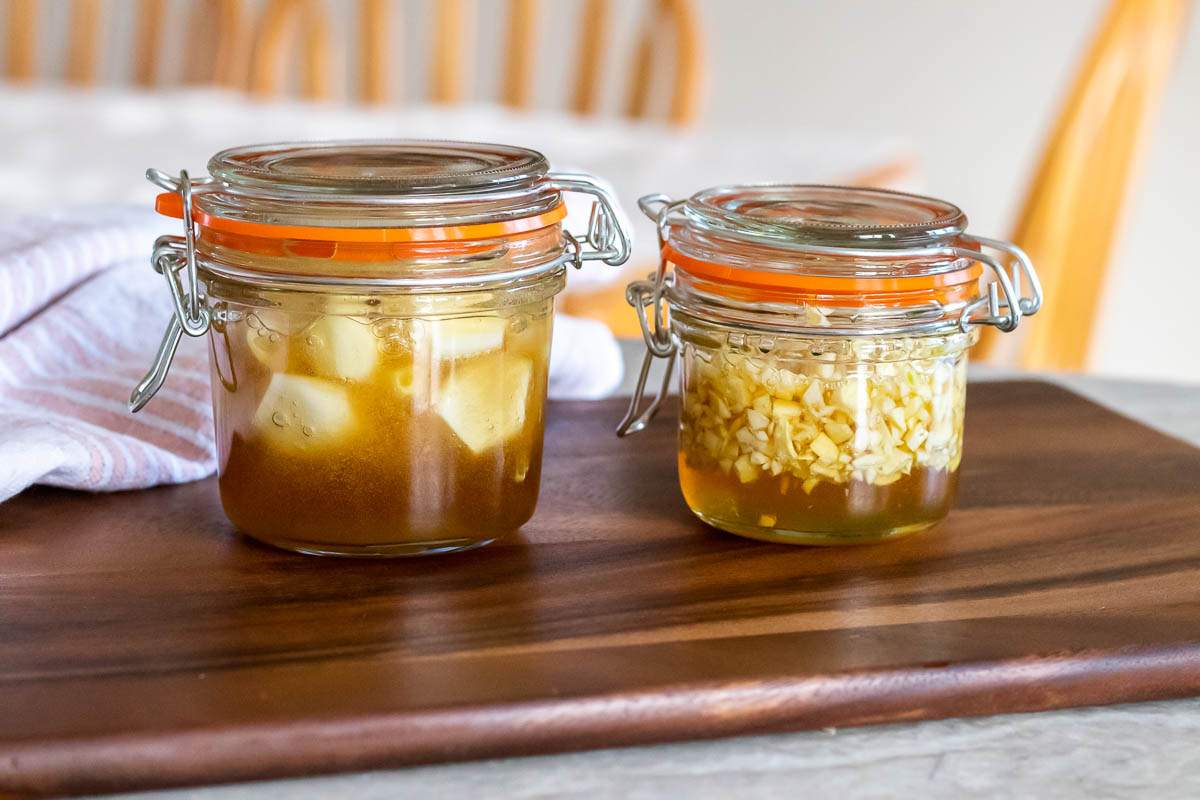
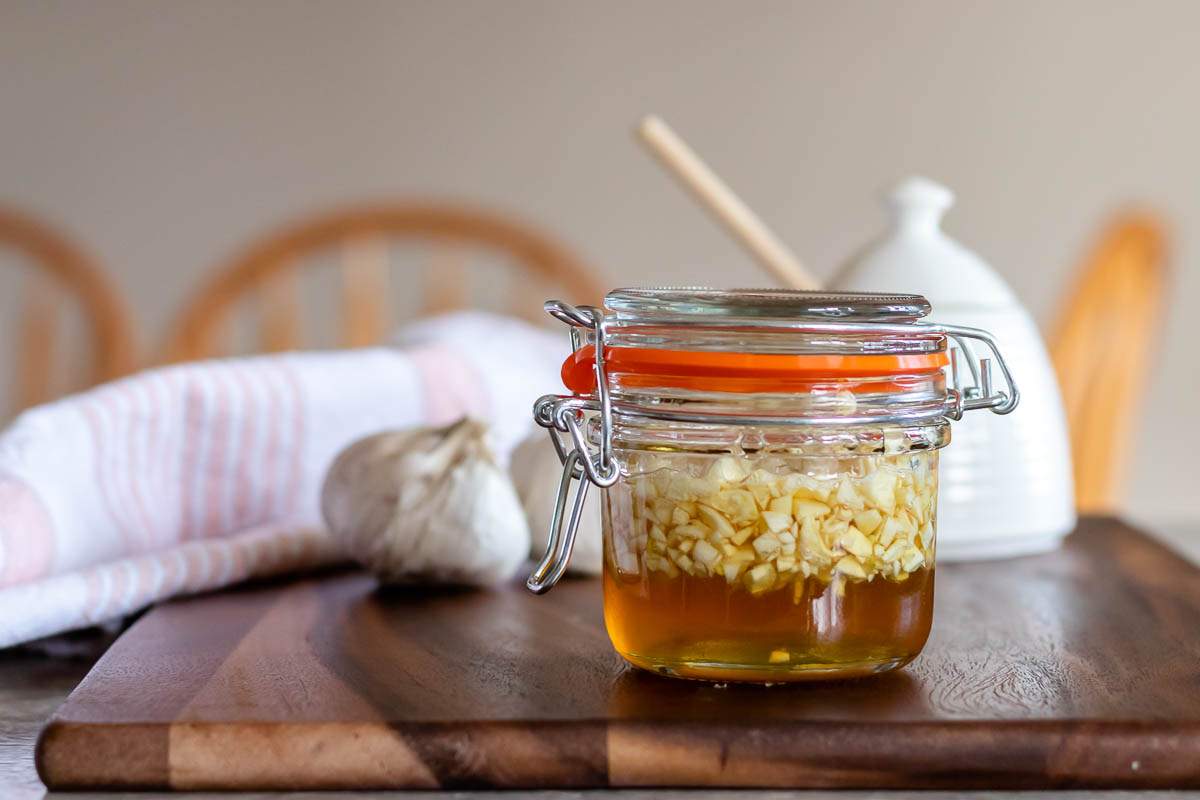
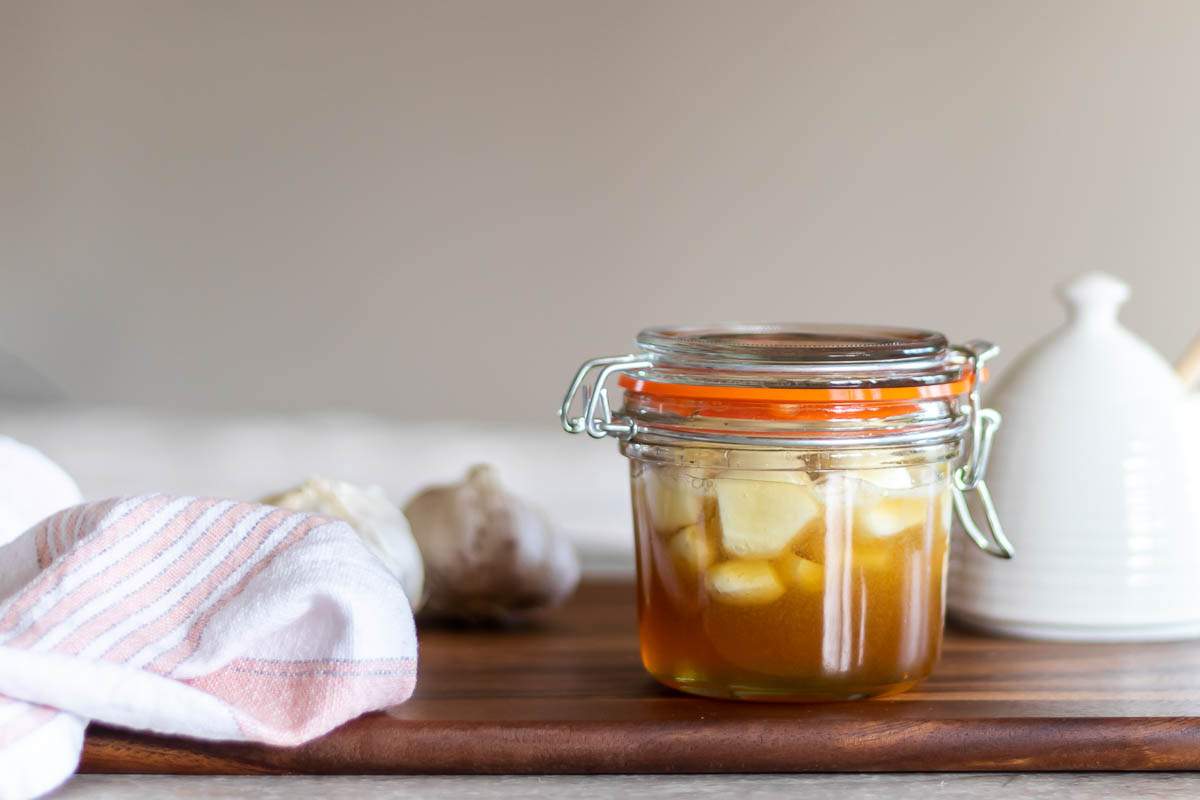
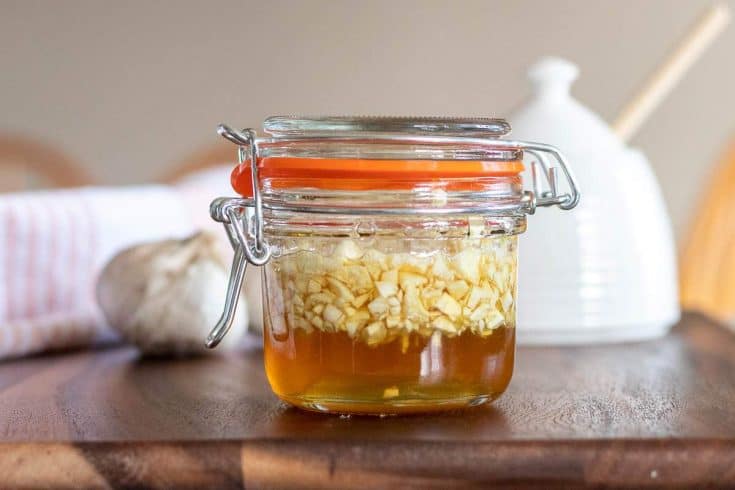
Directions for Honey Garlic with Whole Garlic Cloves or Chopped Garlic
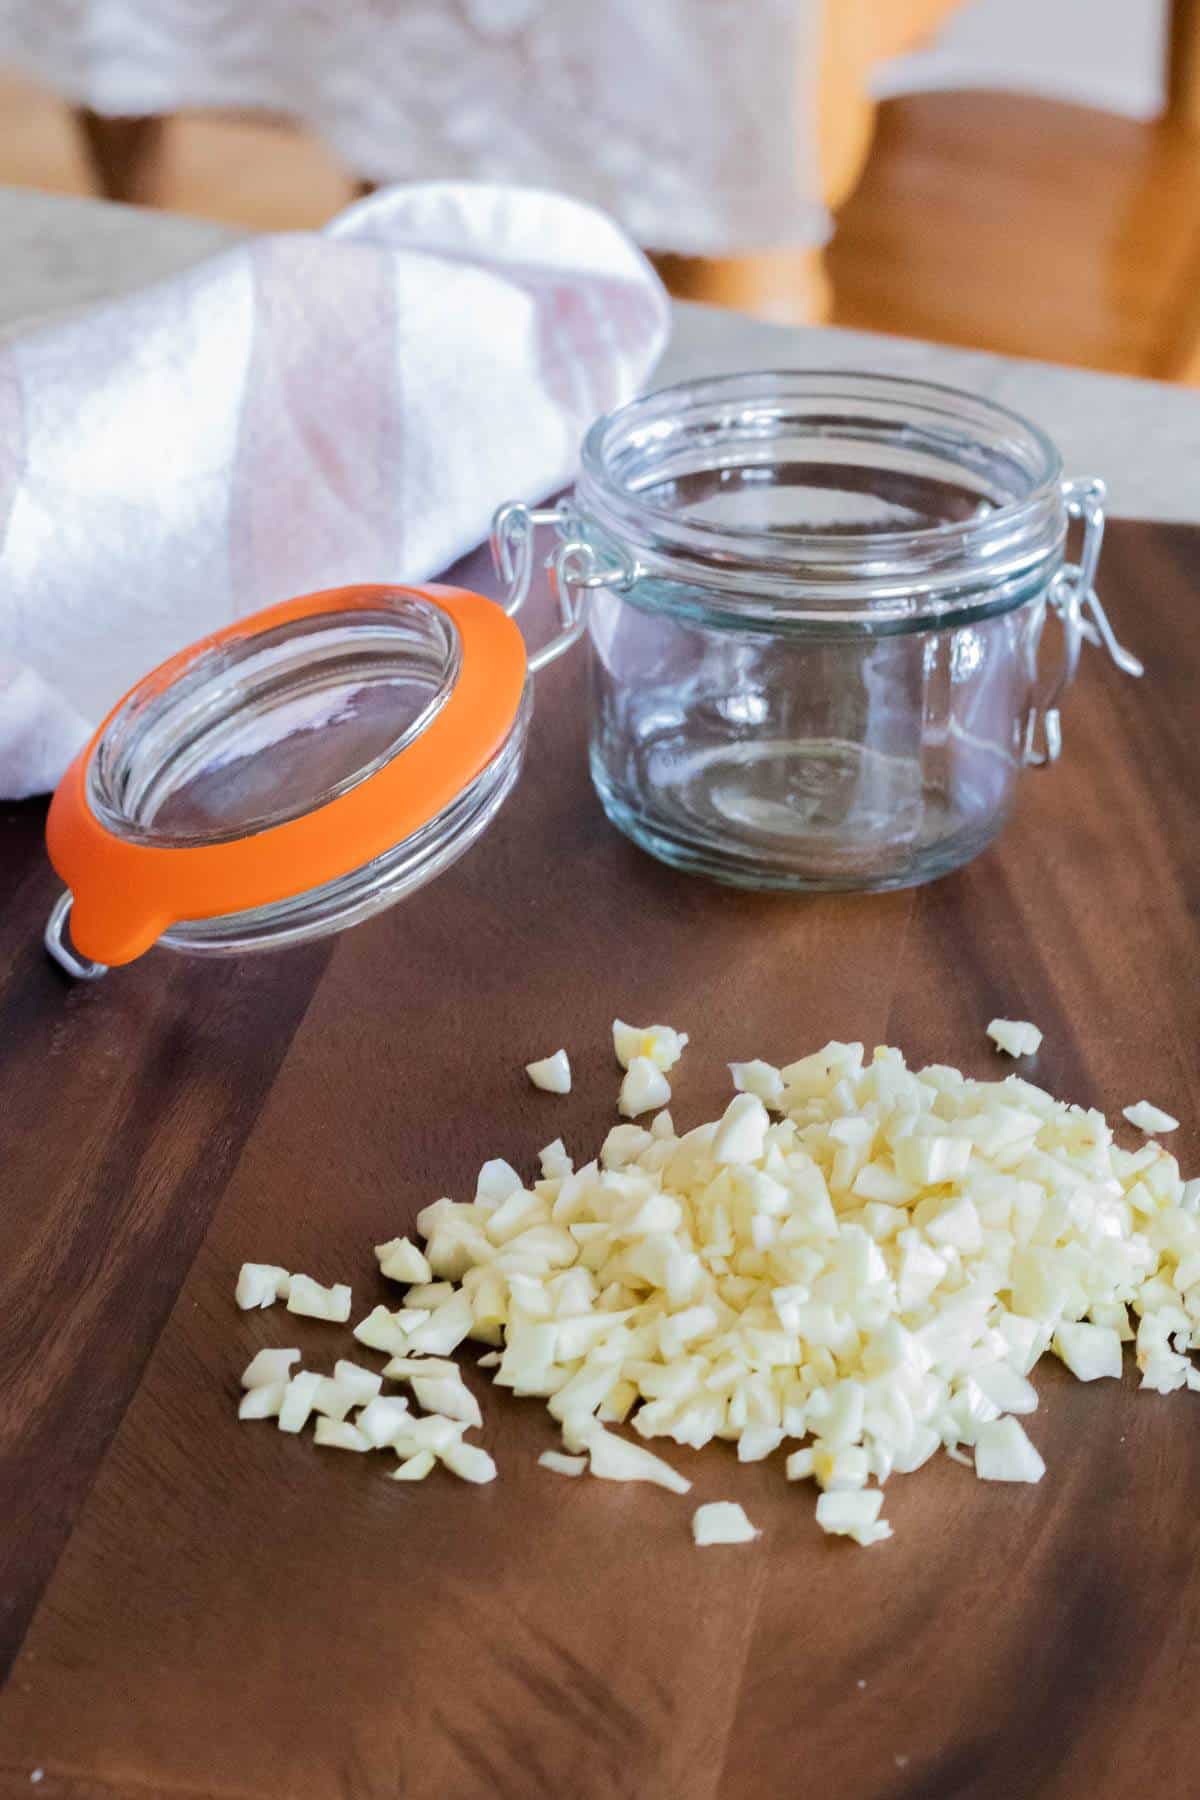
It’s entirely up to you whether you want to make this with whole cloves, or with chopped garlic.
I tend to do whole cloves, only because it’s faster and easier, but chopped would be a bit more versatile. It would be easier to take a spoonful of honey and garlic if the garlic is chopped up into small pieces.
However, if you only want the infused honey and not the garlic, you may wish to stick with whole cloves, as it will be easier to scoop out just the honey.
I’ve done both for this blog post, so you can choose to do one or the other, or both!
I did a larger jar of whole cloves, and a smaller jar of chopped garlic.
Step 1: Prepare Your Equipment
Wash your jar and lid with hot soapy water and either let them air dry, or dry them with a CLEAN dish towel. (When fermenting, you always want to start with clean tools).
For fermentation, your equipment doesn’t need to be sterile, just clean.
Step 2: Prepare Your Garlic
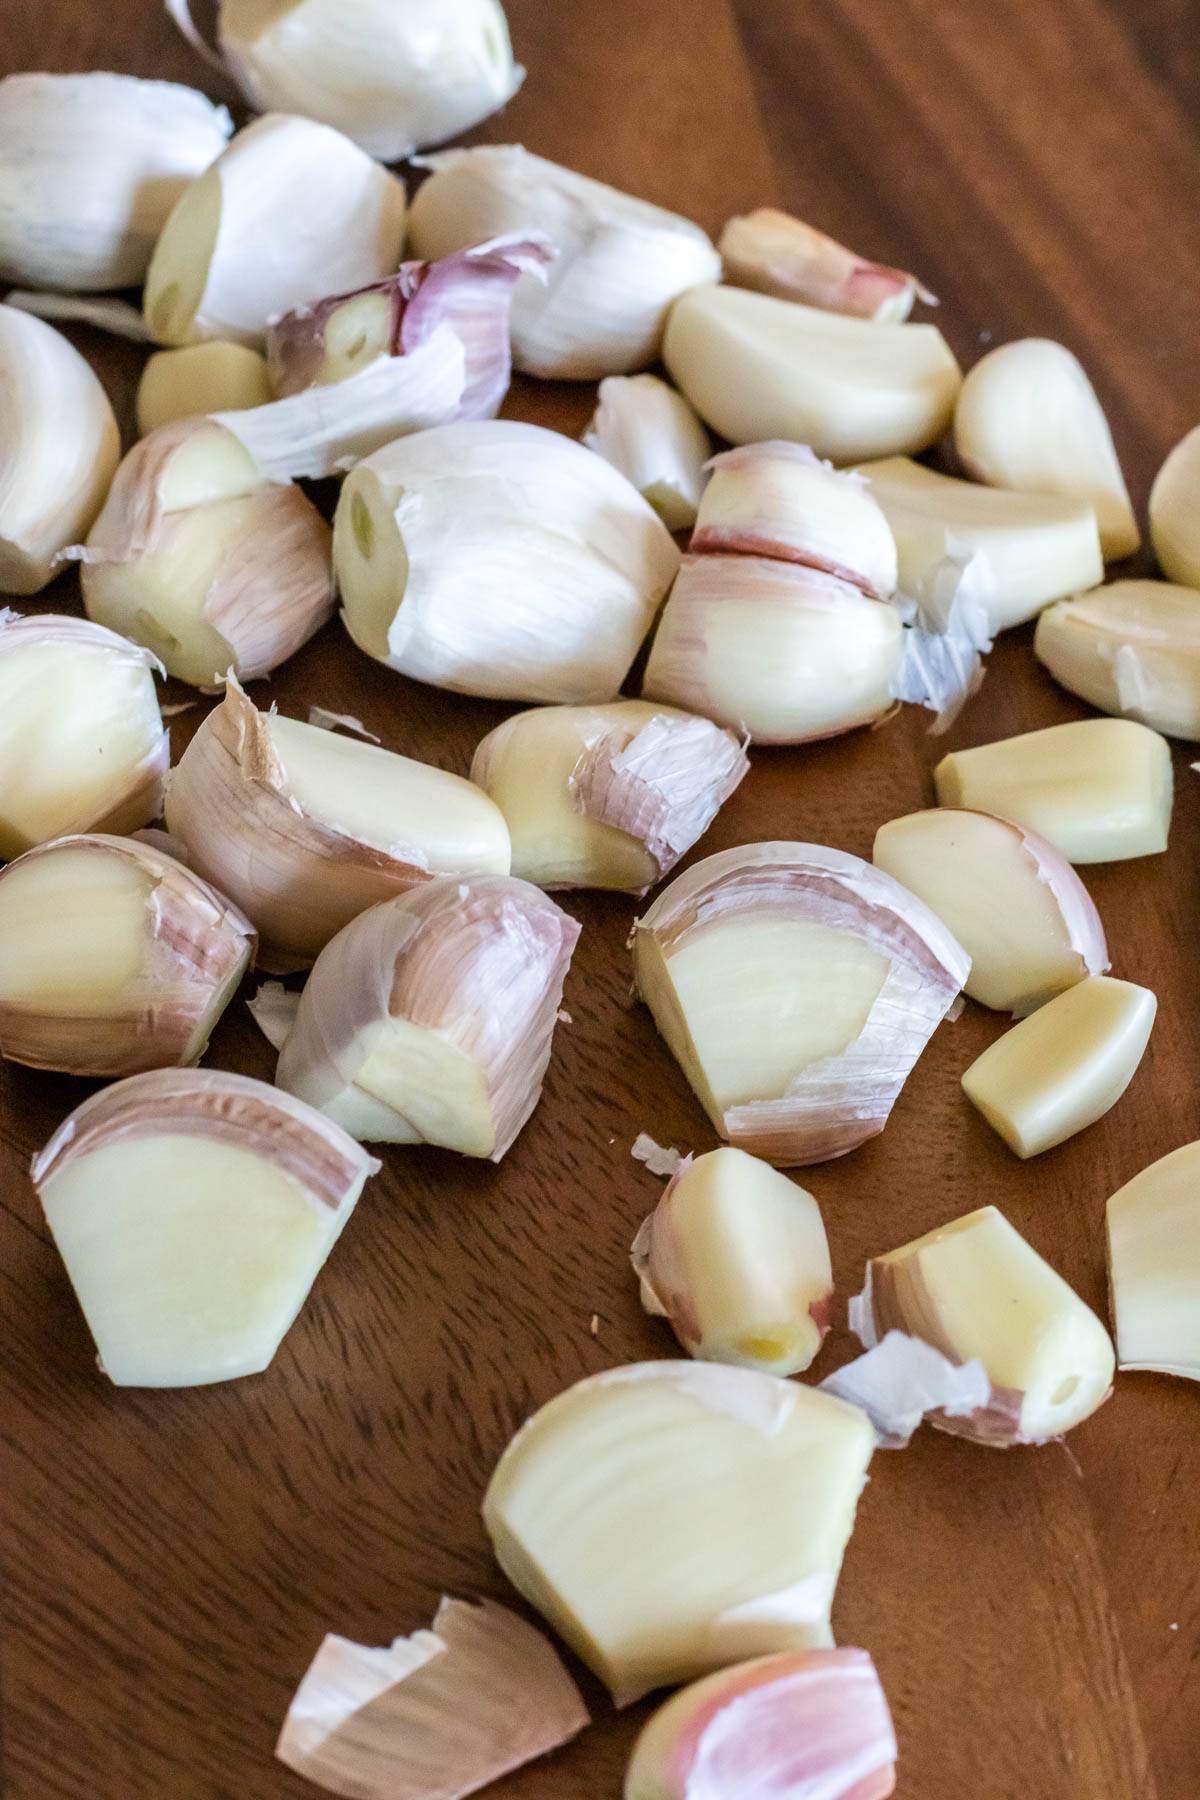
If you’re doing whole cloves, simply peel them.
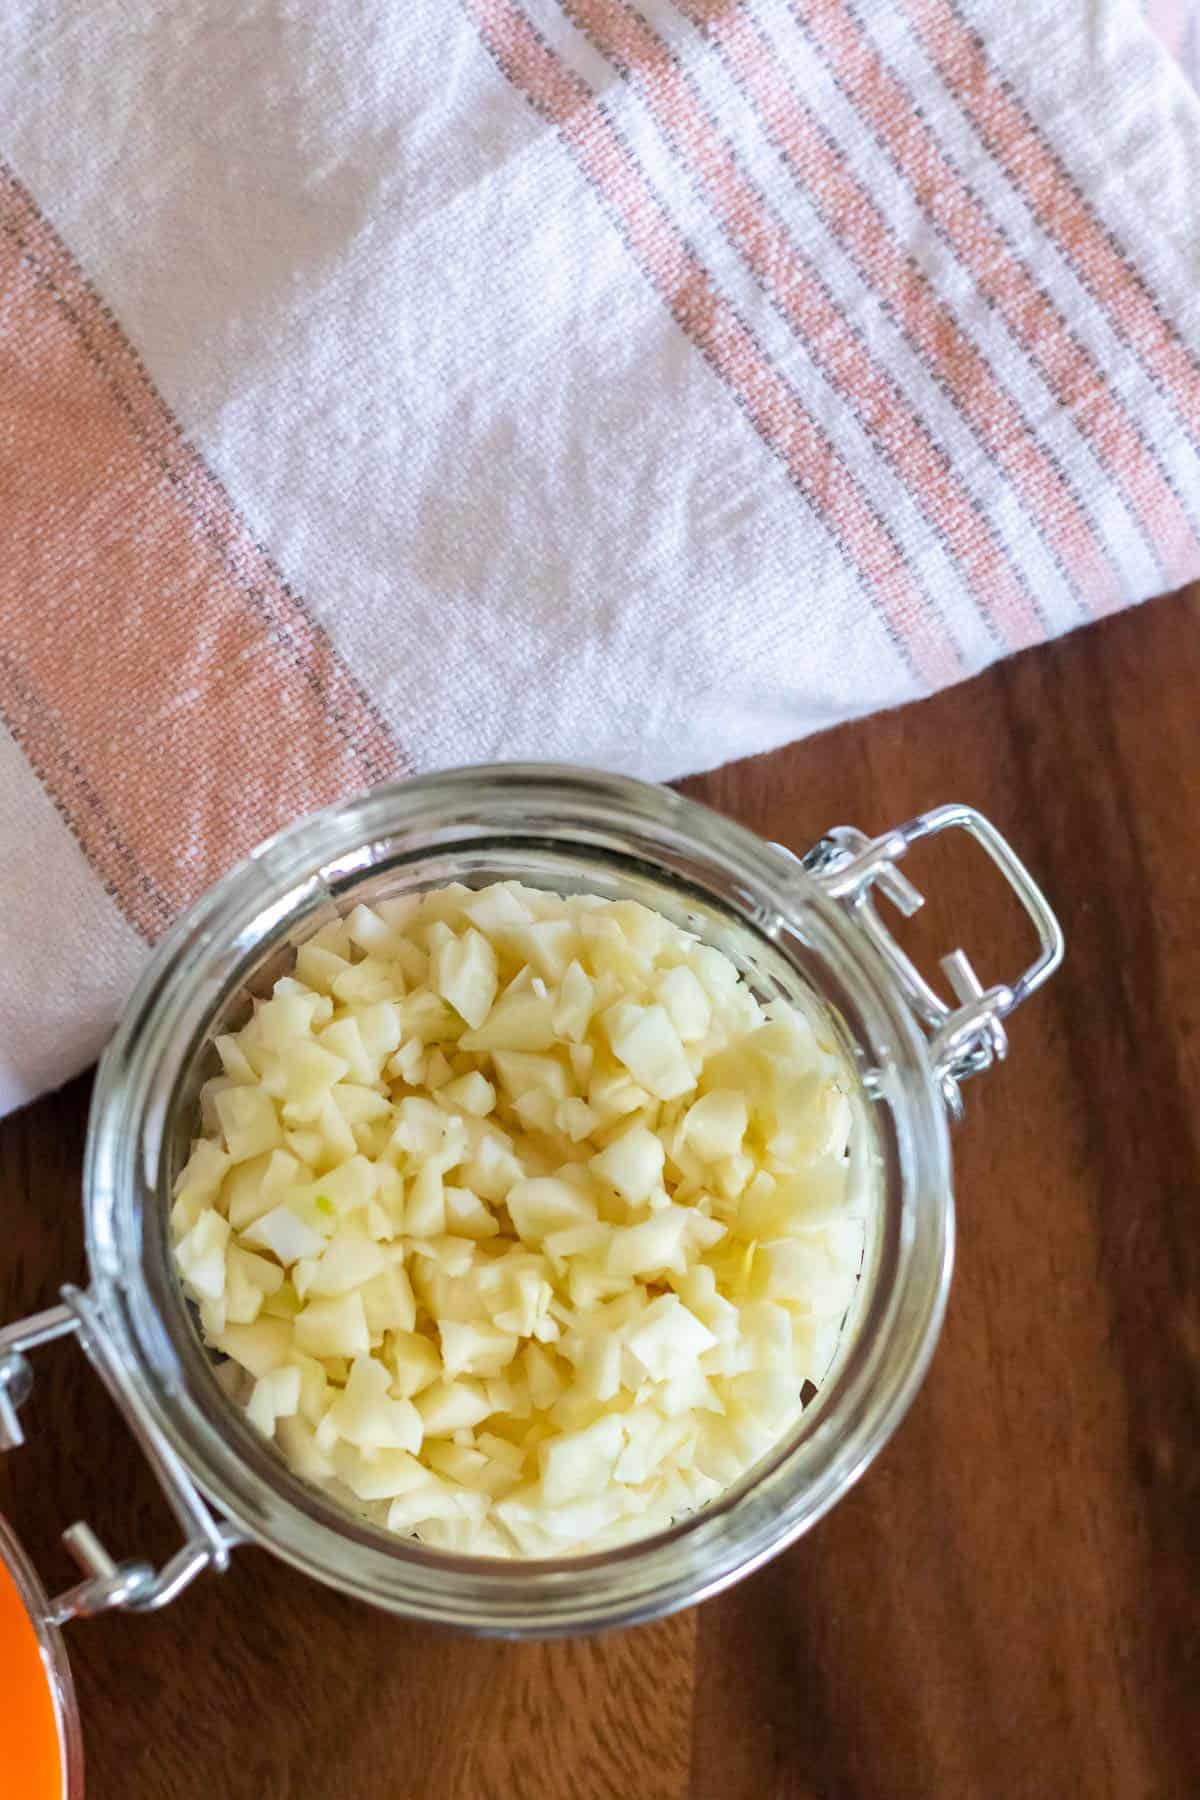
If you’re doing chopped garlic, peel and chop it to the size of your liking. (Or do both, and see which version you like better!).
To peel my garlic, I find it easiest to slice off a bit of the root and the tip. Then the papery garlic skin peels off very easily.
Step 3: Add Garlic to Your Jar
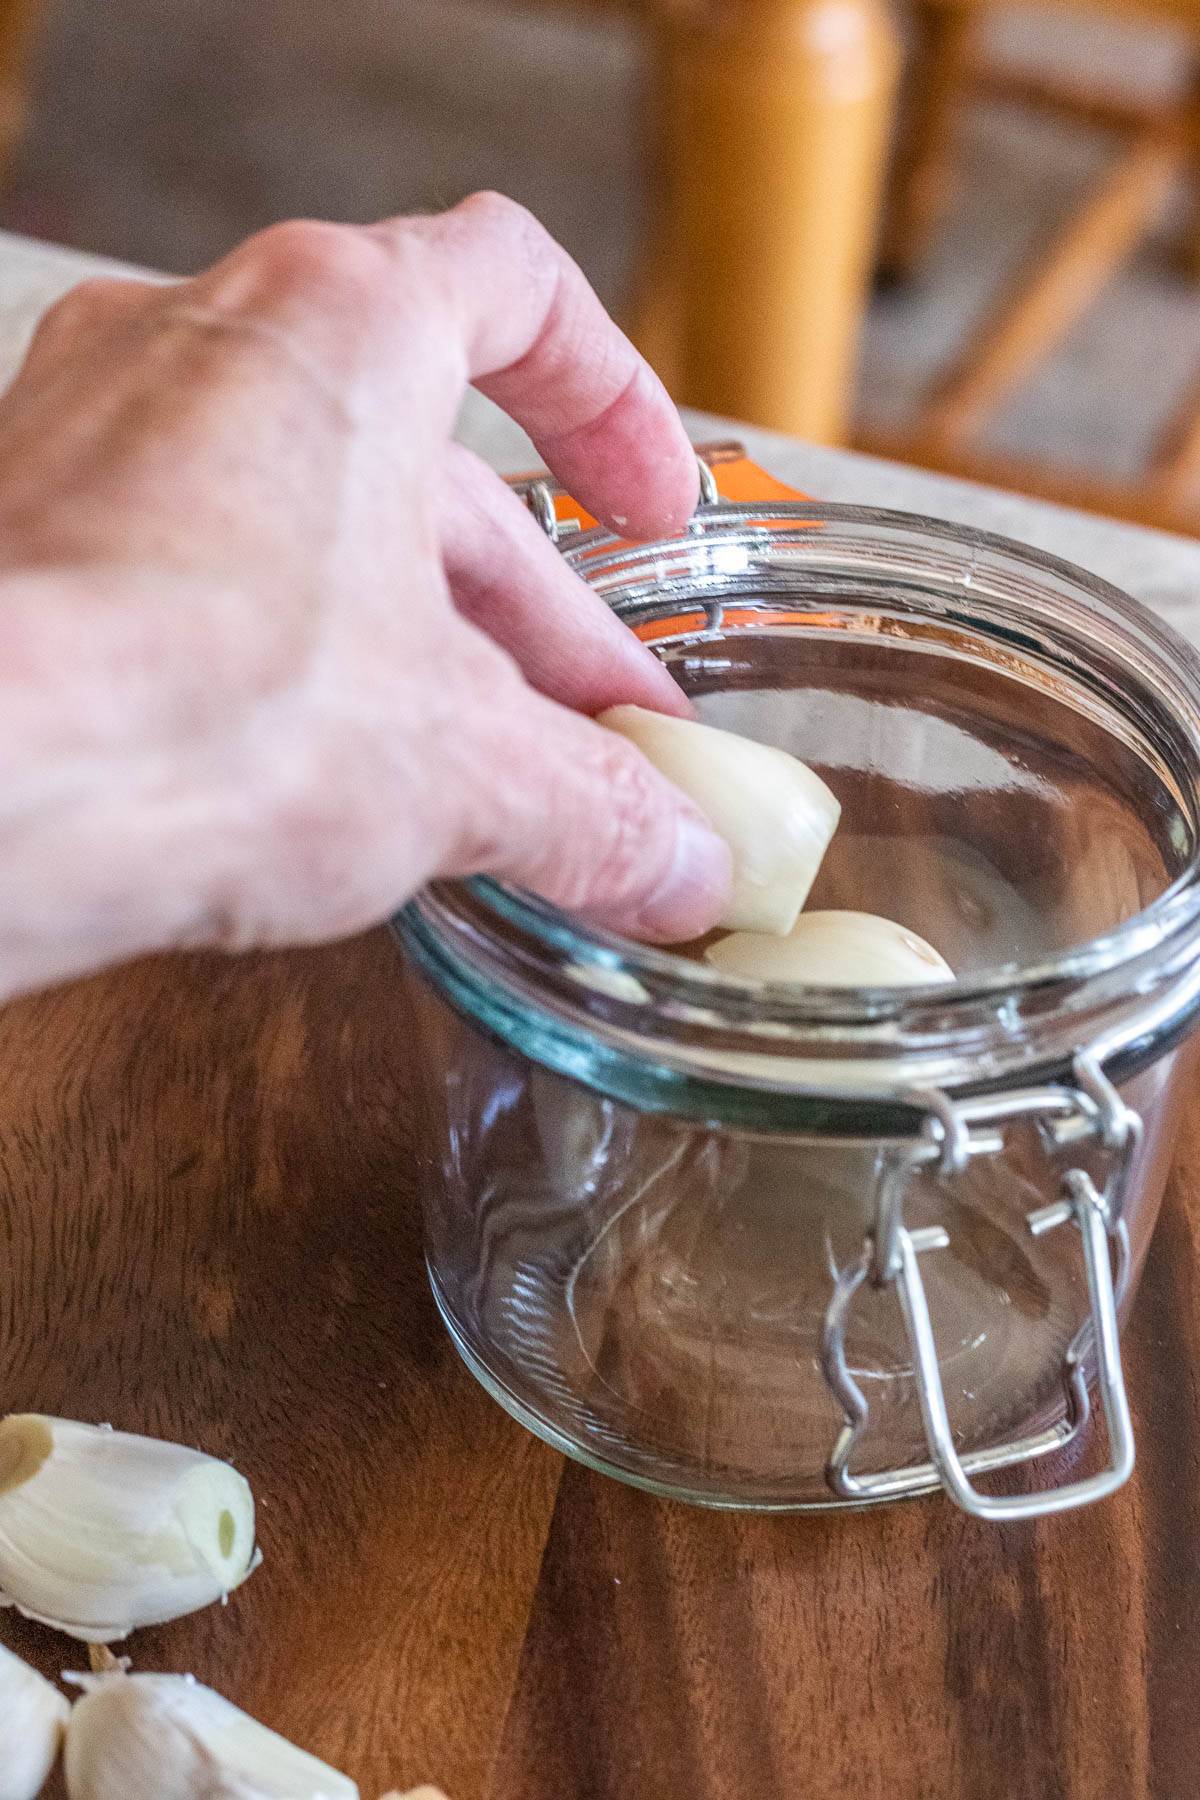
Add your whole peeled garlic cloves or chopped garlic to your clean jar, filling it up about 1/2 way to the top.
You don’t want to fill it too full because it may bubble as it ferments, and you don’t want it to overflow.
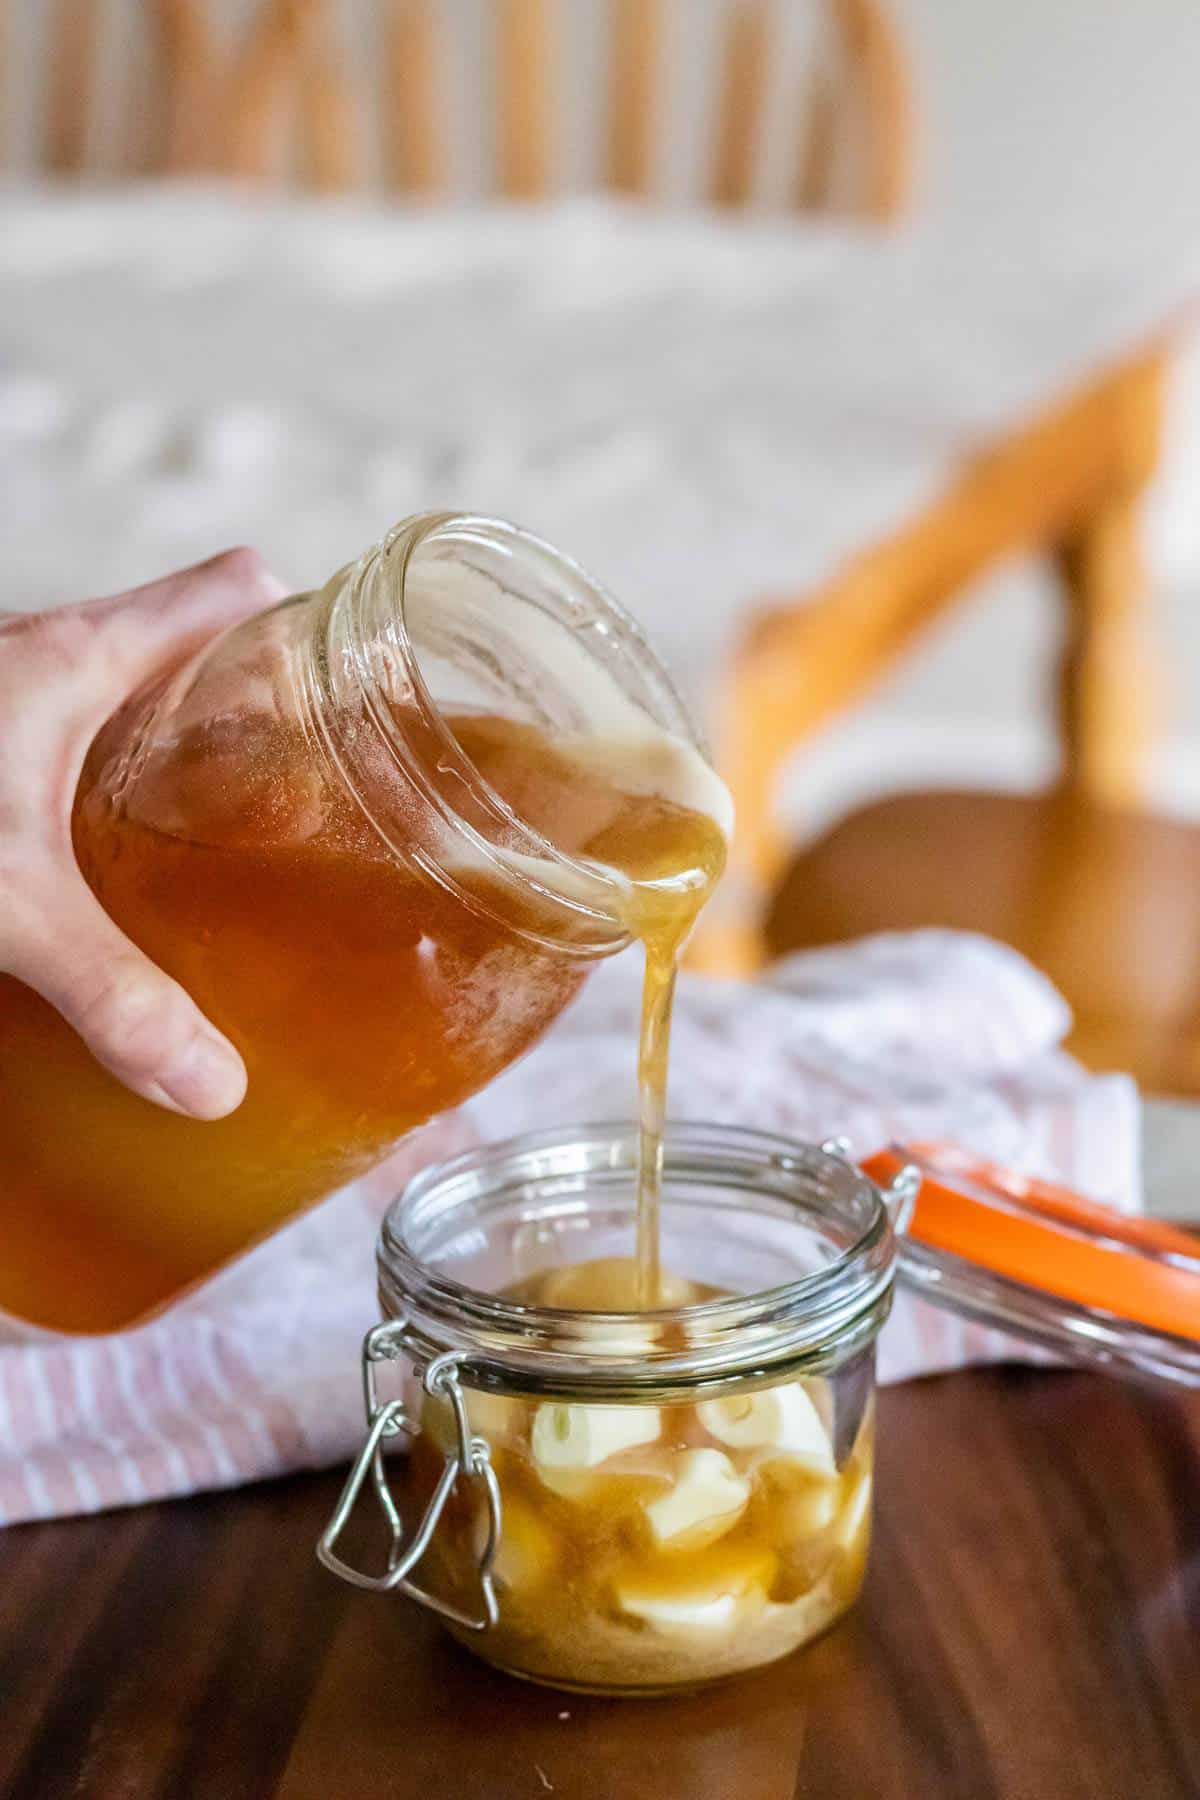
Step 4: Pour Your Raw Honey Over The Garlic
(NOTE: If your honey has solidified (I keep mine in our basement grocery store, which is on the cool side, which tends to solidify my honey), GENTLY warm it up in a pot on your stove with warm water.
The easiest way to do this is to use a pot that’s large enough you can lay the honey jar on its side, and have it be completely submersed in water.
Keep the temperature low so you don’t end up pasteurizing it. I used the lowest burner setting (1). Do this just until it is liquid enough to pour).
My honey had solidified, so I did have to warm it up to liquefy it.
Pour your raw honey over the garlic, taking your time to ensure all the air space has been filled up with honey, and that there is enough in there to keep your garlic coated. Some of your garlic may float to the top, and that’s ok.
If, after a couple of days, you notice that there is not enough honey to keep the garlic coated, you can top it off with more honey.

Step 5: Place Your Lid On Your Jar
Place your lid on top of your honey and garlic mixture and close tightly.
Step 6: Tip Your Jar(s)
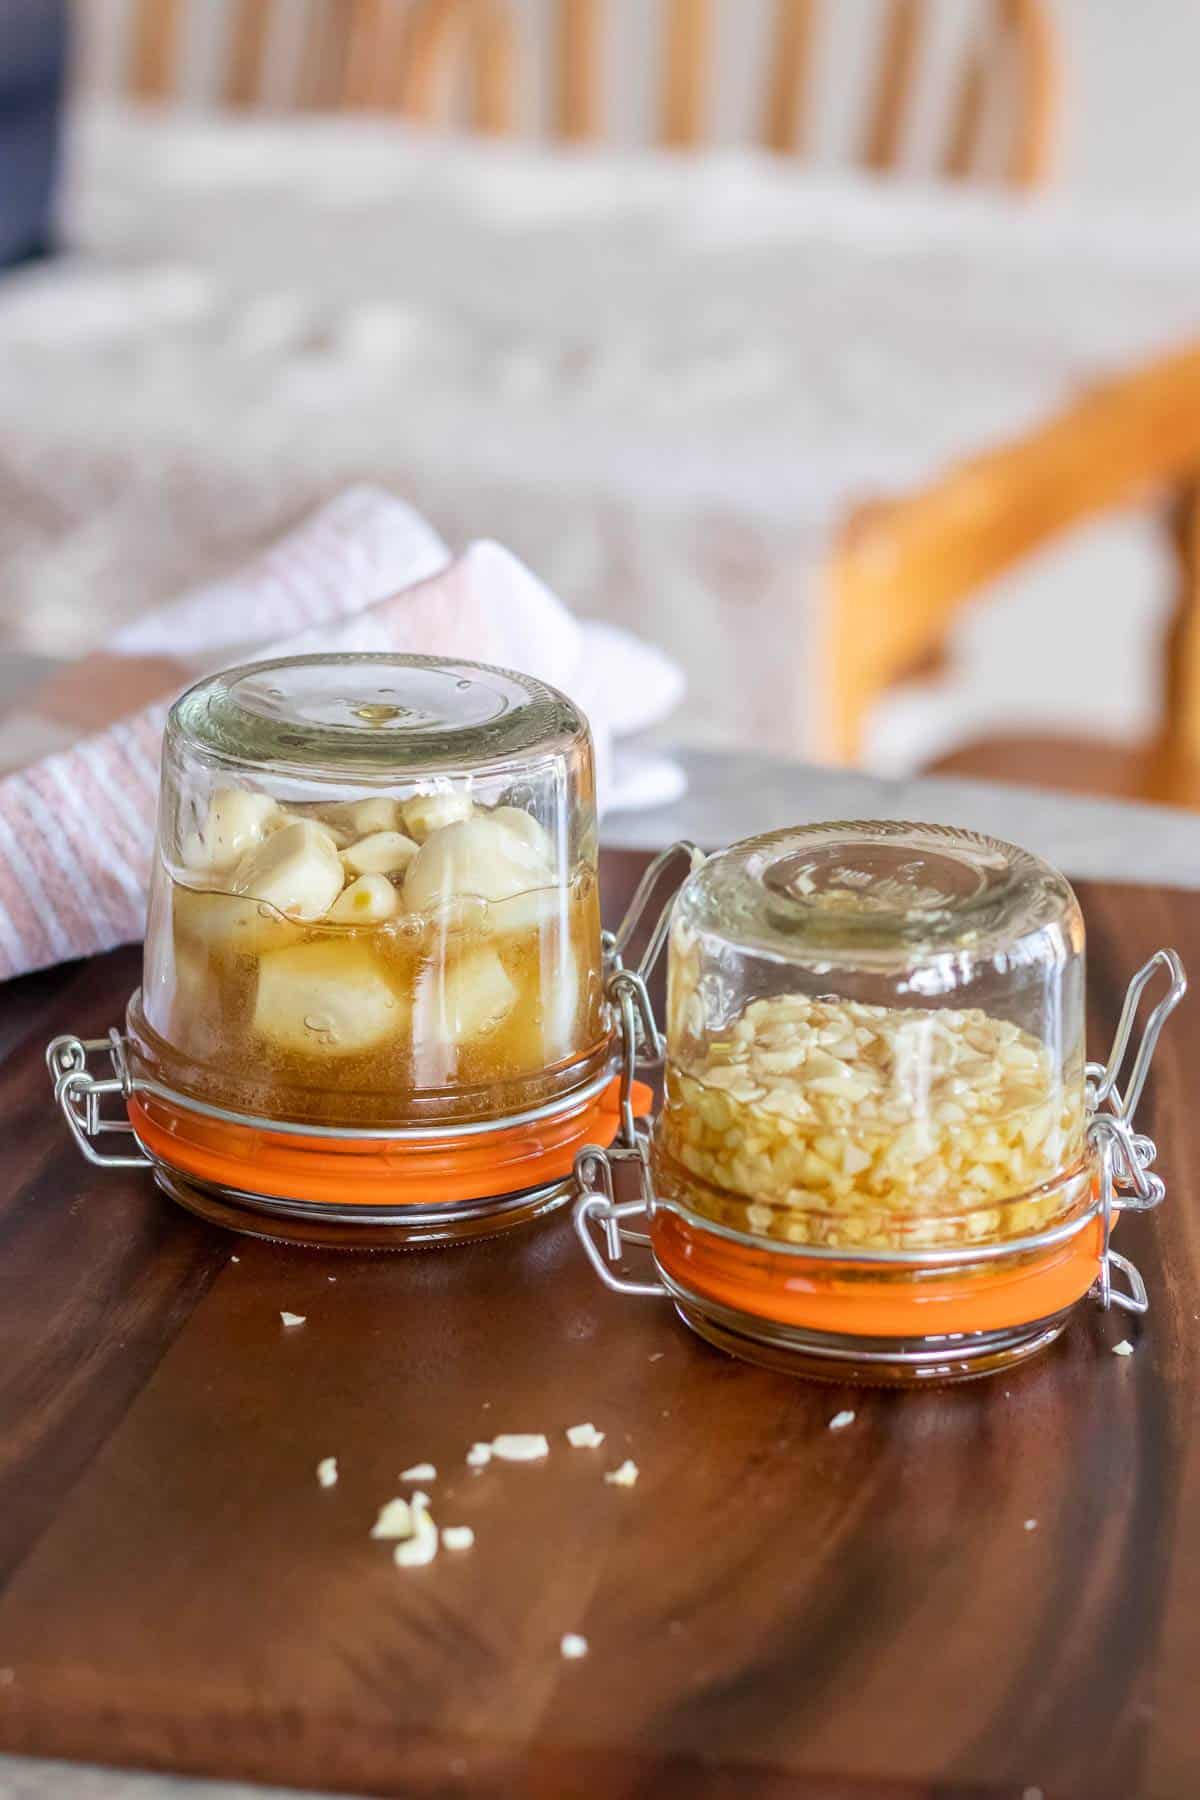
Once every 24 hours, tighten your lid, and tip your jar upside down and make sure all the garlic gets coated in honey. Then turn it back right-side-up and loosen the lid to burp it.
(Gasses will build up during the fermentation process, so you will want to release them at least once a day).
Continue tipping your garlic and honey jar for up to a month. After the first week or so, you won’t need to do it as often… maybe 2-3 times a week, then once a week, then after a month you can stop turning it.
In a few days to a week, you’ll notice the honey getting much thinner, and you may see some tiny bubbles start to form on the surface of the honey. This is your fermentation process in action!
Step 7: Store Your Fermented Honey Garlic
When you’re sure the fermentation process is complete (after about a month), and it won’t be producing any more gasses, you can go ahead and put it in a cool, dark place for storage.
How Long to Ferment Garlic in Honey
To achieve the full effects of fermented honey garlic, you want to let it ferment for at least a month. However, you can taste it at any point along the way to see how it’s coming along.
There is no harm in eating it sooner, it just won’t have all the fermentation benefits yet.
Be sure to use a clean spoon for every tasting, so you don’t introduce any random microbes and spoil your ferment.
How to Store Fermented Honey Garlic
Fermented honey garlic should be stored in a glass jar, with a plastic or glass lid.
(Metal tends to corrode when it comes in contact with ferments, so it’s best to avoid it).
Store it in a cool, dark place. I keep mine in my herbal medicine cupboard.
It can be stored for a minimum of 12 months, or up to 5 years.
(Or indefinitely, depending on your perspective).
Ways to Use Fermented Honey Garlic
Fermented honey garlic is very versatile!
Since it is really just garlic-infused honey, you can use it both medicinally, and in food.
To maintain the beneficial properties of fermented honey garlic, it’s best to consume it raw.
Cooking it will still be delicious, but it will no longer contain the beneficial microbes that comes from fermentation. If using it in a cooked recipe, consider adding it at the end.
- Eat a honey-soaked garlic clove, or take a spoonful of the garlic-infused honey when you feel symptoms of illness coming on (repeat 2-3 times per day until symptoms subside)
- Add a teaspoon of garlic-infused honey to a cup of herbal tea when you feel under the weather
- Take a spoonful to help soothe a sore throat
- Use in place of garlic supplements
- Stir a teaspoon into some bone broth to add more gut-healthy benefits to your broth
- Make a delicious honey garlic salad dressing
- Drizzle some garlic-infused honey over some chicken wings or pork chops
- Drizzle it over stir-fried veggies
Frequently Asked Questions
When made and stored properly, fermented honey garlic is perfectly safe.
The risk of botulism is extremely minimal due to the low PH, but to be cautious, I would not give this to infants under 12 months old.
If stored properly, and not contaminated, fermented honey garlic should not go bad.
I have some in my cupboard from 2019, which is still perfectly good. Make sure you always use a clean spoon for scooping it out, and it should last years, or even indefinitely.
Botulism is a toxin caused by a bacteria called Clostridium botulinum. The illness targets your nervous system and can lead to paralysis and respiratory failure.
These spores are easily killed in our acidic stomach, but infants have not yet developed the acidity to fight these spores.
Honey is one of the most common sources of botulism, and about 90% of botulism cases occur in babies under 6 months of age, and children under 12 months of age are at an increased risk for developing botulism. For this reason, I would not recommend giving this ferment to infants.
Botulism in general is extremely rare, and the risks of an adult developing it are extremely low.
For botulism to develop, it needs to have a PH of at least 4.6. However, the PH of honey is usually around 3.9, which is too acidic for the botulism spores to develop.
If you are concerned about the risk of botulism, you could always add a splash of raw apple cider vinegar or lemon juice to your ferment, to lower the PH level.
See my comment above, regarding the risk of botulism. I would not give this ferment to infants under 1 year of age.
Children would be fine though, as they are at a much lower risk for botulism, as their stomachs are acidic enough to kill the spores.
You could also add a splash of lemon juice or raw apple cider vinegar at the beginning of the fermentation process, to further decrease the risk.
Probably not.
Unlike other fermented products, like fruit, fermented honey garlic does not contain enough liquid to make alcohol.
With a higher moisture content, fermented honey turns into mead.
While you could possibly create alcohol by using too much garlic (which is where the moisture content comes from in this ferment), it is highly unlikely.
However, if you do accidentally make mead, don’t fret – you can still consume it! I just wouldn’t give it to children, or people who wish to avoid alcohol.
You’ll know if you accidentally created mead by the unmistakable alcohol smell.
Typically, mead is created by intentionally adding water to the honey and letting it ferment.
No.
The pasteurization process kills all the beneficial bacteria and natural yeasts that are required for the fermentation process.
Be sure to use raw/unpasteurized honey for fermentation.
Your best source for this will be a local bee keeper. If you can’t find one, try your local farmer’s market!
No.
While sugars are needed for fermentation, maple syrup is cooked at very high temperatures, meaning it has been pasteurized.
There are no beneficial microbes remaining in maple syrup, so you would be unable to use it to ferment garlic.
Maple syrup is also not acidic enough for this ferment.
The longer you let your garlic ferment in the honey, the darker the mixture will become.
The way I look at it, the darker it is, the better! That means it’s had more time to infuse.
You may find that the garlic is almost tasteless by this point, as most of the flavor has been absorbed into the honey. However, it’s still perfectly safe to eat.
For maximum health benefits, take a spoonful of fermented garlic in honey every day.
Yes.
Although eating raw garlic can have a bit of a bite, once it has been fermented, it really mellows out!
A lot of the garlic oils have been infused into the honey, so you’ll notice the honey has become spicier, while the garlic has become sweeter and more mellow.
So yes, you can definitely eat the garlic, you’ll just find it more mellow.
Sometimes garlic will turn a blue or green color, and it’s nothing to worry about! It’s just a chemical reaction from the fermenting process.
It’s not mold, and it’s perfectly safe to eat. (The same thing happens when making pickles – also nothing to worry about!).
Considering that honey lasts indefinitely (they found honey in Egyptian tombs that was thousands of years old and still perfectly edible), and that garlic’s main claim to fame is its powerful anti-bacterial properties, combining these two ingredients together makes it a long-lasting powerhouse.
If the jar is kept sealed and never touched, it will theoretically last forever. However, each time you dip into it and perhaps introduce other micro-organisms (maybe something that was on your spoon), you are increasing the risk of contaminating your honey garlic.
Since honey also draws moisture out of the air, it’s important to ensure your honey garlic jar is tightly sealed when stored.
In practice, your honey garlic ferment, when properly stored, should last a minimum of 12 months, and up to 5 years. Although if you’re consuming it regularly, you will go through it much faster than that!
I like to make a fresh batch every year when I harvest my garlic in the fall.
Pin It for Later
Fermented Honey Garlic (Whole or Chopped)
Fermented honey garlic is made with 2 simple ingredients: raw honey and garlic. It creates a delicious garlic-infused honey that can be used both medicinally and as food.
Ingredients
- 1 cup raw (local) honey
- 2-3 bulbs raw garlic
Instructions
- Wash your jar and lid with hot soapy water.
- Peel your garlic.
- If leaving whole, place garlic in your jar. If you're doing chopped garlic, chop it up as finely as you'd like, then add it to your jar. Only fill your jar half way.
- Pour raw honey over the garlic, making sure it is completely covered.
- Close the lid, and tip the jar upside down for a minute, allowing the honey to fully coat all the garlic.
- Turn the jar right side up.
- Every 24 hours for 7 days, tip the jar upside down again, then open the lid briefly to release any gasses that might build up.
- For the next 2-3 weeks, tip and burp the jar every 2-3 days.
- After a month, you can store the fermented honey garlic in a cool, dark location (a cupboard is ideal). It will last a minimum of 12 months, up to 5 years.
- Take a spoonful of honey and/or garlic at the first signs of illness, or daily as a preventative.
- Use your honey garlic to make delicious salad dressings or marinades.
Notes
- Only use raw/unpasteurized honey, preferably local.
- Use fresh garlic that still has a high liquid content.
- If possible, source your garlic locally so it is least likely to be sprayed or irradiated.
- If your honey has solidified, gently warm it in a pot on the stove. Use a large enough pot that you can lay the jar sideways and completely cover it with water. Use the lowest heat setting so you don't accidentally pasteurize your honey. Heat it only until it liquefies, then remove it from heat immediately.
Recommended Products
As an Amazon Associate and member of other affiliate programs, I earn from qualifying purchases.