Humans are Frugivores
There has been much debate over the years as to what is the natural human diet. Most would say that humans are omnivores, but is that really true? What if I told you that humans are frugivores, and we are designed to eat primarily fruit, along with leafy greens, nuts and seeds? We are meant to live a healthy, vibrant life – eating our natural human diet.
My Diet Evolution
When it comes to food, I’ve always believed in making things from scratch, from simple, whole ingredients. I’ve done a lot of canning and preserving, to ensure that what goes into our bodies is not full of preservatives, or mystery ingredients.
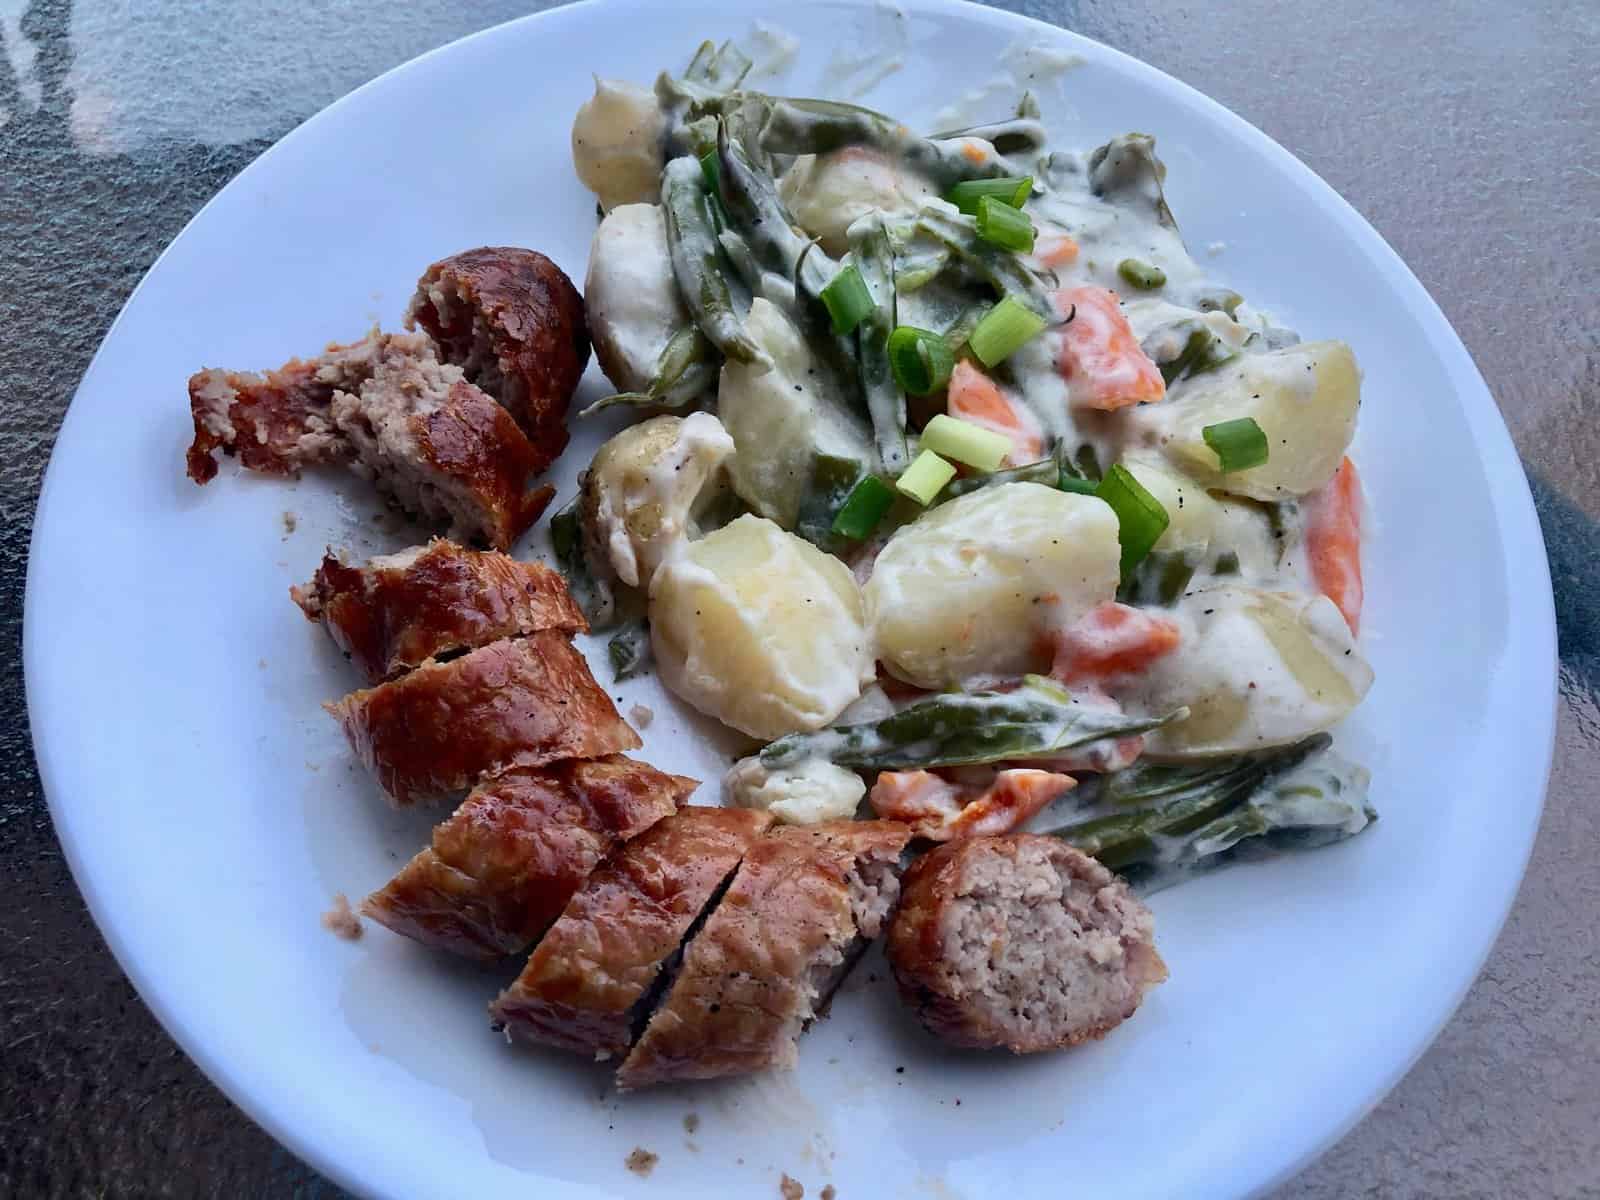
I’ve done different types of diets over the years. I spent 15 years as a vegetarian. Then was diagnosed with Celiac Disease, and thought I couldn’t be gluten free AND vegetarian, because it would be too restrictive – so I transitioned to a Paleo diet (meat, fruits, veggies, eggs, nuts, seeds).
Then I married someone who wasn’t Paleo, and it got too difficult to make separate meals, so I basically started eating everything (except Gluten, of course), while still keeping it as healthy as possible. We incorporated grains, dairy, legumes – basically, a regular, “whole foods” diet.
3 years ago, I gave up alcohol and caffeine, and that made a HUGE difference for me. My chronic migraines completely disappeared. My nightly, 2 am wake-ups became a thing of the past. My anxiety reduced significantly. My mood and energy improved. I dropped 60 lbs over 2 years.
Now that I’m nearing the age of 50, my energy isn’t what it used to be. My focus is scattered. My short-term memory is atrocious. I was diagnosed with ADHD 2 years ago. Basically, I feel achey and tired all the time. And I don’t think that’s a normal way to feel at age 50.
I want to feel vibrant, energetic, and full of life for the next several decades!
Since food is the foundation of health, I decided to seek out the truth, once and for all, about our natural human diet.
What is the Natural Human Diet?
I’ve often wondered what the natural human diet is supposed to be. I’m always in search of the truth, and our diet is no exception.
The general consensus is that we’re omnivores. At least, that’s what we’ve always been taught.
And we’re taught that it’s important to eat from all the food groups.
But what if we’re not supposed to eat from all the food groups?
Let’s break down each of the food groups, and see which ones are logical for our species to eat.
Meat
Animals who eat meat will hunt their meat – snatching it out of the wild with their claws and teeth. Tearing into the raw flesh, and eating it raw. They don’t slice it up, marinate it, and cook it over a fire.
They eat every part of the animal – the fur, the bones, the blood, the flesh.
Carnivores produce an enzyme called uric acid, which is required for breaking down meat.
Humans do not possess the anatomy to hunt food and eat it raw. Some people might hunt for meat, but using tools. We don’t have claws or fangs like a true carnivore.
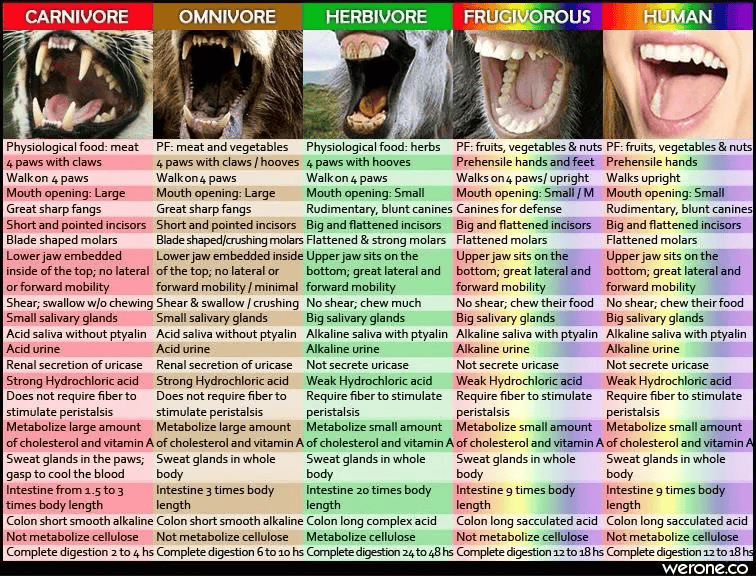
Our digestive tracts are about 10 times our height. Frugivores require fibre, which is not present in meat or dairy, in order to move food through our long intestinal tracts.
A carnivore’s intestines are only 3 times its length (think of how a dog has to poop immediately after eating).
A short digestive tract is necessary for meat eaters, since meat putrefies quickly – so for a carnivore, it needs to pass through their bodies quickly.
When a human eats meat, it sits in our digestive tract and rots – attracting parasites to help break it down, since we don’t produce the enzymes to be able to do that ourselves.
Most people are full of parasites. But parasites are not the enemy! They are doing their job – breaking down and consuming the waste in your body. If the waste wasn’t there, the parasites wouldn’t be there either.
Think about it – if you have maggots all over your garbage, does it make sense to kill the maggots? Or should you just get rid of the garbage?
Meat is not meant for humans.
Dairy
What other species do you know who drinks the milk of another species? And beyond weaning age? Every other mammal drinks the milk from its mother until it weans onto solid food – they don’t continue to drink milk into adulthood.
Dairy is only part of the human diet when consumed as human breastmilk, and only until weaned.
Human breastmilk is meant for baby humans. Cow milk is meant to grow a calf into a 600 pound cow. Its composition is completely different from human milk.
Dairy is not part of the natural human diet.
Fats and Oils
Fats and oils are not whole foods. When we eat olives, we are getting the whole food – all the fibre in the olives, plus the fat. But when we extract only the fat, it is no longer a whole food.
The same goes for avocados vs. avocado oil. Or coconuts vs. coconut oil.
Fats clog our arteries (watch the Game Changers documentary I linked below), and they are not a good energy source for humans. Humans are powered by glucose!
Fats and oils are not part of the natural human diet.
Grains
Commonly referred to as the ‘staff of life’ – can you imagine yourself being lost in the wild, coming across a field of grass, and thinking gosh, that looks delicious – I think I’ll eat some of that?
We would never eat grains in their whole, natural state. In order to consume grains, we dry it, grind it into a powder, add a bunch of stuff to it, and bake it until it no longer resembles its original form.
Grains are not part of the natural human diet.
Nuts and Seeds
Have you ever tried to crack into a walnut or an almond husk with your bare hands? It would be almost impossible.
Squirrels and chipmunks have razor-sharp teeth, which they use to chew through these nut shells.
Although I suppose you could find a rock and smash it open – so it’s possible that nuts could be human food. But not in the roasted, salted, denatured form that we typically eat them in.
Nuts are primarily comprised of fats, which turn rancid pretty quickly. So if we were meant to eat nuts and seeds, they would be a minimal part of our diet. And should be eaten fresh, and raw.
Raw nuts can be part of the natural human diet, but only a small portion.
Root Vegetables
Humans generally don’t love to eat dirt. We scrub our veggies clean, and even peel them if they’ve grown in the ground. This leads me to believe that humans likely wouldn’t seek out root vegetables.
Root vegetables are also very tough – we typically cook them, or shred them finely if we are going to eat them raw.
How often do you eat raw potatoes or sweet potatoes?
We can eat root vegetables, but they probably wouldn’t have comprised a big part of the human diet.
They likely would be used as a last-resort food.
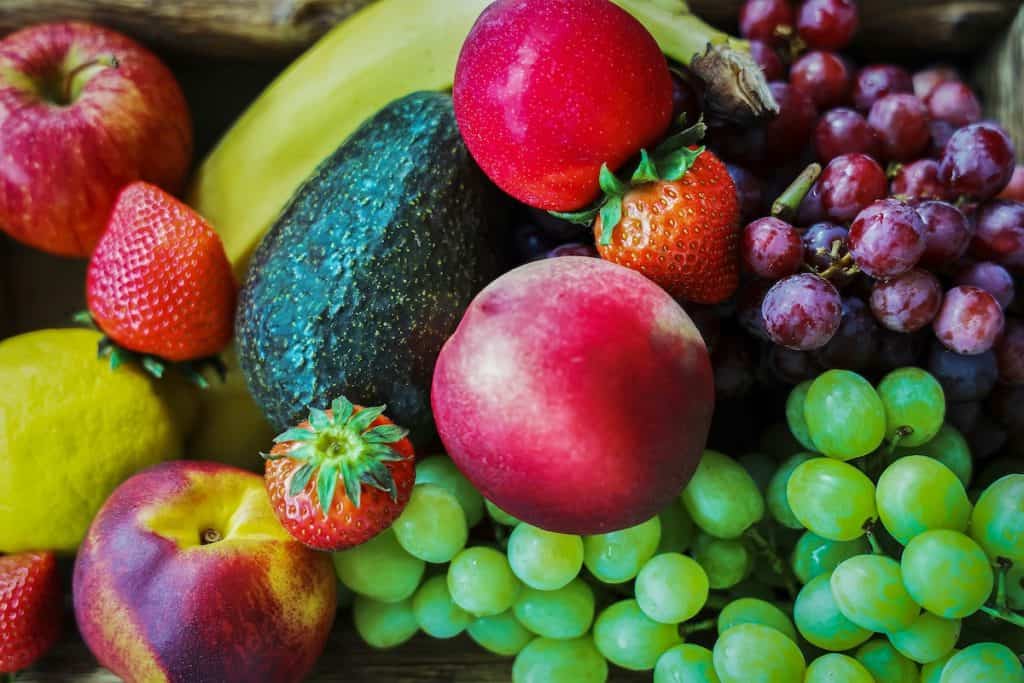
Fruit
Humans have tri-chromatic vision – which allows us to see brightly coloured fruit and see whether it’s ripe or not.
We can easily spot a ripe apple in a sea of green trees.
We have slender hands and opposable thumbs – which are perfectly suited for picking fruit off a tree. (Can you picture a wolf or a coyote trying to pick an apple from a tree?)
Fruit can easily be eaten raw, without the use of any tools.
Its bright colours and sweet taste are appealing to our senses. We can just pluck it off the tree, and eat it! No tools, cooking, or preparation necessary. Just as nature intended for us to procure our food.
We have a sweet tooth because we crave sweet things – sweet, juicy fruit.
Fruit is hydrating, and contains all the nutrients we need – including vitamin c, which we can’t produce on our own – we can only get it from food. Carnivores and omnivores can produce their own vitamin c. Therefore, they don’t need fruit. Fruit is for humans.
Fruit needs no seasoning, it tastes delicious to us naturally. Most cooked foods require seasoning in order to taste good to us.
The human diet should be primarily comprised of raw fruit!
Tender Leafy Greens
Humans and our primate relatives eat tender, leafy green plants – like lettuce and spinach. These are easy to eat, can be eaten in their raw state, and are easy to digest. They are also loaded with minerals and water.
Due to their high mineral content, leafy greens are an important part of the human diet.
What Do Our Nearest Animal Relatives Eat?
Our nearest mammal relatives are primates – chimpanzees, gorillas, apes. They are the most biologically similar to us. So what if we looked to them to see what they eat?
Primates are frugivores. They eat primarily fruit, tender leafy greens, nuts and seeds.
Cooked Foods
We are the only species that cooks their food. Every other species – including primates, eats their food raw.
Cooking food destroys the enzymes it contains, making it more difficult for our bodies to digest.
What if all the sickness and disease that exists in humans, is simply because we are not eating the natural human diet? Not only are we eating things that are toxic to us, but we cook it – altering the chemical structure, destroying the enzymes, and thus making it even more harmful.
Our Body as a Compost Bin
As I was starting to realize that humans were frugivores, I thought about our compost bins.
We have 2 compost bins under our sink:
In compost bin 1, we put all our raw fruit and veggie scraps. These are things that break down quickly and easily in our back yard. They don’t attract animals or maggots.
In compost bin 2, we put everything else – meat, bones, dairy, fats, anything with oil on it – basically things that don’t break down quickly and easily. These items get hauled off to our municipal composting facility, where they use special equipment and extremely high heat in order to break these “foods” down into compost.
So think about it – how easily would our bodies be able to break down the items that go in the 2nd compost bin?
The Protein Fallacy
We have always been taught that protein is important – but why do we assume that in order to have protein, we must eat animals? Think about it: All the animals you eat for protein, get their protein from plants!
Humans are no different. We don’t need to eat protein. We need to eat amino acids, which are the building blocks for protein. Where do amino acids come from?
Plants.
When you eat meat, the body has to work harder to break down those proteins into amino acids, to then convert them into usable protein.
Human Breastmilk
Human breastmilk is the sweetest of all animal milks – with 7% lactose (milk sugar). It also has the lowest amount of protein – less than 1%. What does that tell you about how much protein we need to consume from our diet?
Natural Instincts
Imagine putting a child in a room with a rabbit, and a tray of brightly coloured fruit. Which item do you think the child would eat? Obviously the fruit! They aren’t salivating over the rabbit and plotting to kill it for food.
They might, however, want to snuggle with the rabbit! Because humans are not predators – we do not have a natural instinct to hunt animals.
We have to disassociate from what we’re eating. We don’t kill animals ourselves, we buy them neatly packaged at the store. Instead of “cow”, it’s labelled “steak”, or “hamburger”, or “ground beef”. You forget that it was a living, breathing animal that was killed.
It’s time to start listening to our instincts – and eating a diet that aligns with us biologically, ethically, and spiritually.
Ethics and Morality
In my journey of learning about the true human diet, I found myself watching documentaries about the meat and dairy industries.
Yes, these are industries – and huge ones, at that. They profit at the expense of the pain and suffering of animals.
The truth is – I knew what went on behind the walls of factory farms and slaughterhouses. I watched Food, Inc. many years ago. I spent 15 years as a vegetarian, primarily because I love animals.
When I went back to eating meat, I had to completely disassociate from what was on my plate. It was sausage, not a pig. It was steak, not a cow.
I had convinced myself that I needed meat in order to be healthy. But now that I know that is not the case – I have no reason to continue to eat it.
I prided myself on only eating locally sourced, ethically raised and slaughtered meat. But the truth is, there is no way to ethically slaughter an animal. Animals are sentient beings, who want to live just as much as we do. What gives us the right to take their lives? Especially knowing that it’s completely unnecessary, and even harmful to us.
Most of us love our pets, and would never dream of eating them. Even if we were starving to death, we would probably die before killing and eating our pets. But we think nothing of eating a “farm animal” – because that’s their purpose?
I highly recommend watching some of the documentaries I have listed at the end of this blog post. I sobbed as I watched some of them. Some, I couldn’t even finish watching.
The point is, when you know something, you can’t un-know it. When you take the red pill, you can’t go back and ask for the blue one instead.
I cried, and asked for forgiveness from the animals whose lives I took so that I could have meat on my plate. When you know better, you do better.
Spirituality
The closer we eat to the natural human diet, the more spiritually aligned we become.
When we aren’t clogging our lymphatic system with meat, dairy, fats, and processed foods – our bodies become lighter, freer.
When our digestive systems aren’t bogged down with digesting non-human foods, we have the energy to engage in our human spirituality.
There is nothing spiritual about the torture and slaughter of animals. The moment I made the decision to stop eating animal products, I immediately felt more aligned with my purpose on this earth.
A Frugivore Diet is the Ultimate Simple Living Hack
Think of all the time we spend on food. From procuring it – whether we grow it ourselves, buy it at the grocery store, or from farmer’s markets. Then bring it home, store it appropriately, prepare it, cook it, then clean it up.
What if we could skip most of those steps? How much time would we save by simply eating whole, raw food?
Grocery shopping would be a breeze – the produce section of the grocery store is usually the first section inside the store. Just grab your basket, load it up with fruit and lettuce, and you’re done.
Imagine a life where you don’t have to cook – ever. No pots and pans needed. No greasy pans to scrub.
Food is meant to be simple! Every other animal on earth eats its food directly from the source. Why can’t we?
It’s hard to shift paradigms – we have been brainwashed to believe we need all the ‘food groups’ – but personally, I’m excited to embrace the simplicity of moving toward a raw, plant-based diet.
This will be an interesting journey – I’m sure there will be bumps along the road. We are addicted to cooked foods. We associate them with feelings of comfort. The smells are nostalgic.
How to Transition to a Raw, Plant-Based Diet
If you are now convinced that humans are frugivores, and you want to transition to a raw, plant-based diet to see for yourself what health and vitality feels like, you may be wondering where to start.
Give Up Animal Products
The first thing I did, was to give up all animal products. That was pretty simple and straightforward. No meat, dairy, or eggs.
Raw til 4
I get it – the thought of going fully raw is daunting! Even given that I’m 100% certain it’s our species-appropriate diet, I’m still transitioning slowly.
I started by simply adding more raw fruit and vegetables into my diet each day.
Before this, I almost never ate fruit. So I started making a fruit smoothie for breakfast every morning. Snacking on grapes and bananas throughout the day. And making a leafy green salad with tomatoes and cucumbers to go with my (cooked), plant-based dinner.
Sometimes people refer to this as ‘Raw til 4’ – eating only raw foods until 4 pm, and then having a cooked supper. I think this is a great way to transition.
You could even just take it one meal at a time. Start with breakfast – eat only raw fruit for breakfast. Or make a smoothie. Then maybe have your normal lunch, but include a raw salad with it. Then have your regular cooked dinner.
Documentaries
Still not convinced? That’s ok! I’m not here trying to convince you. But for those of you who are on a journey to seeking out truth in all aspects of your life, like I am, you may be looking for information to help solidify your decision.
I watched a ton of documentaries while I was making this transition. While they aren’t directly related to being a frugivore, they all make a strong case for why we should be eating a plant-based diet.
Some of these were very difficult to watch – particularly Dominion and Earthlings. But after watching them, I knew with 100% certainty I would never eat animals or animal products again.
Health-Related
Ethics-Related
The Most Adorable Cow on the Planet
Dairy is Scary! The Industry Explained in 5 Minutes
Books
The Natural Human Diet: Quick Start Guide