How to Plan a Vegetable Garden
A good vegetable garden begins with a good plan. If you’re gardening just for fun, to grow a few tomatoes and maybe some lettuce, then you don’t have to plan very far ahead. However, if you’re planning to use your vegetable garden to provide a significant portion of your family’s food, then garden planning is so important!
In fact, I begin planning next year’s vegetable garden in my head during the current gardening season. I observe and take notes on whether I grew too little or too much of something, planted it in the wrong place (maybe it’s getting shaded out), maybe I should have succession planted something, rather than planting it all at once (I’m looking at you, radishes).
Keep detailed notes of these types of things, and you will be grateful when it comes time to plan next year’s vegetable garden!
In any case, although I take notes throughout the year, my serious garden planning begins in January. This is typically when seed catalogues arrive, and we can get down to the nitty gritty of planning out this year’s garden.
I’m going to show you step-by-step how I plan my garden each year!
This post may contain affiliate links, which means if you make a purchase through one of these links, I make a small amount of commission at no extra cost to you. See full disclosure here.
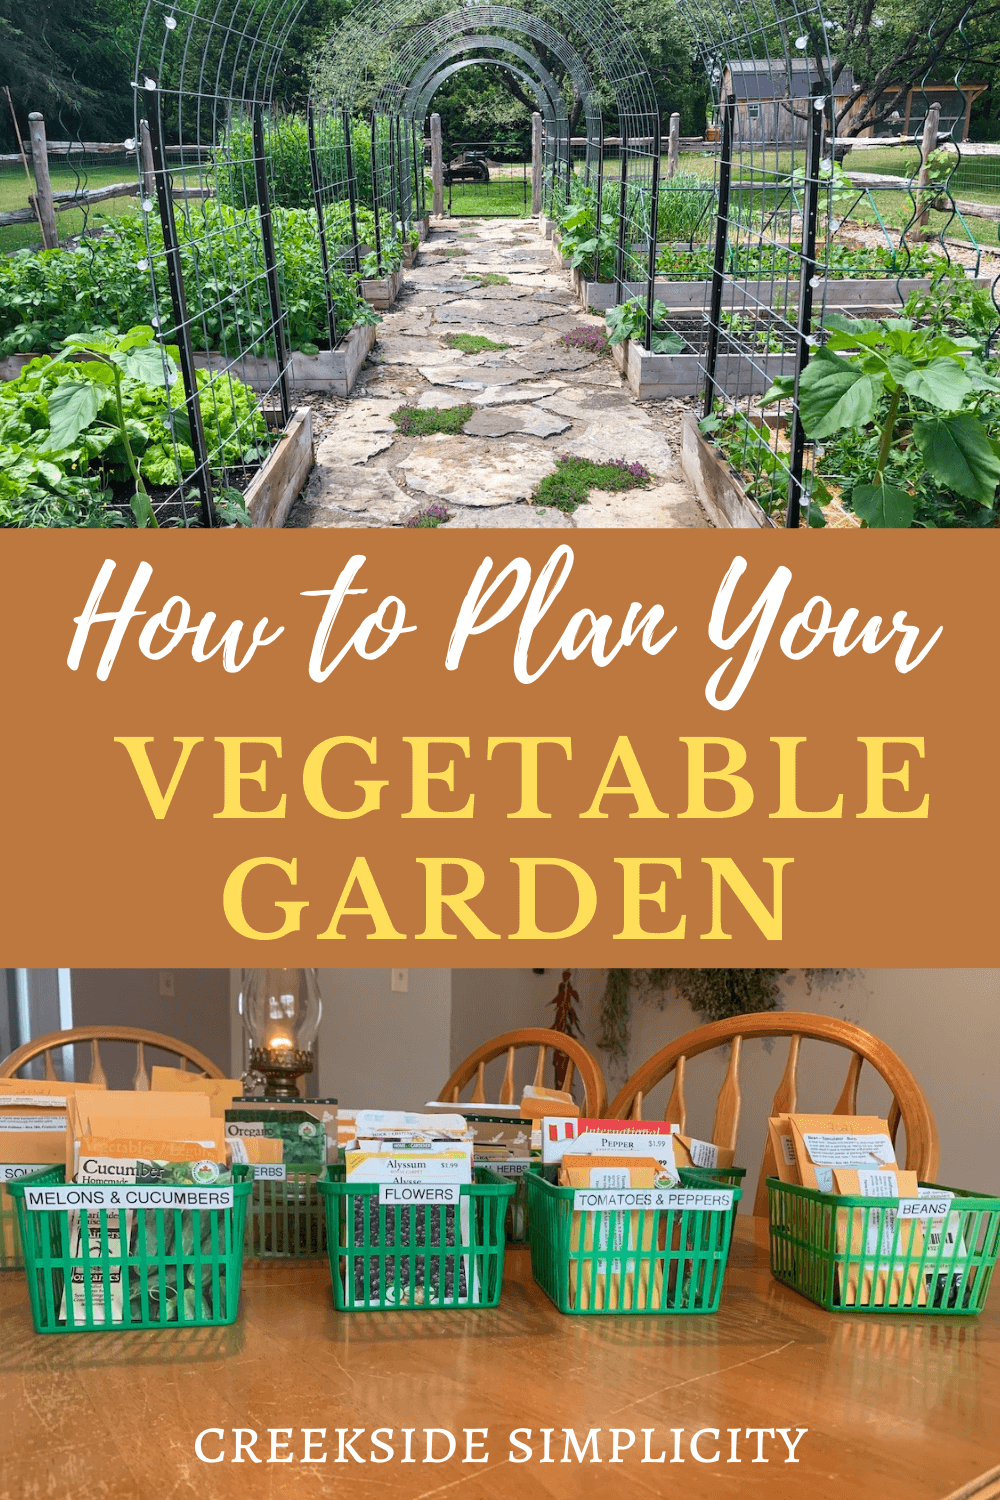
Organize Your Seeds
The first step in planning your garden, is to organize the seeds you already have!
I don’t know about you, but by the time gardening season is over, I’m so exhausted that I typically don’t take the time to inventory and organize my seeds. But organization is an important part of garden planning.
Although my seeds are separated in baskets by type, I take the baskets right out to the garden with me when I’m planting. Often, empty seed packets get tossed back in the basket along with the full ones, or sometimes if I’m planting things from different categories, they will end up in the same basket together.
In January, I take the time to go through all of my seed baskets. Sorting your seeds by type is SO helpful.
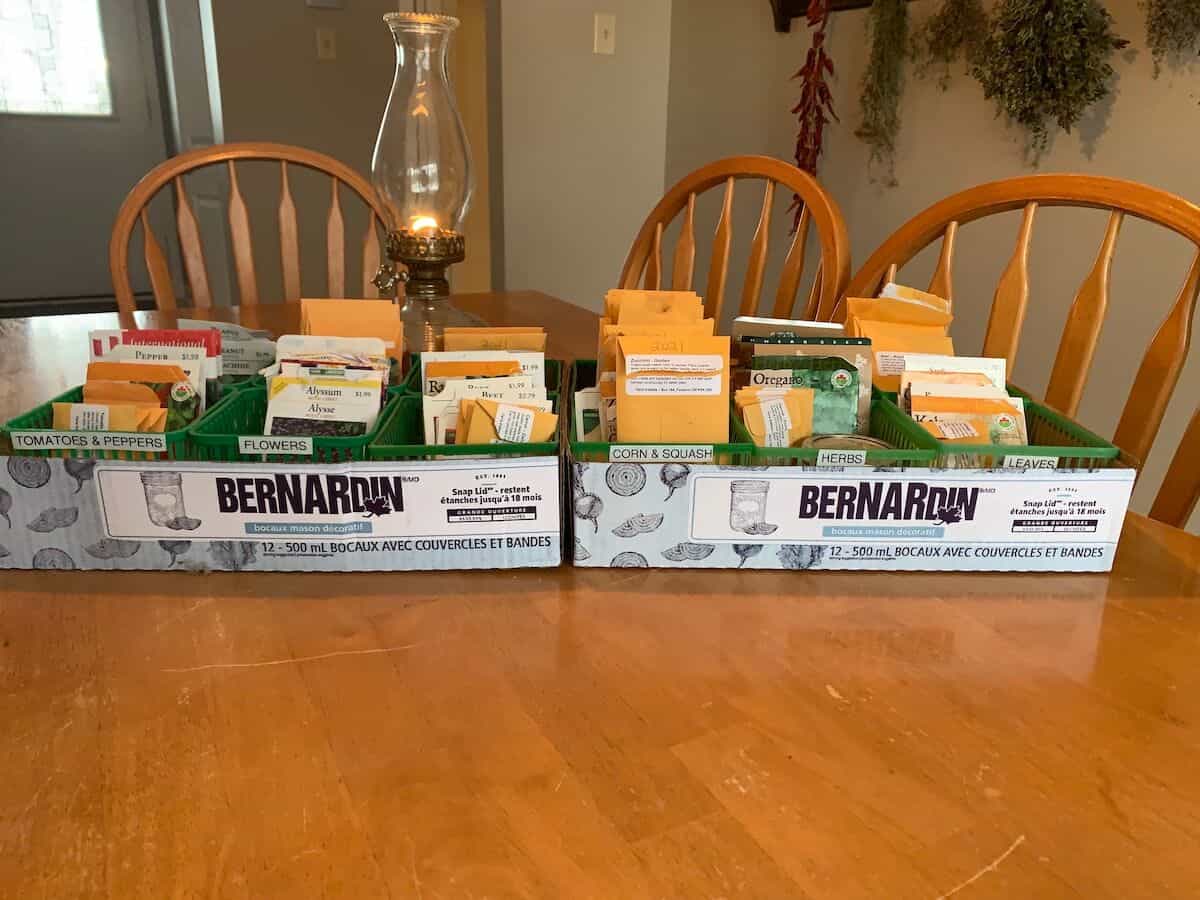
Look around your house, and find some kind of containers that you can use to separate your seeds. I use these repurposed strawberry baskets, as they’re the perfect size for storing seed packets.
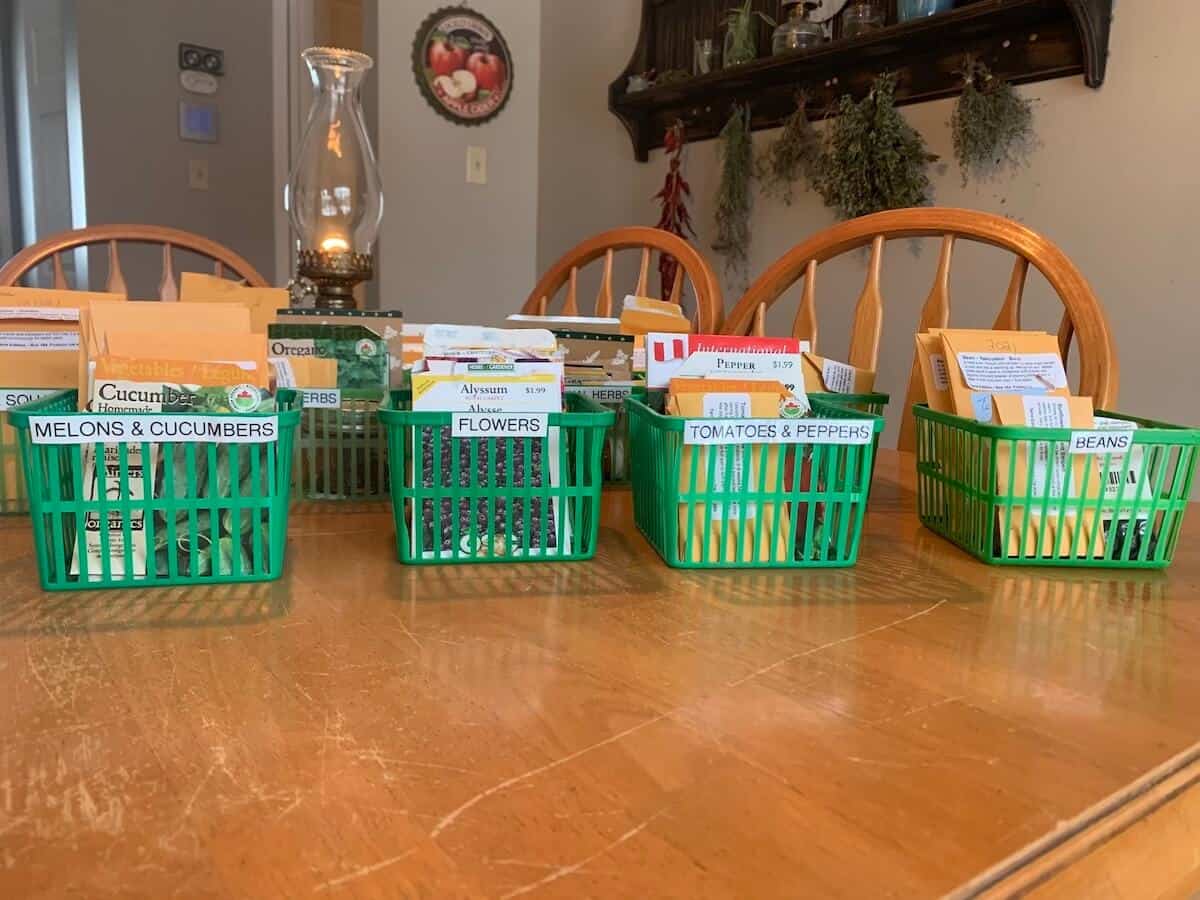
Then I store them in canning jar boxes, which happen to be the perfect size.
I love to use things I already have, rather than buying new items, but if you don’t have anything suitable on hand, I’ve seen people use these photo storage cases for organizing their seeds.
Another option could be as simple as using ziplock bags and labelling the front with the type of seeds you have inside. Then these could get stacked in a shoe box.
Use your imagination and I’m sure you can come up with something!
If your garden is larger or smaller than mine, you may need more, or less categories.
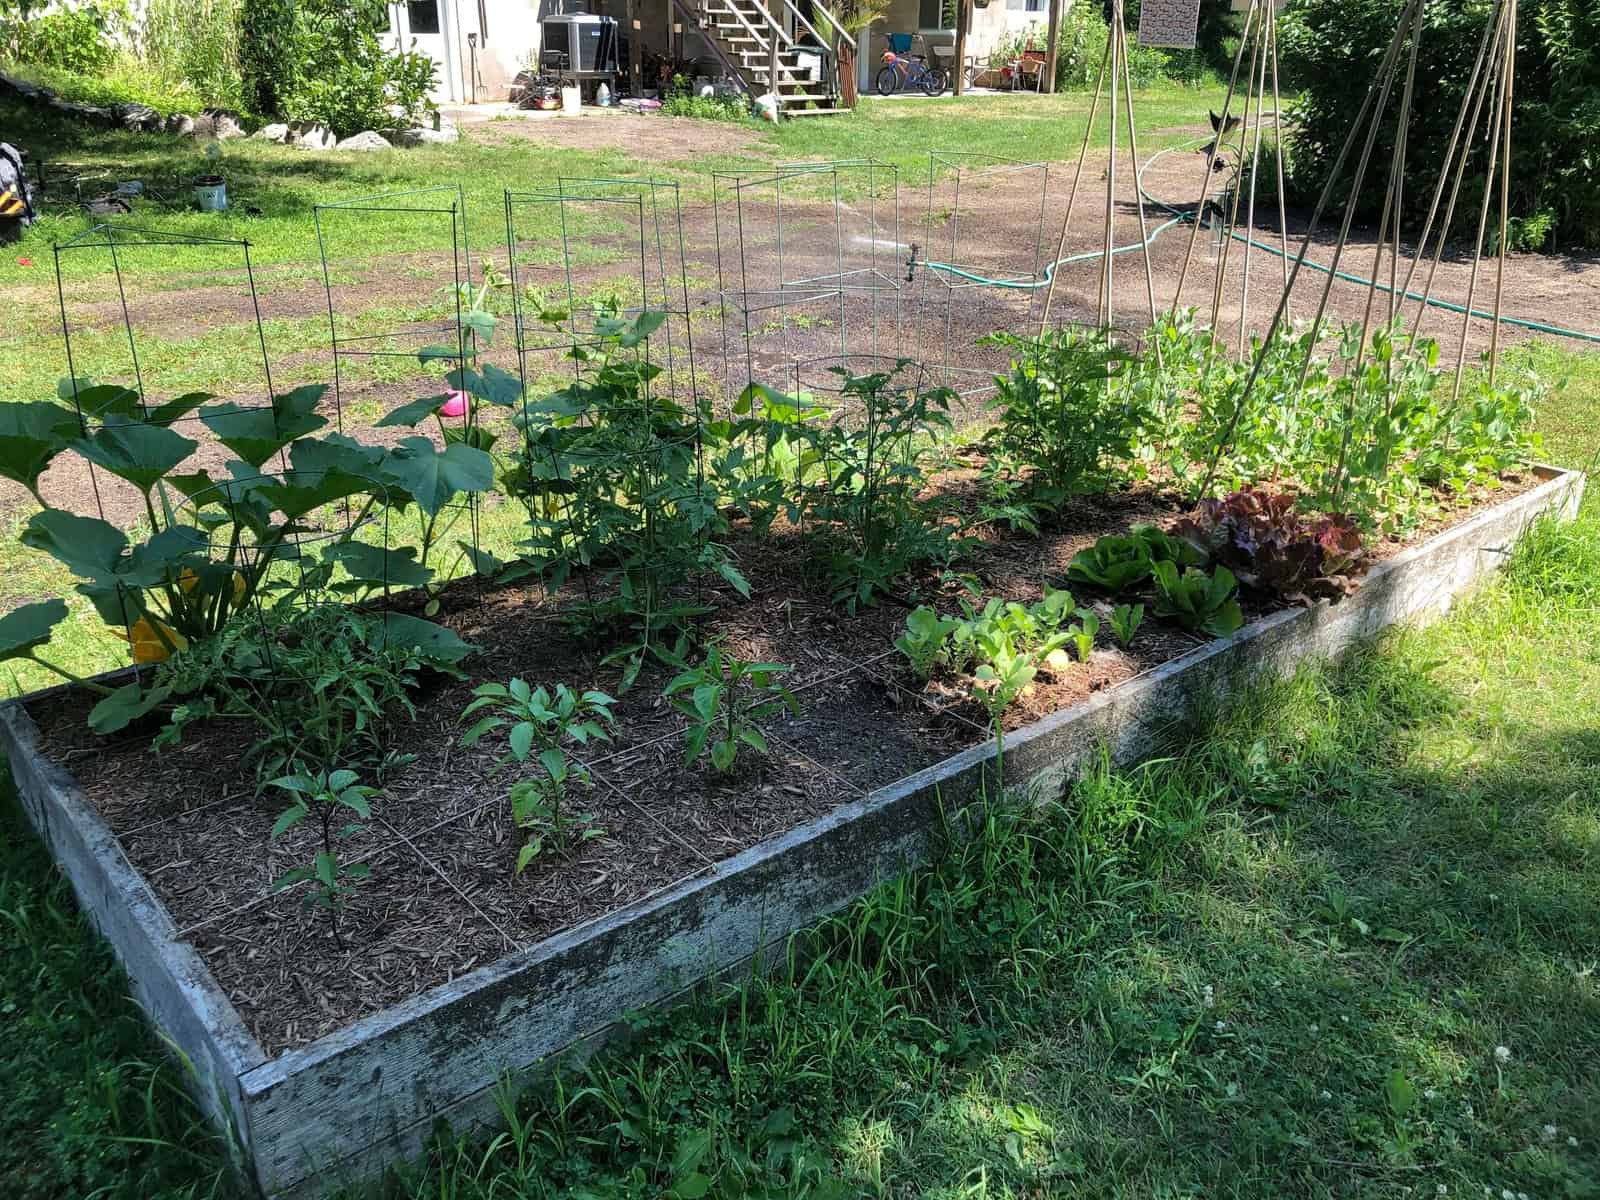
I grow most of our garden in raised beds, and typically I plant one category per bed, so organizing them this way makes the most sense for me.
If you plant differently, feel free to organize your seeds in whatever way works for you! I prefer to plant similar things together, as it makes crop rotation easier. Also, similar things tend to have similar light and water requirements.
I use the following categories to sort my seeds:
Leaves
All leafy greens. Kale, spinach, swiss chard, cabbage, lettuce, bok choy etc.
Most leafy greens prefer cooler weather, so by planting these in the same bed, I can take advantage of season extension techniques.
Brassicas also attract cabbage moths, so it’s simple to cover the entire bed with a cover to keep the cabbage moths from laying eggs. Nothing in this bed requires pollination, so the cover does not negatively affect anything.
Melons and Cucumbers
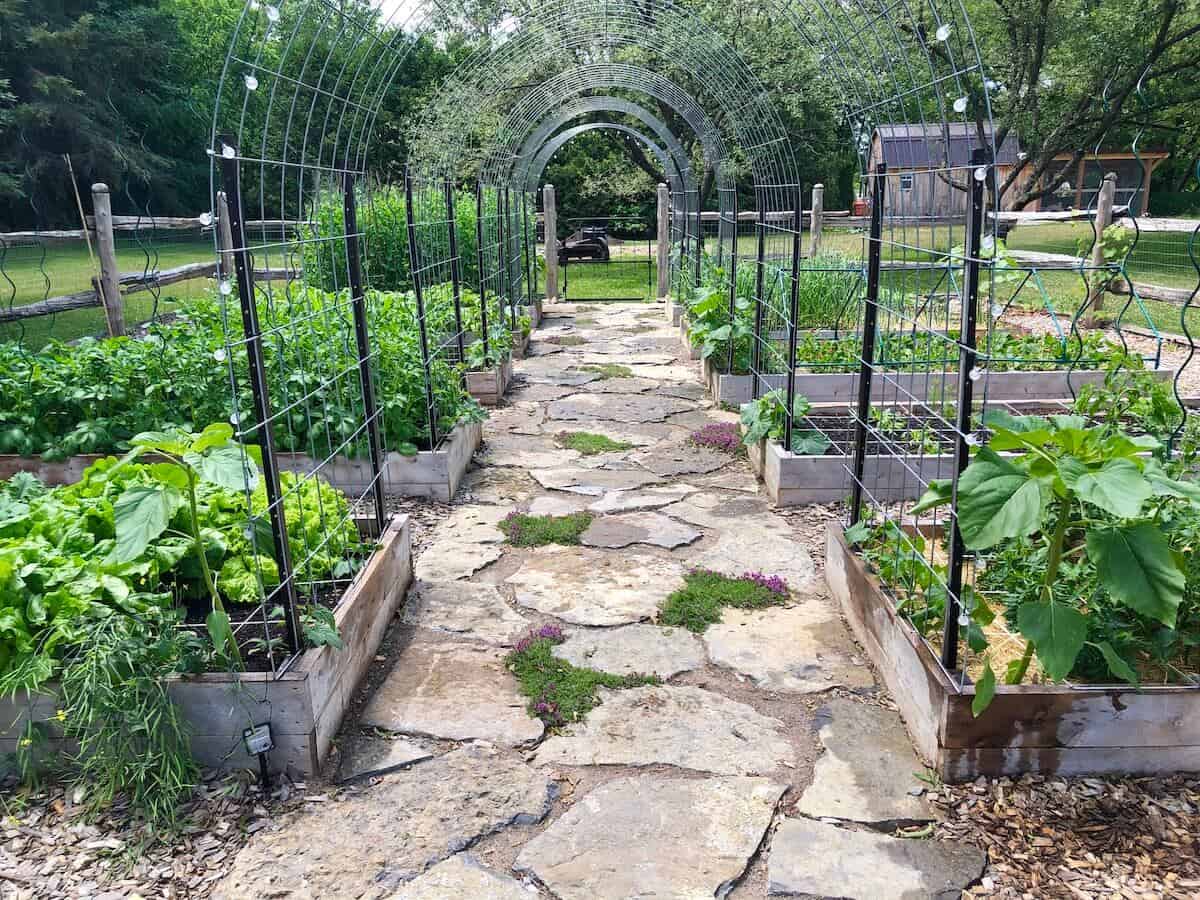
These are members of the curcubit family. As these like to climb, they get planted along my garden trellises so I can take advantage of vertical space. I usually plant one type of melon or cucumber on each side of my cattle panel trellises.
Tomatoes and Peppers
I grow several varieties of each, and they get planted in the same bed, so I store these together.
Roots
All root veggies: carrots, radishes, beets, onions (although this year I’m giving onions their own bed, but it’s easy enough to store the seeds with the other root veggies)
Beans
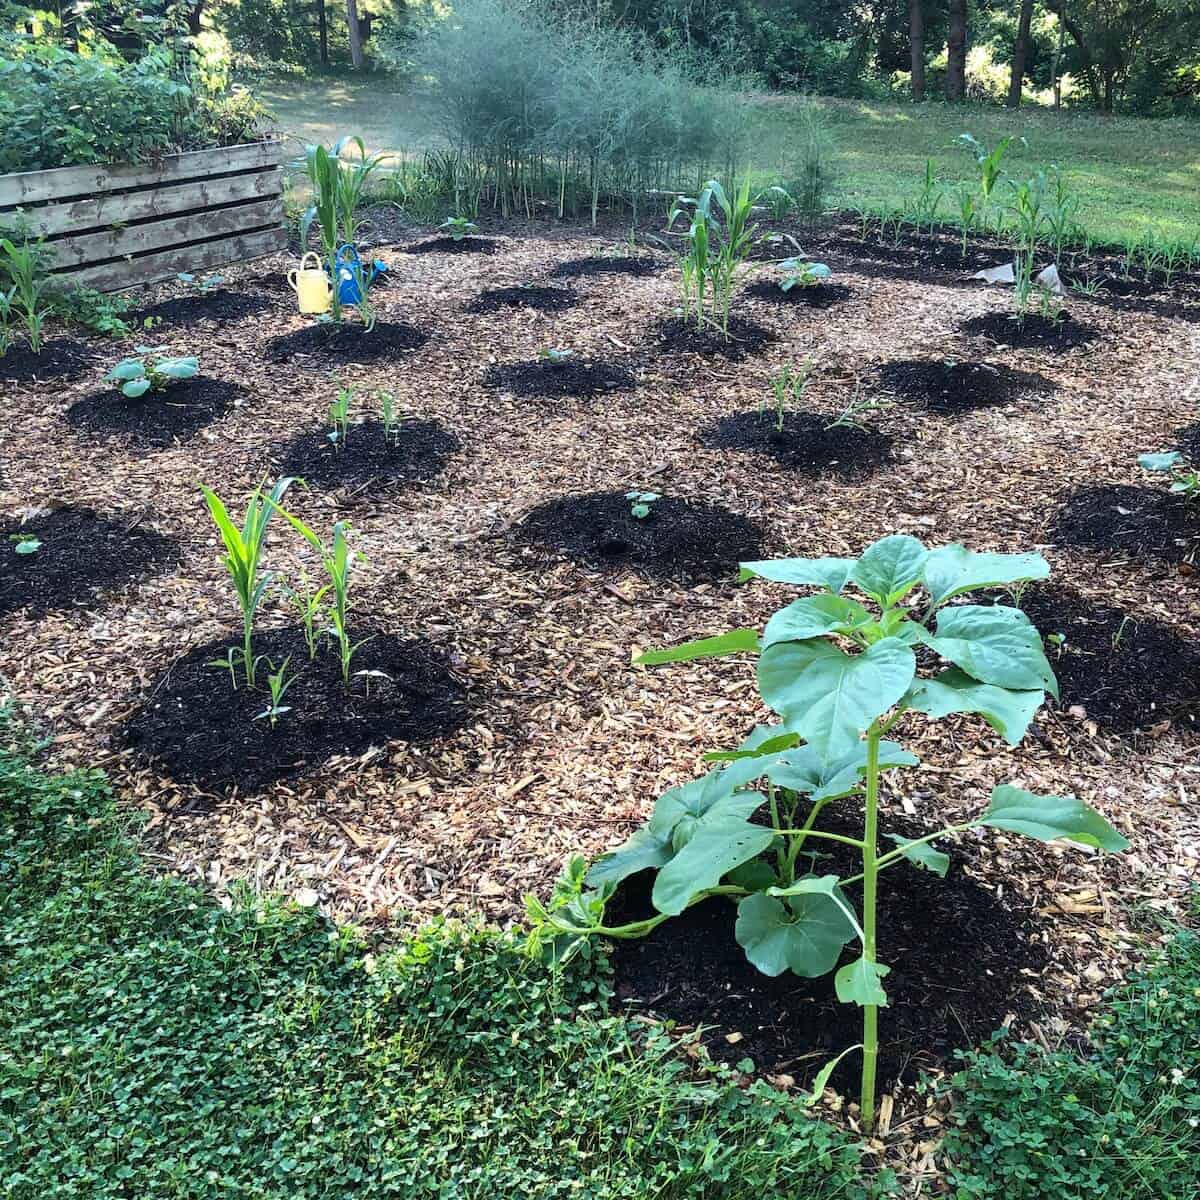
Fresh eating beans as well as beans for dry storage. (These could be separated into 2 different categories if you wish) – I personally plant my fresh eating beans in my raised bed/kitchen garden (shown at the top of this post), and my beans for drying get planted with my squash and corn (see photo below).
Peas
I primarily grow just snow peas and sugar snap peas, and these get planted along my garden trellises.
Medicinal Herbs
All my medicinal herb seeds are in their own basket. We try to grow as much of our own medicine as possible. (I order all my herb seeds from Richter’s in Canada).
Medicinal herbs play a big role on our natural homestead, both for the humans and animals who reside here.
They’re also useful for making herbal tea, skincare products, natural dyes, and so much more. And they add beauty and fragrance to our homestead as well.
Culinary Herbs
Any herbs that are generally used for cooking: Thyme, oregano, dill, basil, parsley, etc.
Since most herbs are perennial, these have their own bed next to the house, close to the kitchen. Herbs are something that you will be snipping and using often, so plant them as close to your kitchen as you can!
Flowers
Any flower seeds that are just for fun. I love to grow flowers alongside my veggies, as they attract pollinators, and are also pretty to look at!
Corn & Squash
These actually don’t go in my raised beds, they go into my in-ground garden due to their size, so they go in a basket together. (see photo below).
Check your seed inventory
As I go through each seed basket, I open up each seed packet and look inside to see how many seeds are left. If I feel I don’t have enough for this year’s planting, I’ll go ahead and add that to my list. I’ll also check the expiration date on the packet. If I feel the seed is pretty old, I may order a fresh packet, just in case.
Begin Planning Your Garden
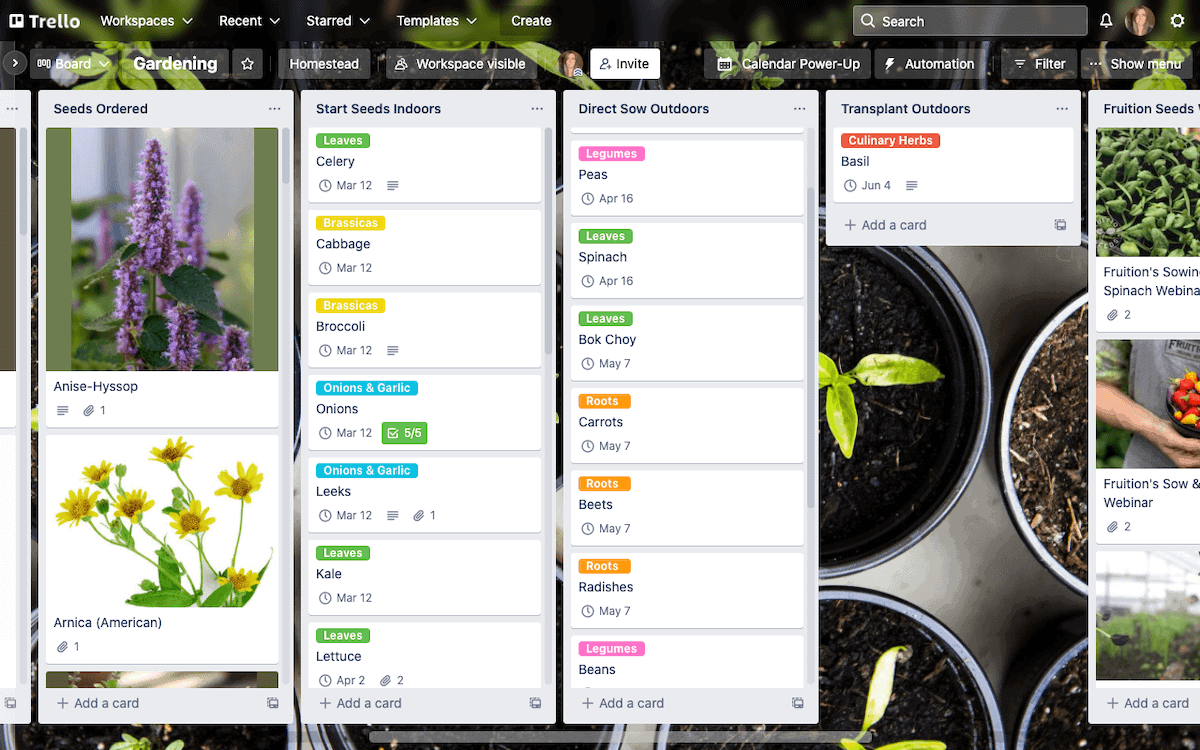
For my garden planning (and every other kind of planning I do), I use an app called Trello.
Trello is an amazing, flexible app, that lets you do all kinds of things! (I also use it for Meal Planning, Homeschool Planning, Cleaning Schedules, and so much more). Best of all, it’s FREE!
You can create ‘boards’ for anything you’d like. For example, this is my Gardening board.
Inside the board, you can create as many lists as you’d like.
In this screenshot, you can see I have a list of the seeds I ordered (along with photos and links to each type of plant info), I have an indoor seed-starting list, a direct sow outdoors list, and a transplant outdoors list. I can create due dates with reminders for when to plant what.
I’ve created different labels for different categories of plants.
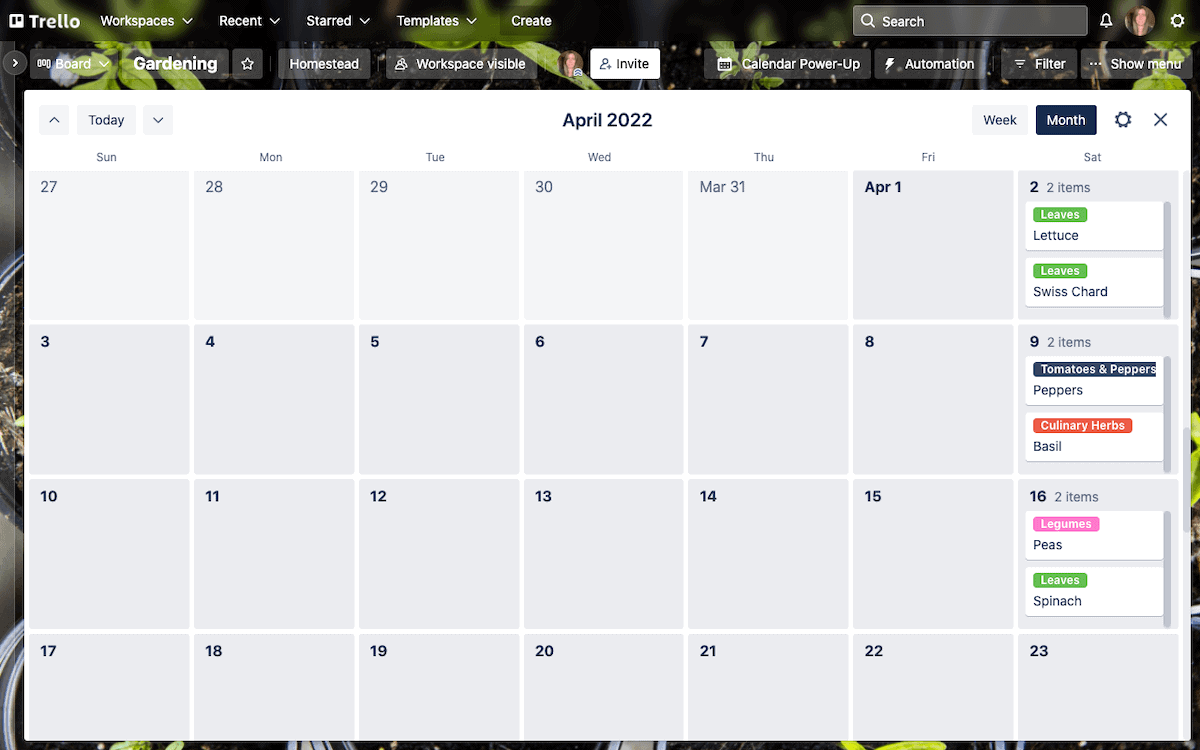
There is also a calendar view, which makes it easy to see at a glance what I need to plant each week.
(I use Saturday as my planting day, since that is my weekly Gardening Day).
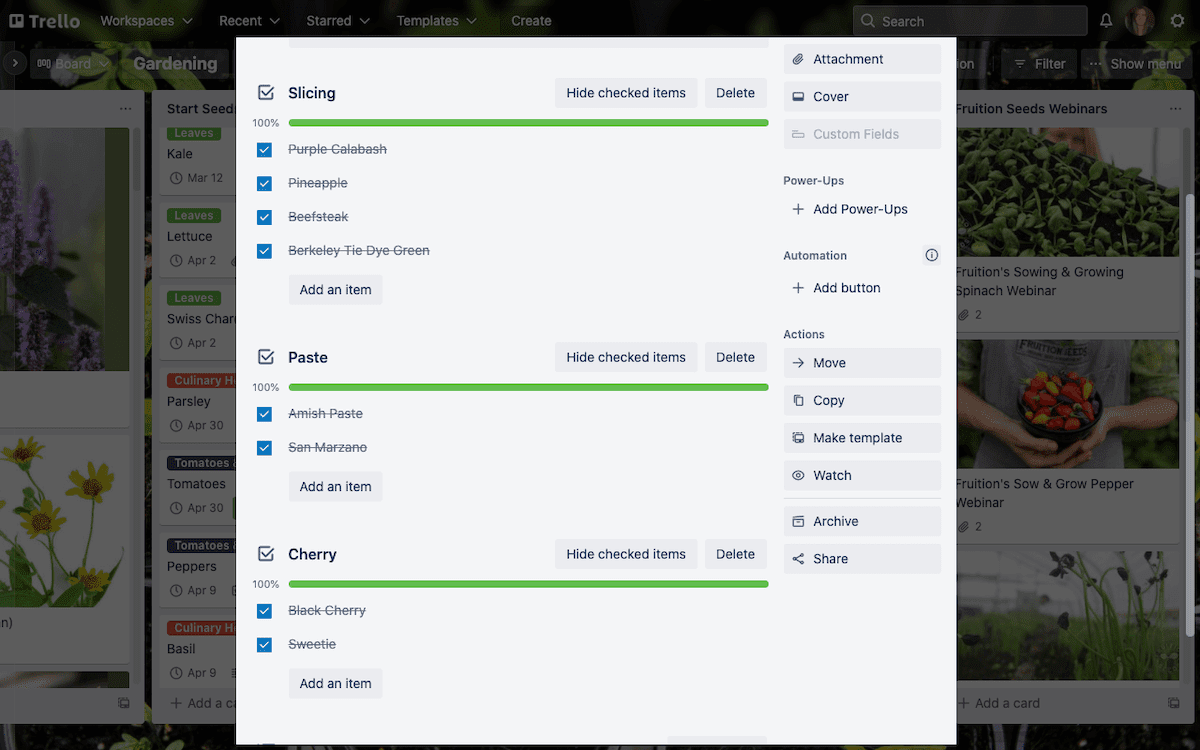
For different varieties, I make a checklist inside the Trello card.
ie) On my tomato card, I will make a checklist showing all the varieties of tomatoes I want to grow. I’ll check off the ones I have, and leave unchecked the ones that I need to order.
Now, you certainly don’t have to use Trello. A good ol’ notebook and pen will work just fine. But I have a preference for digital tools, because they don’t get lost, and I can easily re-use them from year to year.
I actually created this board last year, so all I had to do this year was update what I wanted to plant, and update the planting dates for 2022. Easy Peasy!
Sketch Out Your Garden Space
It’s always a good idea to sketch out your garden space BEFORE ordering your seeds. As you may realize you don’t have nearly enough space for everything you want to grow!

Gardening can be so fun, that you will want to grow EVERYTHING. But try to be realistic and not over-buy seeds if you can help it.
Sketching out your gardens is super easy if you use the Square Foot Gardening Method.
I just sketch out the grids, then write in each square what I’m going to plant. As I said, planting one type of plant per bed makes it even easier, as I can then look at my seed list, decide how many of each plant I want to grow, and sketch it out in my grid.
Use pencil! You will erase and move things around.
Here are some things to consider when sketching out your gardens:
- Taller plants should go on the north side, and shorter plants on the south side. (unless you’re in the southern hemisphere, then this would be reversed).
- Keep similar plants together, as they typically have similar light and water needs.
- Keep things you will harvest frequently closer to the house (like lettuce & herbs), and things that will be harvested maybe just once further away from the house (like squash and corn).
- Consider companion planting – this is next-level if you’re a new gardener, but some plants work synergistically together. ie) I interplant basil and marigolds around my tomato plants, as they help repel the tomato horn worm. Plus the tomatoes help to shade the basil a bit – while basil is a heat-loving plant, I find that too much sun makes it bolt (go to seed) too quickly! The tomatoes help shade the basil, and the basil helps repel hornworms from the tomato. As you research companion planting, you’ll find many of these types of relationships!
- Are you planting things that climb? (pole beans, cucumbers, peas, vining tomatoes, melons – these will all need some kind of trellis). Technically you can just let them sprawl along the ground, but not only does that take up more garden space unnecessarily, but also increases the risk of rot, insect damage, or even just getting stepped on. Vertical gardening solves all of these problems!
- Maximize your garden space by using shadier spots for things like leafy greens, and sunny spots for things that need a lot of heat and sun.
- If you don’t have existing garden beds, and you’re planning to build some from scratch, I highly, highly recommend consulting the Square Foot Gardening book first! It will give you all kinds of helpful tips for not only building your beds, but what to fill them with, how big to make them, and so much more.
Once you have sketched out your garden, you may find that you need to modify your seed list! Maybe you don’t have enough space for 20 varieties of tomatoes after all.😉
But it’s also perfectly acceptable to plant just 1-2 plants of each variety. I love to do this with my tomatoes, so I can sample a bunch of different kinds! Plus they ripen at different times during the season, so it means I have tomatoes ripening at all different times.
Order Your Seeds
Once you have gone through your seeds, and made a list of what seeds you need to re-purchase, you’ll want to think about what you want to grow this year, and how much. Here are some things to consider when planning your garden:
- How much garden space do you have?
- What does your family eat the most of?
- How difficult is it to grow?
- Does it grow in your region?
- How many of each plant will you need to feed your family, if you’re going to be primarily relying on your garden for vegetables?
- Are you only growing enough for in-season eating, or are you also planning to preserve food to put up for winter?
Depending on how much experience you have with gardening, as well as your family situation, your goals may change over time.
For instance, when I was a new gardener, I was only interested in growing things for fresh eating, and things I wanted to grab from the garden right before a meal. If you’ve never harvested a salad minutes before dinnertime, you are missing out on this wonderful luxury!
However, as my skills developed over time, I wanted to grow larger quantities of things so that I could begin learning how to preserve our own food.
If you are new to gardening, I highly, highly recommend starting SMALL. If you start too big, you’ll get frustrated, and may end up giving up gardening altogether! Not to mention, there is a learning curve to growing each type of vegetable or fruit. Some are easier than others.
Once you master growing a particular type of food, it frees up brain space to learn how to grow other types of food. You will also want to consider how much garden space you have.
Be realistic!
Remember that those teeny tiny tomato seeds can turn into massive bushes that can take over an entire tomato bed. I LOVE using the Square Foot Gardening method, because it tells me EXACTLY how many plants I can plant per square foot. It takes the thinking out of gardening! I call it ‘gardening for dummies’. I’m all about keeping things as SIMPLE as possible.
You can read my blog post about why I love square foot gardening here.
NOW you get to flip through your seed catalogues, or go to your favourite seed website, or simply make a list to take to the store with you if you’re planning to buy locally. Make a list of the new seeds you’d like to order this year.
Go ahead and place your seed order!
What Seeds to Start Indoors
While you anxiously wait for your seed order to arrive, you can be researching the next step: indoor seed starting.
Depending on your growing climate, some of your seeds may need to be started indoors, in order to get a head start on growing.
I live in Canada, and we have a relatively short growing season, which means most heat-loving plants need to be started early.
Tomatoes, peppers, and herbs, especially.
Also onions, which take a long time to mature.
Broccoli and cabbage are cool season crops, so I want to start those early so they are well-established before the summer heat kicks in.
The rest of the seeds CAN be direct-sown (put directly in the garden rather than started indoors first). But if you want a head-start, you can also start some of these indoors.
Here is an example:
Start some of your lettuce plants indoors, a few weeks before they can get planted out. When it’s time to plant them out, you can also direct-sow some lettuce seeds at the same time. That way you will have lettuce sooner, but also will have new lettuce growing to take its place.
What Seeds To Direct Sow
Some seeds don’t like to be disturbed once they’ve been planted, and should be sown directly into your garden.
- Legumes – peas and beans generally do better when direct-sown. However, since they are a large seed, I always soak them in water for a few hours before sowing them. This helps to soften the hard shell, so they will germinate faster.
- Corn – similar to legumes, I always soak my corn before planting, but it prefers to be direct-sown
- Root veggies – carrots, radishes, beets, turnip etc get direct sown. This is not something you would want to transplant. Since it’s grown for its root, you wouldn’t want to disturb the root by moving it once it’s established. These are easy to direct sow!
Once you know which of your seeds will need to be started early, you will need to know HOW early, and then count backward from your average last frost date.
For example, our average last frost date is mid-May. Tomatoes typically get started about 6 weeks before average last frost (although to be safe, I don’t put my tomatoes out until the first week of June, as we occasionally get hit with a late frost). So that means I should be starting my tomato seeds around the first to middle of April.
The Square Foot Gardening book has wonderful, easy-to-read charts that show you how many weeks before your average last frost date to start different veggies indoors.
Write these dates down for each of the seeds that you will be starting indoors.
Indoor Seed Starting Equipment
To start seeds indoors, you’ll need a few items:
- Seedling trays – or you can get creative and save things from your recycling. Foam meat trays, plastic salad boxes, anything you might have around the house that will not leak when you put your seedings on them. I personally like the seedling trays, because you can get them with clear plastic lids, which help the soil stay moist until germination occurs.
- A shelf to put them on
- Grow lights. I’ve tried using natural light from a south-facing window, however I always end up with leggy plants when starting them this way. Since the light isn’t directly above the plant, the plant ALWAYS wants to stretch toward the window. You can turn them a couple times a day, but they will continue to reach for the window. So I find that grow lights work the best.
- Seedling pots. I have always saved pots whenever I buy plants from the garden centre, so I don’t have to buy these. But if you don’t already have some laying around, you may need to purchase some. I prefer square shaped ones because they fit in the trays better.
- Seed starting medium. You’ll want a specific type of soil that’s just for seed starting, to ensure your seedlings get all the nutrients they need before you transplant them to your garden. The good news is, you won’t need a whole lot, since you’re only using a small amount for each cell or pot. Get organic if you can, to be sure there is nothing nasty in your soil. Remember, your plants are only as healthy as what’s in your soil.
While you wait for your seed order to arrive, you can collect the items you’ll need for seed starting, so you will be ready to begin once you have your seeds!
Happy Garden Planning!
Those are the basic steps to planning your garden!
While showing you how to actually start your seeds and plant your garden are whole separate topics, I hope this post helped you with some basic and practical steps for planning your garden.
Having a solid garden plan will help you not feel overwhelmed, you won’t waste seeds, and you’ll know exactly where and how everything will be planted.
Free Seed Starting Cheat Sheet
Grab a free copy of my seed starting cheat sheet!
Pin It for Later
Other Posts You Might Enjoy
Emergency Food Storage for Beginners
25 Ways to Live a Simple Life
How to Feel More Self-Reliant in Uncertain Times
25 Homemaking Skills You Should Know