Blogging Resources
If you’ve already visited my How to Start a Blog post, you’ll know that there are certain tools you’ll need if you want to start an income-earning blog.
(If you haven’t read that post yet, you’ll want to do that first! That way you have your step-by-step guide to starting a blog – this resources page is meant to go along with that).
Here’s where you’ll find the links to all the courses, tools, and equipment I use to run my blog.
This post may contain affiliate links, which means if you make a purchase through one of these links, I make a small amount of commission at no extra cost to you. As an Amazon affiliate, I earn from qualifying purchases. See full disclosure here.
I wouldn’t recommend investing in them all at once. What I did, is chose one item at a time, whichever I felt was going to make the biggest immediate difference for me.
The absolute minimum you need to start a blog is a domain name, hosting, and WordPress software (all of which you can get through BigScoots.com).
Blog Courses
There is a ton of information available on the internet about how to start a blog... which can be both a blessing, and a curse.
There is a lot of contradictory information out there, and when you're trying to cherry-pick bits and pieces of information, sometimes you end up more confused than when you started.
Sometimes it's nice to get all the info, from start to finish, from ONE person. When it's all laid out neatly in step-by-step form.
I didn't invest any money in courses at the beginning of my blogging journey, and frankly, it set me back several years. I was basically a hobby blogger, and had no idea how to create a business with my blog.
My blog didn't start growing until I actually invested in a few basic courses.
After taking these courses, I ended up deleting a lot of my content, because I realized it was in no way contributing to the growth of my blog.
None of these courses are very expensive, and if you want to start blogging as a business, you will be much further ahead if you set everything up correctly from the beginning.
Consider it an up-front business expense and an investment in your blog.
Create Your Blog Dream
If you want someone to walk you through the process of setting up a blog, step-by-step, this is the course to take! Lisa from Farmhouse on Boone has her own very successful blog, and she can teach you how to create one, too.
Her video modules walk you through every step of the process: From selecting a host, to installing Wordpress, writing your first blog post, how to take good photos, and so much more.
This is the course that will get your blog from an idea in your head, to having an actual blog.
I didn't take Lisa's course until years after I had started "blogging" (I put that in air quotes, because what I was doing wasn't really blogging, it was more like journalling. I had zero SEO or Pinterest strategy, and I just wrote what I felt like - and what I was writing didn't even benefit the reader! It was more like 'a day in the life of me').
Once I took Lisa's course, I realized I basically had to start from scratch.
Pinteresting Strategies
Confused by Pinterest?
This was the first course I ever invested in for my blog, and it was 100% worth the money. (Plus, it helps that Carly keeps it very affordable).
Pinterest is my #2 traffic driver, next to Google, so learning how to use it correctly is so important for your blog.
I wasted a lot of time and energy trying to figure it out on my own for free - I wish I had taken this course right from the get-go. I ended up spending a lot of time going back and having to re-do all my Pinterest boards to fix my mistakes.
Carly teaches you all the strategies behind using Pinterest effectively to get the best results.
Easy On-Page SEO for Beginners & Intermediates
Pinterest and SEO are going to be your 2 main traffic drivers to your blog - so I recommend investing in an SEO course as well as a Pinterest course.
Many SEO courses are very expensive, but this one from Debbie Gartner is extremely affordable.
Similar to the Pinterest course, after I took Debbie's course I had to go back and update all my posts with proper SEO techniques.
So save yourself some time and invest in this SEO course right from the beginning.
I created a checklist with all her SEO tips that I attach to each blog post card in Trello. That way I can check each item off as I complete it for each post.
It's a quick eBook course, you'll be able to consume it in a few hours, and then it's very actionable.
Free SEO Email Course
If you just can't swing her paid SEO course, Debbie's free SEO email course will help get you started! I found this very useful, especially considering it is free.
(I took her free course before deciding to upgrade to her paid course).
You'll get your free SEO lessons delivered directly to your email inbox.
It will also give you an idea of what to expect if you're considering Debbie's paid course.
Blogging Tools
Starting a blog requires certain tools and bits of software to help you be successful.
I try to keep the tools I use to a minimum, both to save money, and also to be more efficient.
These tools are the ones that I wouldn't be without.

Bigscoots (Hosting)
The very first thing you need when you start a blog, is a self-hosted Wordpress account. This means you OWN your website and your content. But unless you have servers in your home (you probably don't), you will need someone to host your self-hosted blog.
This is where Bigscoots comes in.
I used to use Bluehost, because that seemed to be what most bloggers recommend - but then I realized they recommend it because they have a very generous affiliate program.
After having issues with Bluehost for years, and then realizing their renewal rate was crazy expensive, I made the jump to Bigscoots.
Their customer service is night and day compared to Bluehost. And as a beginner, you want someone you can contact quickly to help solve any issues you might be having.
Bigscoots customer support is fast, and second-to-none. Plus, it's very affordable.
I use their shared hosting plan, and pay just $7.95/month. (It's only $6.95 a month if you pay for the full year at once).
You can also buy your domain through Bigscoots if you wish (that's what I did!). That way your hosting and domain are both in one place.
Restored 316 (Theme)
Another important piece of your website, is your theme. Your theme is the look and feel of your website. It contains the layout, fonts, customization, menus, etc.
Unless you are an experienced web designer, you will want to purchase a theme.
There are free themes that are available, but like hosting, I wanted to have access to support if anything went wrong.
Restored 316 has amazing customer support, and will help you with any theme-related questions you have while setting up your blog.
Canva (Graphics)
Creating Pinterest pins is an important part of driving traffic to your blog.
I love to use Canva to design my pins. It's easy to create templates that you can re-use over and over again, speeding up your pin design time.
I also could not live without the Canva content scheduler.
I create about 10 Pinterest pins for each blog post in Canva, then use the built-in scheduler to automatically pin these for me about once a month.
The pins show up on a calendar, so you can physically see when each pin is going out. It's brilliant!
Once those pins are done and scheduled, I don't have to think about them again! Canva will post these to Pinterest for me, and each one of those pins will begin to generate traffic over time.
Canva has a free version but it doesn't include the scheduler, so I use the premium version.
Flodesk (Email Marketing)
Once you start getting traffic to your website, you will want to have a way to connect with your readers in the future.
Without having an email marketing tool, your visitors may never come back!
Email marketing allows you to send out weekly newsletters to your readers, or to send them a freebie for joining your email list.
In the future, when you have your own digital products to sell, your email list will contain your biggest fans, who may be interested in purchasing your products.
I've looked into many email list providers. Some have a free tier but it is limited (you can't send out automated emails, for example, or create workflows). Most get more expensive the more email subscribers you have - many people pay thousands of dollars a month to maintain their email list! And since they already have all their forms and automations set up, they don't want to switch, because of how much work it would be to move everything to a new provider. Therefore, they are stuck paying hundreds or even thousands of dollars a month as their list grows.
I wanted to ensure that the ESP I selected was the one I would want to use forever. I didn't want to have to move everything later, and I certainly didn't want to spend a ton of money to send emails.
I found Flodesk and haven't looked back. It's beautiful, intuitive, and simple to use. And best of all, it's one fixed price, no matter how many subscribers you have.
At the time of this publication, Flodesk is $38.00/month - and your pricing is locked in forever, no matter how much your email list grows.
They also have a built-in Checkout program that allows you to sell digital products and connect those purchases with your email list!
For a small additional fee, you can create gorgeous sales pages that will help you sell digital products to your readers. I love that it is seamlessly integrated with my email list - that way it keeps it simple and I'm not trying to manage 2 separate systems.
I absolutely love Flodesk, and if you sign up for a free 30 day trial using my link, you can get 50% off for your first year if you decide to keep using it. That means you'll get a year of email marketing for just $19/month! That is a steal.

ClickUp (Planning & Organization)
One of the first things you'll notice when you start blogging, is that you need to be organized! There are a million things that will need to be done, and you'll want a streamlined way to keep track of it all.
Enter: ClickUp.
ClickUp is my wizard behind the scenes. I literally use it to organize every aspect of my life... including my blog!
Here are some of the ways I use ClickUp for my blog:
- content planning
- publishing checklists
- to-do lists
- keeping track of published posts
- keeping track of affiliate programs
- keeping track of blog stats
...and so much more.
And best of all... it's free!
Adobe Lightroom Classic (Photo Editing)
If you're shooting photos with a real camera (vs a phone), then editing is essential! Shooting photos in Raw format means editing is necessary in order to bring out the colors and lighting in your image.
I use Adobe Lightroom Classic to edit my blog photos.
There is also an online version of Lightroom (just called 'Lightroom'), where all your images are stored in the cloud.
I prefer the classic version, as it's more robust, and I can store my images on my external hard drive. That way I don't have to pay for more cloud storage when I run out of space.
If you're just getting started, I'd recommend grabbing the 'photography suite'. It's $19.99 a month currently, and it includes Lightroom Classic, Lightroom, and Photoshop.
When you use Lightroom classic with local storage, you can sync your photos to Lightroom (cloud) so you can edit them on any device - but the best part is that it doesn't count toward your online storage space. So that is my recommended workflow.
PlugIns
A WordPress plugin is a tool that “plugs into” a WordPress.org website, to add new functionality or enhance existing functionality without coding.
Many plugins are free, but a few are paid.
You want to keep plug-ins to a minimum, as they can slow down your site speed.
Here are some I use.
Thirsty Affiliates
When I first started blogging, i was manually copy/pasting all of my affiliate links into my blog. There are 2 problems with this method:
1. Every time you need an affiliate link, you have to find the website, log in, find the correct link, copy the code, then come back to WP and paste it in. This is a HUGE waste of time.
2. If any affiliate link ever breaks or changes, or you decide you want to use a different affiliate, you have to manually comb through all your posts to find those links, and manually change them all.
Using an affiliate link plugin like Thirsty Affiliates, allows you to store all your links right in Wordpress, to quickly and easily add them to posts.
There is a paid version of TA, but I just use the free version.
Create by Mediavine
This is the plug-in I use for recipe cards, how-to cards, and lists (like the one you’re reading right now!)
Create Lists also use Amazon API, which means you can pull Amazon affiliate links into your lists.
Header Footer Code Manager
Header Footer Code Manager (HFCM), allows you to insert code into your website without messing anything up.
I use HFCM to:
- insert my Google Analytics code
- insert Flodesk code for my email forms
- insert my Pinterest validation code
It's the best plugin for adding code to your website because it allows you to specify what pages or categories you want the code to appear on.
Blogging Equipment
You very likely already have all the equipment you need to start a blog.
If you have some kind of a computer, and some kind of a camera (even if it's your smart phone), you can start your blog!
But over time, you may be ready to upgrade some of your tools, in order to improve your blog and continue to grow.
Apple MacBook Pro
Now, I have to admit, I have been a Mac user for many years - at least 20. And I love, love my Macs. Our whole family has iMacs, Macbooks, iPads and iPhones.
Macs are so user friendly, I have never in 20 years gotten a computer virus, and I love how they all stay in sync. Whatever I do on my Mac syncs with my phone and my iPad. It makes switching between devices very seamless!
I am NOT a techy person (which is good, because it goes to show that ANYONE can start a blog).
While I also have and love my iMac (it's a desktop mac with a much larger screen, and a proper keyboard), I really only use my Macbook Pro for blogging.
I love how portable it is, that I can grab my Macbook and sit on the couch in front of a cozy fire and work on my blog while sipping my coffee in the wee hours of the morning.
Some people prefer desktop computers, and I may some day as well, as my eye sight grows poorer. 😉
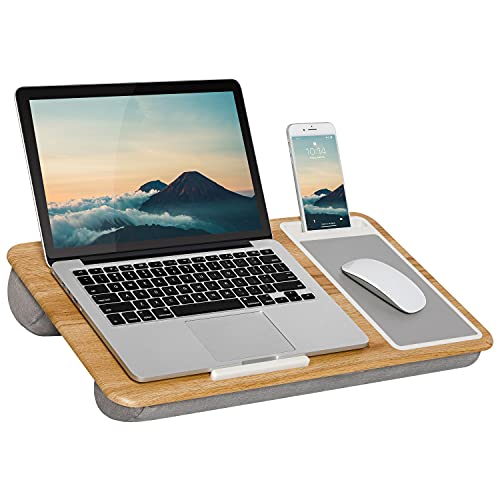
LAPGEAR Home Office Lap Desk
If you're like me, and prefer to work on a laptop, you will definitely want a lap desk.
It's more comfortable than sitting your laptop on your lap, and keeps your laptop from overheating.
The keyboard cushion makes typing infinitely more comfortable, and there is even a built-in mouse pad if you prefer to use a real mouse over a track pad.
I love that I can prop up my phone in the slot at the top, so it's within reach if I need to use it to check something.
![Image for Canon DSLR Camera [EOS 90D]](https://m.media-amazon.com/images/I/51LGtxwNfXL._SL500_.jpg)
Canon DSLR Camera [EOS 90D]
I have been using an iPhone to take pictures for my blog since 2015. I JUST got my first real camera this year... in 2024.
So a DSLR camera is definitely not a requirement. However, in looking at other people's blogs, I've realized how beautiful the photography is, and how it really does draw you in to read a post.
Humans are, by nature, visual creatures - we love beauty. This is why we all love Instagram, because we can get lost in all that beautiful imagery (well, back before it became just a platform for reels, but I digress...).
As with anything I buy, I do a TON of research before I make a purchase - especially something that is going to cost a fair sum of money.
I read about different brands of cameras, different types of bodies (DSLR vs. Mirrorless), different types of sensors (Full-Frame vs. Crop Sensor), and even different types of lenses.
Canon seemed to be the most popular choice for beginners, and DSLRs are cheaper than Mirrorless cameras.
Mirrorless cameras are going to be the new technology going forward, but I've never been one to need the 'latest and greatest' anything. I tend to buy slightly older technology, so that I can spend a lot less.
My daughter also already had a Canon DSLR with a crop sensor, which meant that if I bought the same type of camera, we could share lenses. (This is a nice bonus for me, because she already has a nice collection of lenses!). That way I could try them out before deciding if that particular lens was one I wanted to invest in for myself.
My recommendation would be to buy a slightly older camera, second-hand, and save some money for a couple good lenses.
Instead of buying a brand new, current model, introductory level camera, I invested in a semi-professional Canon 80D, which is several years old, but got raving reviews from anyone who had it.
It has more features than even the newest introductory level DSLRs, since it's a semi-pro model.
My suggestion would be, to find a local or online camera shop that sells used equipment. That way you will know it has been thoroughly inspected, and often will even include a warranty.
I would also suggest buying just the body, and skipping the kit lens. I don't know any bloggers who use a kit lens, unless it came with their camera and they haven't purchased a replacement lens yet.
I've linked the newer model of my camera below (the 90D), since the 80D is no longer sold.
But as I said above, I highly recommend going used/refurbished for your first camera!

Canon EF 50mm f/1.8 STM Lens
A 50 mm lens is usually the first lens anyone should get for their DSLR camera. It’s hugely versatile, and allows you to create great bokeh (where you have your main image in focus, but your background is blurred).

Canon EF-S 24mm f/2.8 STM Lens
As much as I love my 50 mm lens, you do have to get a fair distance away from your subject in order to fit it in the frame.
The 24mm lens is a wider angle, so it helps you get closer to your subject. It's also ideal for wider shots, like landscape or garden shots.

NEEWER 700W Equivalent Softbox Lighting Kit
I admit that I don't own a lighting kit yet, but I'm very quickly realizing that taking photos with my new camera is really all about the lighting.
And here in Ontario, Canada - we have long winters and lots of overcast days. And I'm finding it annoying to try to time my photo shoots with the weather, and with the time of day.
So a lighting kit will be my next investment - that way I can shoot photos whenever it works for me, rather than waiting for the natural light to be just right.
This is the lighting kit that is recommended by Lisa Bass (from Farmhouse on Boone), so likely the one I will start with.
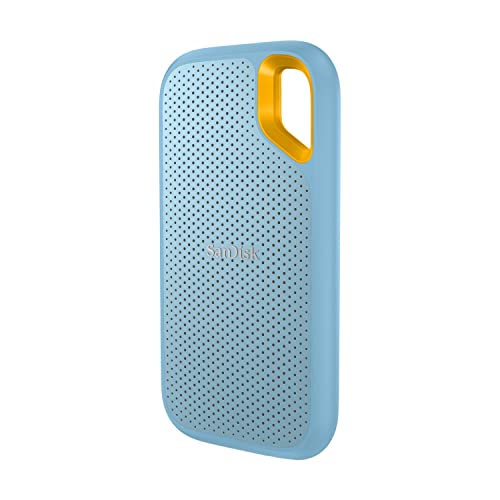
SanDisk 1TB Extreme Portable SSD (External drive)
If you're using a DSLR camera and shooting in raw, you'll quickly realize that those files are a big space hog.
I download my raw images directly to my external drive so they don't take up space (and slow down) my computer.

SanDisk 128GB Extreme PRO SDXC UHS-I Memory Card
If you're using a DSLR camera, you'll need a memory card. This is what you insert into the camera, and it stores your photos until you transfer them to your external hard drive.
A faster SD card (like this SanDisk Extreme 128 GB one) will render your images and video faster than a standard SD card.
I hope that gives you a sense of what tools I find the most helpful for blogging.
I have tried many different tools over the years, and the ones I have listed above are all the ones I consider essential at this point in my blogging journey.
While you can certainly blog without these things (and if you have a very tight budget, I recommend just grabbing a domain name, $7.95 hosting, and a free WordPress theme – like Kadence) and getting started. Don’t let these other costs hold you back. You will still learn a TON in the process of setting up your blog and learning how to write high quality posts, and take good photographs. As your skills improve and you’re ready to invest more, maybe choose one thing that you feel will help you grow faster.