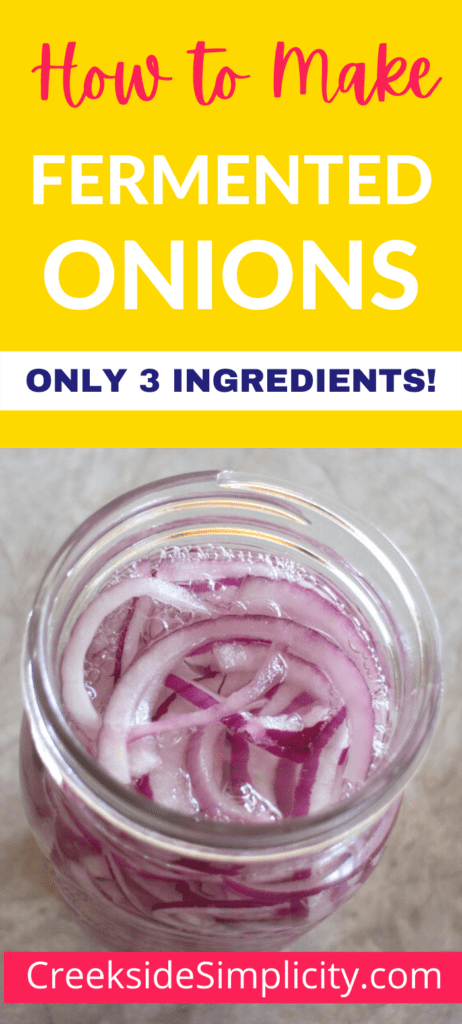
Easy Fermented Red Onions


Why make pickled onions with vinegar, when there is a better way. Lacto-fermented onions are so much easier and healthier! Fermented red onions use just three basic ingredients: Sliced onions, salt, and water. A delicious way to introduce probiotic goodness into your diet.
Why Ferment Onions
Whenever possible, I turn our condiments into fermented condiments, simply by adding salt, and leaving them at room temperature for a few days.
This simple process helps the food become more digestible, and adds beneficial bacteria to your gut, which we could all use more of!
To learn more about the benefits of cultured foods, I highly recommend checking out Cultures for Health.
Fermenting red onions makes them slightly softer, less spicy, and more tangy and flavourful. They are not as sour as a vinegar pickle. The flavour of white vinegar is very intense, where the sourness from lacto-fermentation is much more subtle.
There are many health benefits of fermented foods.
Fermentation is a great way to introduce good bacteria into our guts.
The ‘pickling’ done by our ancestors was, in fact, fermentation. They used salt, not vinegar, to preserve their vegetables.
If you’re new to fermentation, I think you’ll find this basic red onion recipe a great place to start. Happy fermenting!
This post may contain affiliate links, which means if you make a purchase through one of these links, I make a small amount of commission at no extra cost to you. As an Amazon affiliate, I earn from qualifying purchases. See full disclosure here.
1. Gather Your Ingredients & Supplies
What I love about making fermented vegetables, is how utterly simple they are!
No complicated recipes.
All you need are a few simple ingredients: vegetables, salt, and water. (Sometimes you don’t even need the water!)
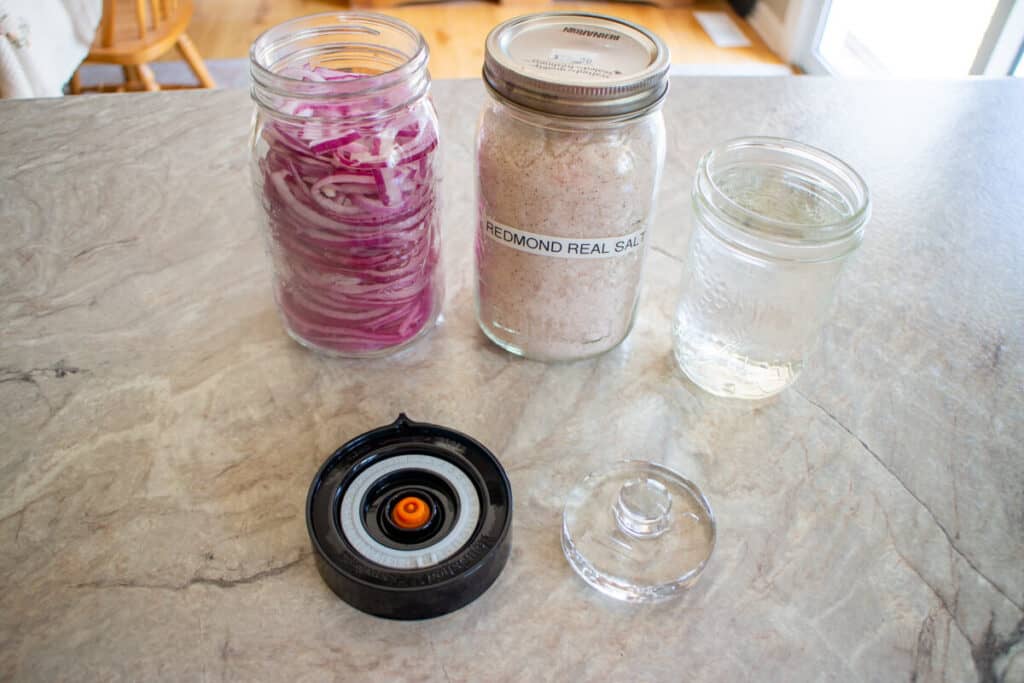
To make fermented red onions, you’ll need:
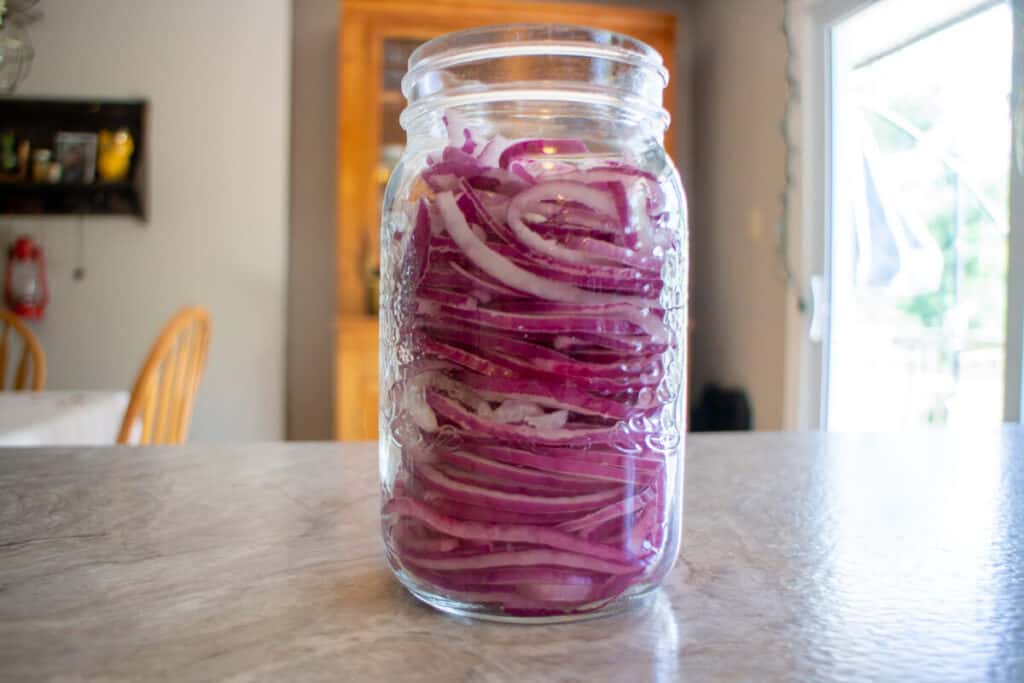
- a quart sized mason jar of raw onions, thinly sliced. (I use my food processor for this, which only takes seconds!) I used red onions, but you could also use white onions if that’s what you have. You can even ferment pearl onions!
- 2 tsp. salt (see my notes below)
- 2 cups of water (approximately a pint sized jar). Do NOT use chlorinated tap water. I use water from my Berkey Water Filter for all my ferments.
- optional additional flavorings: red pepper flakes, chili peppers, chopped garlic cloves, hot peppers, etc
- optional: starter culture to kick-start fermentation (such as whey)
- Glass fermentation weight
- Fermentation lid
The fermentation weight is an important part of the fermentation process, as it keeps your onions submerged under the brine, so they don’t go moldy. However, the fermentation lid is optional.
There are other styles of fermentation lids, such as these pickle pipes. (I haven’t used them personally, but I know others who have, and like them).
Another option is to use a plastic lid (metal will react to the fermentation and it may rust, which you don’t want). If you go with a regular plastic lid, you’ll need to burp your jar regularly to release the gasses as they build up.
My favorite solution, which you’ll see pictured below, is the Easy Fermenter Starter Kit.
It includes 3 glass weights, 3 fermentation lids, an air pump, and a fermentation recipe book!
This kit has served me extremely well over the years, and I’m happy to recommend it.
I used to have a lot of trouble with ferments going moldy until I started using the Easy Fermenter system! The unique lid style allows gasses to escape, without letting any air or contaminants back into the jar.
It also has a dial on the top so you can set the date that your ferment should be complete.
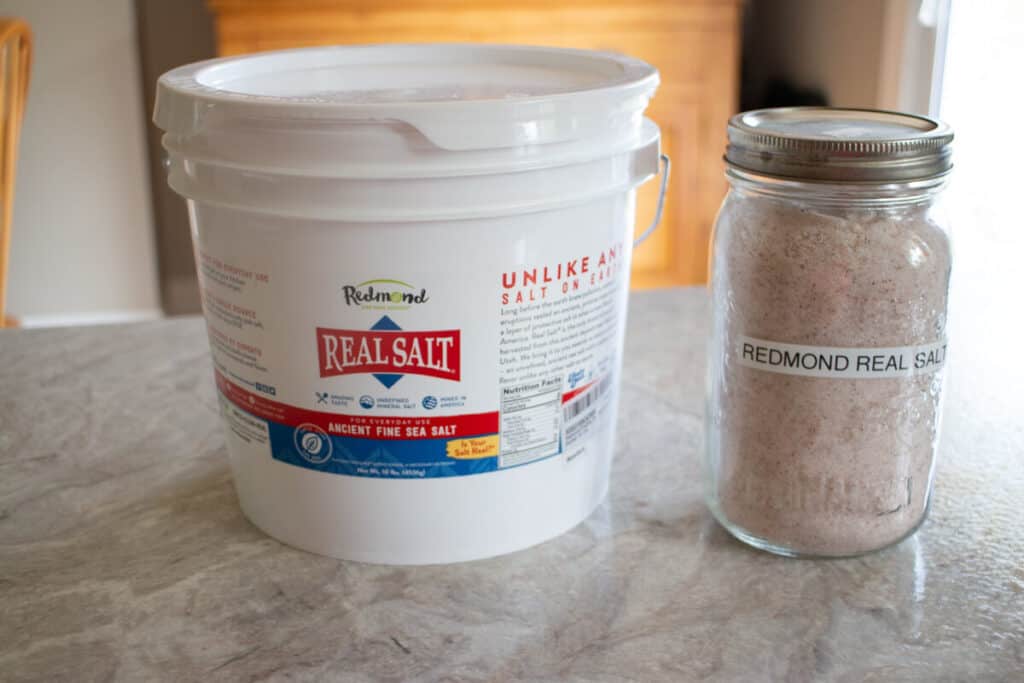
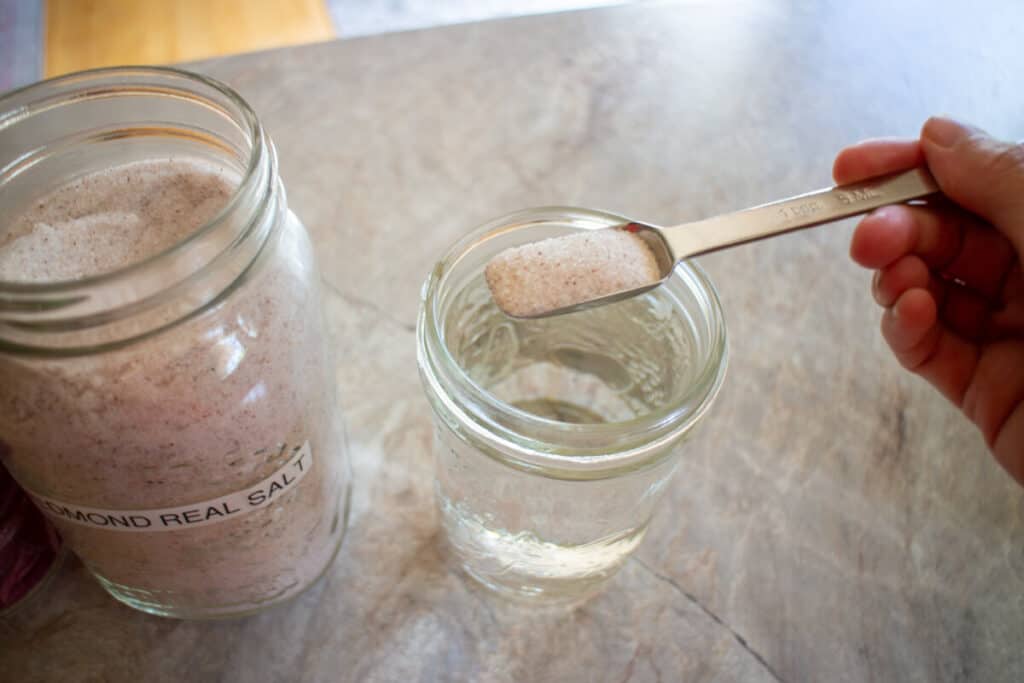
A Note About Salt
You don’t want to use table salt for this. You want a good, high quality salt. Himalayan pink salt or sea salt are good options. I use and love Redmond’s Real Salt. It’s so versatile, and I can use it for everything from salting our food, to canning, to making ferments. It’s the only kind of salt I buy!
Salt is also an important part of our family’s food storage plan! I recommend storing one, 10 lb bucket of salt per person in your family. These plastic buckets are perfect for long-term salt storage as they keep moisture out of your salt!
I buy Redmond’s Real Salt in bulk in these 10 lb buckets, and then just keep a jar of it in my kitchen.
2. Prepare the Ingredients
If you wish, you can add additional flavourings, such as red pepper flakes, or chopped garlic cloves to add extra flavour to your fermented onions. If using, place these in the bottom of the quart jar.
As I mentioned above, the quickest and easiest way to prepare your onions, is by running them through your food processor with the slicing blade! This not only saves a ton of time, but a ton of tears as well. 😉
Plus, I like that it makes the onion slices all evenly sized.
But if you don’t have a food processor, or don’t want to lug it out, you can simply cut the onions into slices with a sharp knife.
As you’re slicing, place the onions into the jar so you can see how many you’ll need.
You’ll want to pack the onions pretty tightly into the jar, as they will settle as they soften with fermentation. I pushed them down with my fist as I was putting them in.
Leave enough space at the top for your fermentation weight and lid (if you’re using them).
Look how pretty!
3. Make the Salt Brine Solution for Fermented Red Onions
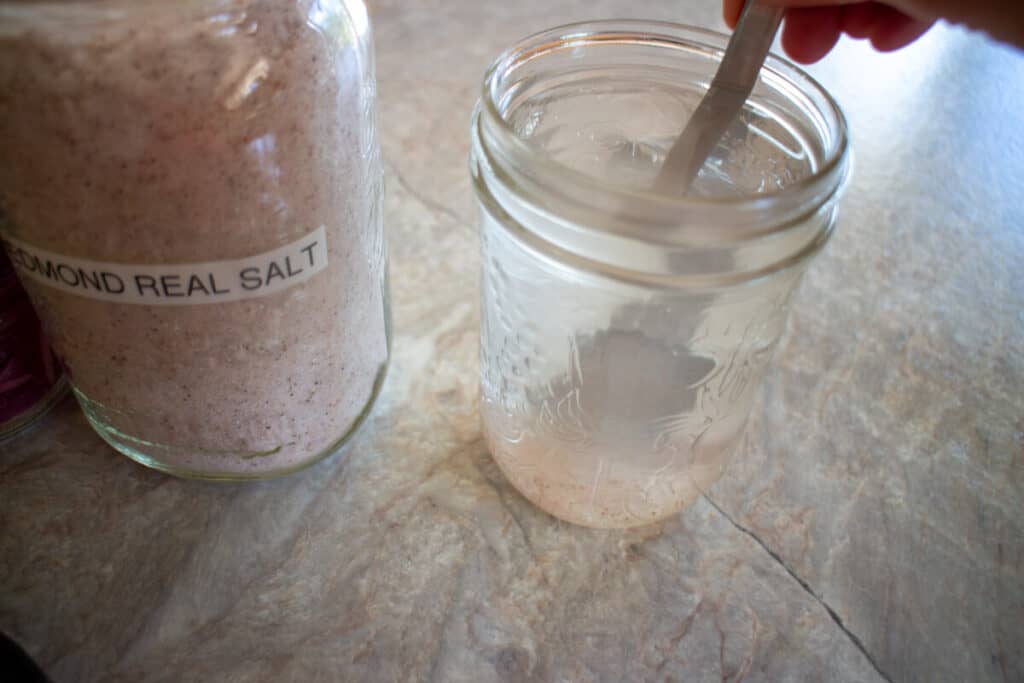
Now it’s time to make the brine.
The brine is what keeps your vegetables from going moldy. The salt converts the vegetable sugars into lactic acid, which is a natural preservative that inhibits the growth of bacteria.
Add 2 tsp of salt to the 2 cups of water.
Stir well to dissolve. This might take a minute or so.
You could heat it a little to make it dissolve faster, but it’s unnecessary, and if your brine gets too warm it could kill your ferment. So I recommend just stirring until it’s dissolved.
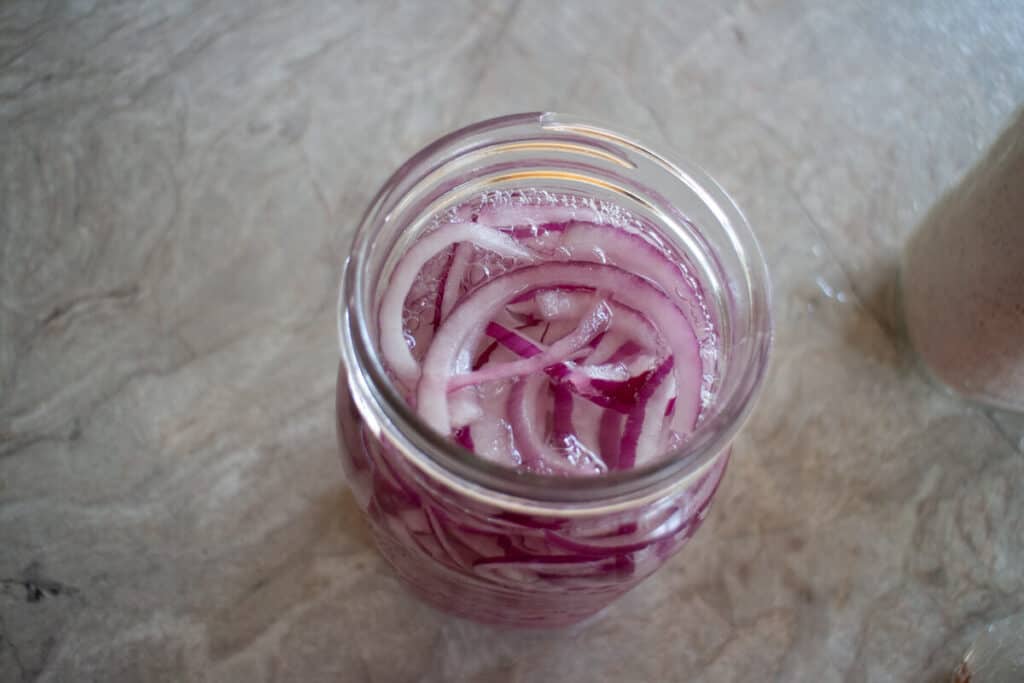
Now pour your salt water brine over the onions.

This amount of brine should completely cover the onions.
You can see the water level is at the surface of the onions. Once you put your glass weight on, it will submerge them completely under the brine.
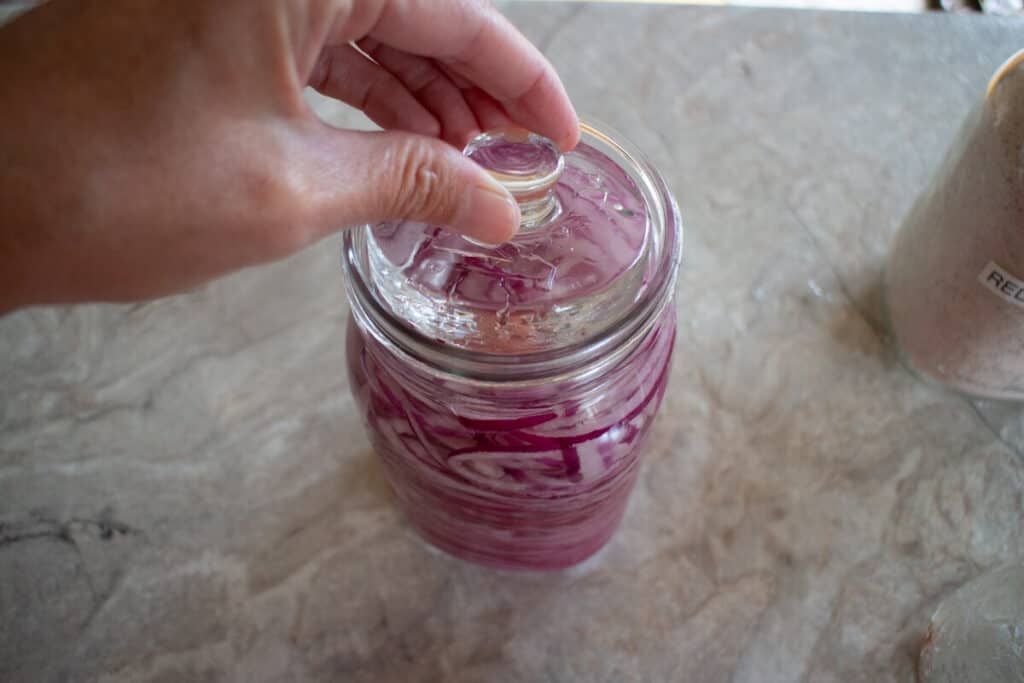
4. Apply the Fermentation Weight & Lid
Place your glass fermentation weight on top of the onions. If your brine level is too high once you do this, simply pour a bit off.
The onions should be completely submerged under the brine, but there should still be enough space that you have room for your fermentation lid.
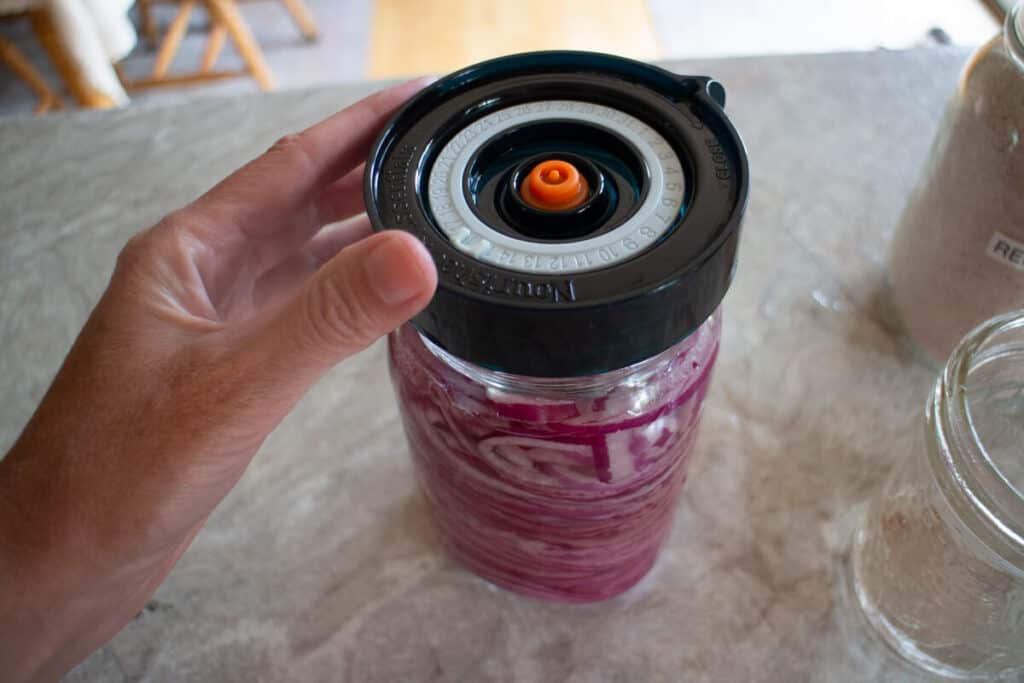
Next, apply your fermentation lid, if you’re using one.
I set the date on my lid for 7 days from today, which is when I’ll begin checking it.
Having the date dial built right into the fermentation lid is super convenient! But if you’re using a different style lid, you can just write on the jar itself.
You can either use a piece of masking tape, or one of these chalk markers to write directly on your jar.
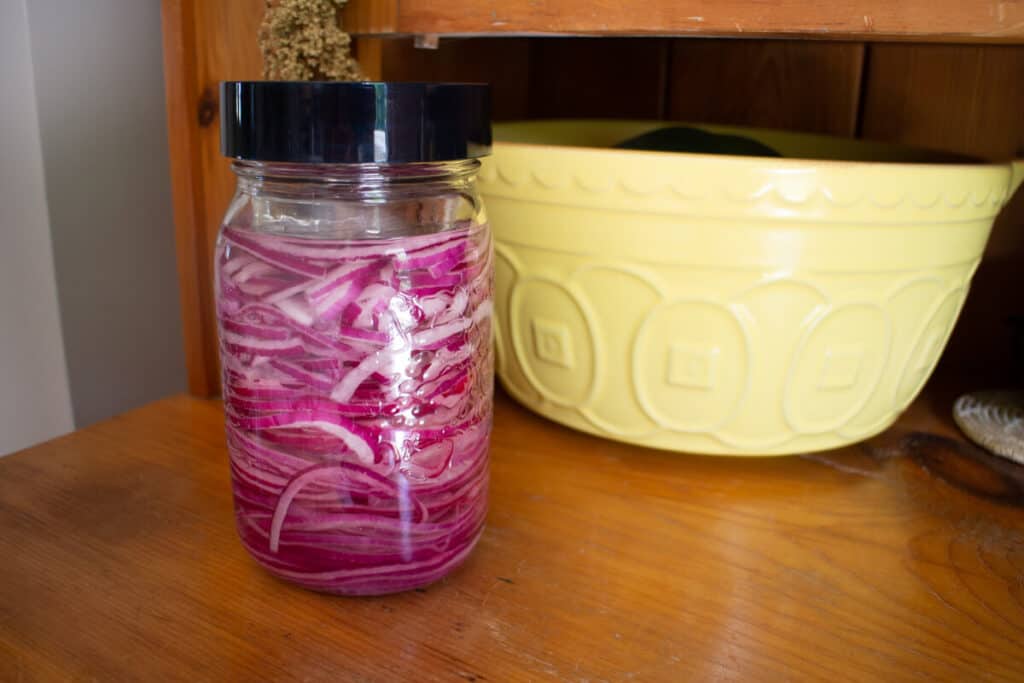
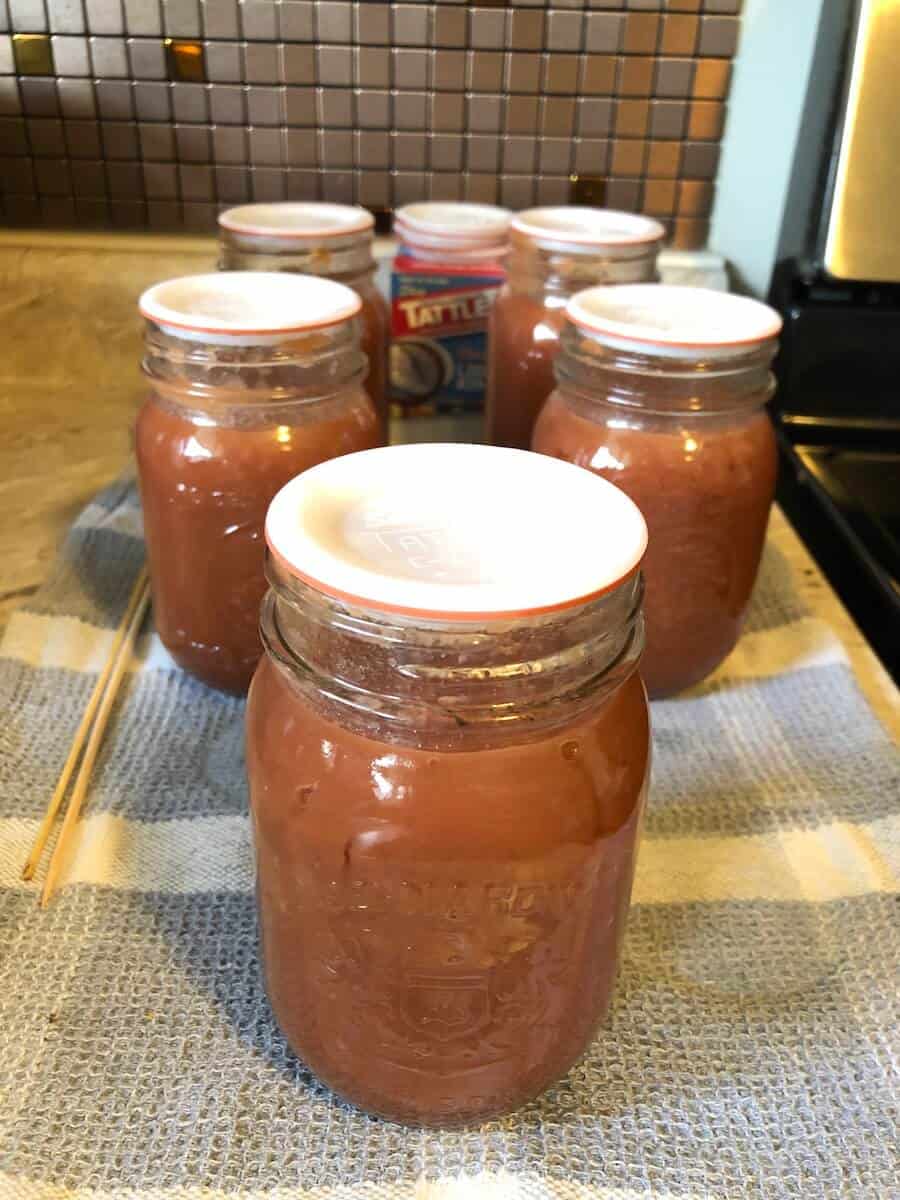
Ferment Red Onions for 5-7 Days
Set your jar somewhere where you won’t forget about it, but it’s out of the direct sunlight.
I put mine by the window just to take this photo, but then I moved it to a shelf in my kitchen where I put all my ferments. I walk by it every day, so I remember to check on them!
After a few days, they will start to turn a gorgeous vibrant pink color. You can begin tasting it to see if it’s at your desired level of tanginess. Generally, somewhere between 5-7 days is the sweet (or tangy) spot.
Once it’s how you like it, remove the weight and fermentation lid, put a plastic lid on the jar, and place it in your refrigerator!
Fermented red onions have a long shelf life. They should keep easily for at least 6 months when refrigerated, if not longer, but I promise you they won’t last that long! They are so delicious, you’ll gobble them up long before then.
Ways to Use Fermented Red Onions
Now, you might be wondering how to use these delicious, fermented red onions! Here are some ideas for you:
- Add them to a pickle & cheese tray for snacking
- Topping for hamburgers or hot dogs
- Pizza topping
- Tacos
- Salad topping
- chopped up and added to potato salad
- anything raw that you would typically use fresh onions in!
More Fermentation Recipes to Try
Fermented Honey Garlic (Whole or Chopped)
Lacto-Fermented Salsa
Fermented Dilly Beans
Fermented Cherry Tomatoes
Tepache from Pineapple Scraps
Apple Scrap Vinegar
Fermented Sweet Pickle Relish
FAQs about Fermented Red Onions
Pickled onions are made with vinegar, then processed in a water bath canner to seal them. They are softer than fermented onions, and also less nutritious, because the heat processing means they are no longer raw, and there are no probiotics present.
Fermented onions are made with salt rather than vinegar. They will have a slightly more mellow flavor, but will retain some of the crispness of raw onions. They are also very nutritious, as the fermentation process creates lots of gut-friendly probiotics.
Sometimes it takes a bit of practice to get the right amount of salt for your liking in a ferment. Too much salt can be very salty, but too little salt may result in poor fermentation, or worse, your ferment could go bad because there was not enough salt to kill off any harmful bacteria.
You can try a new batch of fermented onions, using less salt, and then when fermentation is complete, mix it together with your original batch.
-on sandwiches
-on hotdogs and hamburgers
-in potato or egg salad
-in a garden salad
-added to a pickle & cheese tray
Sometimes you’ll find a whitish film on the top of your jar of fermented onions. This is NOT mold! You don’t need to throw these away. It’s simply kahm yeast, a harmless byproduct of the fermentation process. It occurs once the sugars are used up, and the PH drops due to lactic acid production.
If you had mold, it would have a fuzzy texture, and would likely be green, blue, or white. It would also likely be in one spot, rather than covering the whole surface of the brine.
Kahm yeast is not harmful, but it can change the taste of your ferment. It will create sort of a yeasty flavor. You can choose to scrape off the visible yeast (I just use a spoon), or if you find it has ruined the taste of the ferment, you can go ahead and compost it.
1. Kahm yeast can sometimes form if you haven’t used enough salt in your ferment. Make sure you are using the recommended amount of salt. (At least a 2% brine ratio).
2. I found I didn’t get kahm yeast as often when I started using a proper airlock fermentation lid, rather than just using a regular lid, or a cloth napkin to cover my ferments.
3. Don’t over-ferment your food. Since kahm can form once all the sugars have been eaten, and the PH has dropped, as soon as your ferment is complete, go ahead and switch to a regular lid and store your ferment in the refrigerator.
One of my favorite things about fermentation, is you can ferment almost anything! You can ferment any type of onion you have on hand, even the tiny pearl onions are delicious.
I just prefer the red ones because they are gorgeous (they turn such a pretty pink color after fermenting), plus they tend to be a little sweeter than other types of onions.
If you wish, you can even combine several types of onions together in one jar.
As a general rule of thumb, anything you can pickle, you can ferment! Fermentation was the original ‘pickling’.
Pin It for Later:
Fermented Red Onions

Why make pickled onions when you can ferment them? These easy, fermented red onions use just three simple ingredients: onions, water, and salt.
Ingredients
- 1 Quart Jar sliced red onions
- 2 cups water (1 pint)
- 2 tsp sea salt
Instructions
- Thinly slice red onions (using a food processor if desired), and fill a tightly packed quart-sized mason jar.
- Make a brine, by stirring 2 tsp of good quality sea salt into 2 cups of (non-chlorinated) water.
- Pour your brine over your onions.
- Place fermentation weight on top of onions.
- Apply plastic lid or fermentation lid.
- Let sit at room temperature, out of direct sunlight, for 5-7 days.
- After 5 days, begin tasting. When it reaches the desired level of tanginess, remove fermentation lid and replace with a regular plastic lid, and place in refrigerator.
Notes
Fermented red onions will keep in your refrigerator for at least 6 months!
Recommended Products
As an Amazon Associate and member of other affiliate programs, I earn from qualifying purchases.


Just correcting a bit of misinformation here- the salt itself is not the agent of fermentation. Rather, the salt brine makes the environment in the jar inhospitable to other, harmful bacteria, and allows the lactobacillus naturally present on the vegetables to multiply and colonize the jar free from competition. With a lactobacillus starter, one could theoretically accomplish a salt-free fermentation, though the risk of harmful bacteria winning the “war” is drastically increased. Salt brine is simply the easiest and most reliable method for ensuring that the desired microbes are going to work on the contents of the jar
Thank you for the correction, Derek. I will update the post accordingly.
I notice that the recipes you post for fermented veggies use a brine made from 1 Tbsp of sea salt per cup of water, but the onion recipe calls for 1 tsp of salt per cup of water. Was that intentional? Do onions require a less salty brine?
Hello Linda! Yes, vegetables with less water content (such as onions, carrots, beets, etc.) require less salt than higher water content vegetables. But generally, you can experiment with different amounts of salt and make ferments to your own taste. Hope that helps!