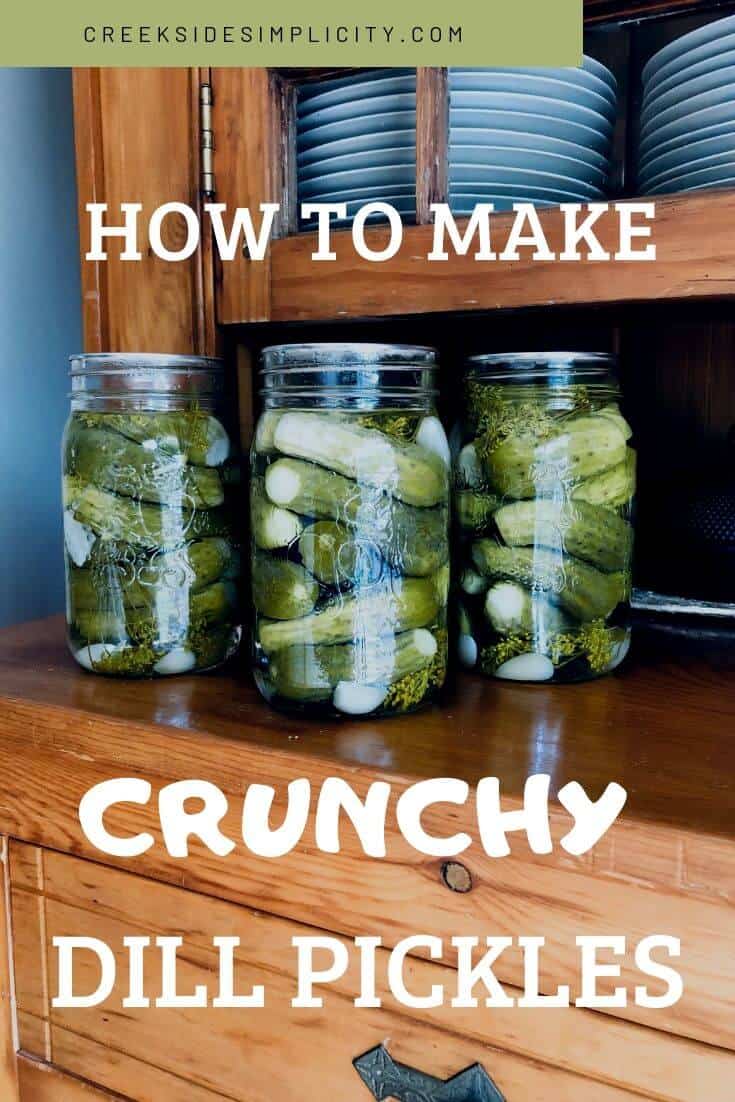
How to Make Crunchy Dill Pickles Using the Open Kettle Method

Our family absolutely LOVES homemade dill pickles, but the crunch factor is important! If you’ve ever bit into a limp dill pickle, you’ll know what I mean. 🙂 There are definitely some tricks to getting crunchy dill pickles! Follow this recipe exactly as it’s written and you’ll have crunchy dill pickles that your whole family will love.
Canning is not something that came naturally to me.
I didn’t grow up with a mother or a grandmother who canned… at least not in my presence. However, when I became a mother, I was intrigued by canning.
I loved the look of home-canned goods, lined up on a shelf.
I loved the idea of becoming a little more self-sufficient, by ‘putting up’ my own food.
I loved the idea of having control over ingredients in the things we were eating.
I loved the idea of reducing our waste/recycling by re-using the same jars over and over again.
I decided to start by thinking about what food items we were already buying in jars, and then figuring out how to can them myself.
Dill pickles… that was something we spent a lot of money on! By this point, I was already a conscious consumer, so I was buying the ‘Bubbies’ brand of pickles… which were a fermented pickle with high quality ingredients, BUT they cost a fortune, so I had to ration them.
I was a little nervous to try my hand at fermenting, but I decided to give pickling a go.
I knew that my family would likely turn up their nose at mushy pickles, so my mission was to find the BEST crunchy dill pickle recipe, and I believe this is it!
I get compliments on these pickles ALL the time.
Even my husband brags about them to his friends and co-workers, and often gives them away!
Let’s get to work!
This post may contain affiliate links, which means if you make a purchase through one of these links, I make a small amount of commission at no extra cost to you. See full disclosure here.
How to Make Crunchy Dill Pickles
If you’ve never canned before, you’ll want to take the time to read up on basic canning safety.
How to properly sterilize your jars and tools, how much head space to leave at the top of your jars, what food items can be safely water bath canned, and which ones need a pressure canner.
These things are what I spent the MOST time reading about and understanding before diving in. Once you get that stuff down pat, the recipe part is fairly easy!
I recommend a reputable book, like this Ball Canning Book.
This book (well, the Bernardin book because I’m in Canada, but it’s identical) – is my canning bible.
Although I’ve been canning for YEARS, I still pull this book out every single time, to refresh my memory on techniques, as well as for all the delicious recipes inside! I would not recommend canning without this book!
However, you can also check out the National Centre for Home Food Preservation for canning safety tips, as well as recipes.
I just prefer to have a real book in my hands, as there may be a time when we don’t have access to the internet.
Next, you’ll want to gather your ingredients and supplies.
Ingredients for Crunchy Dill Pickles:

For 24 quart sized jars of pickles, I used:
- 1/2 bushel of cucumbers (approx. 3″ long)
- Enough garlic for 96 cloves (whole cloves if small, or if large you can cut them in half) – 4 cloves per jar.
- Enough dill for 2 pieces of florets in each jar. (Large florets can be ripped into 2-3 pieces). Save the fluffy stuff for dehydrating, but you won’t use the fluffy stuff in this recipe.
- 2 gallon jugs of vinegar (you won’t use all of it but you will need more than one jug)
- Filtered water (I use my Berkey Water Filter for all my canning & fermenting. Berkey removes 99.999% of all contaminants and makes me confident that the food I’m preserving is safe & healthy. If you don’t have a high quality water filter like a Berkey, I’d recommend buying a big jug of bottled water).
- A box of pickling salt.
Supplies for Crunchy Dill Pickles:
There are some supplies you’ll need for canning, but the good news is, you’ll be able to use them over and over again!
Here are the basic supplies you’ll need for crunchy dill pickles:
24 quart sized wide-mouth jars (they usually come 12 to a box, so buy 2 boxes)
If you are re-using old jars, just make sure there are no chips or cracks in them (especially along the rim, which would prevent the lid from sealing). You’ll also need new lids, as you can’t re-use old lids for canning.
You’ll need a stock pot for boiling your brine. Mine is a nice heavy duty one that I got at our local Home Hardware.
In fact, if you have a local small hardware store, I’d recommend going there for all of your canning supplies – they will have everything you need! For those of you who don’t, I’ve included Amazon links.
A good, basic stock pot is something you will use frequently when you’re canning. Make sure it’s heavy duty so that your food won’t scorch on the bottom. This is not something you want to cheap out on. During canning season, mine gets very heavy use!
Grab your free eBook!
Directions for Crunchy Dill Pickles:
1. Soak your cucumbers
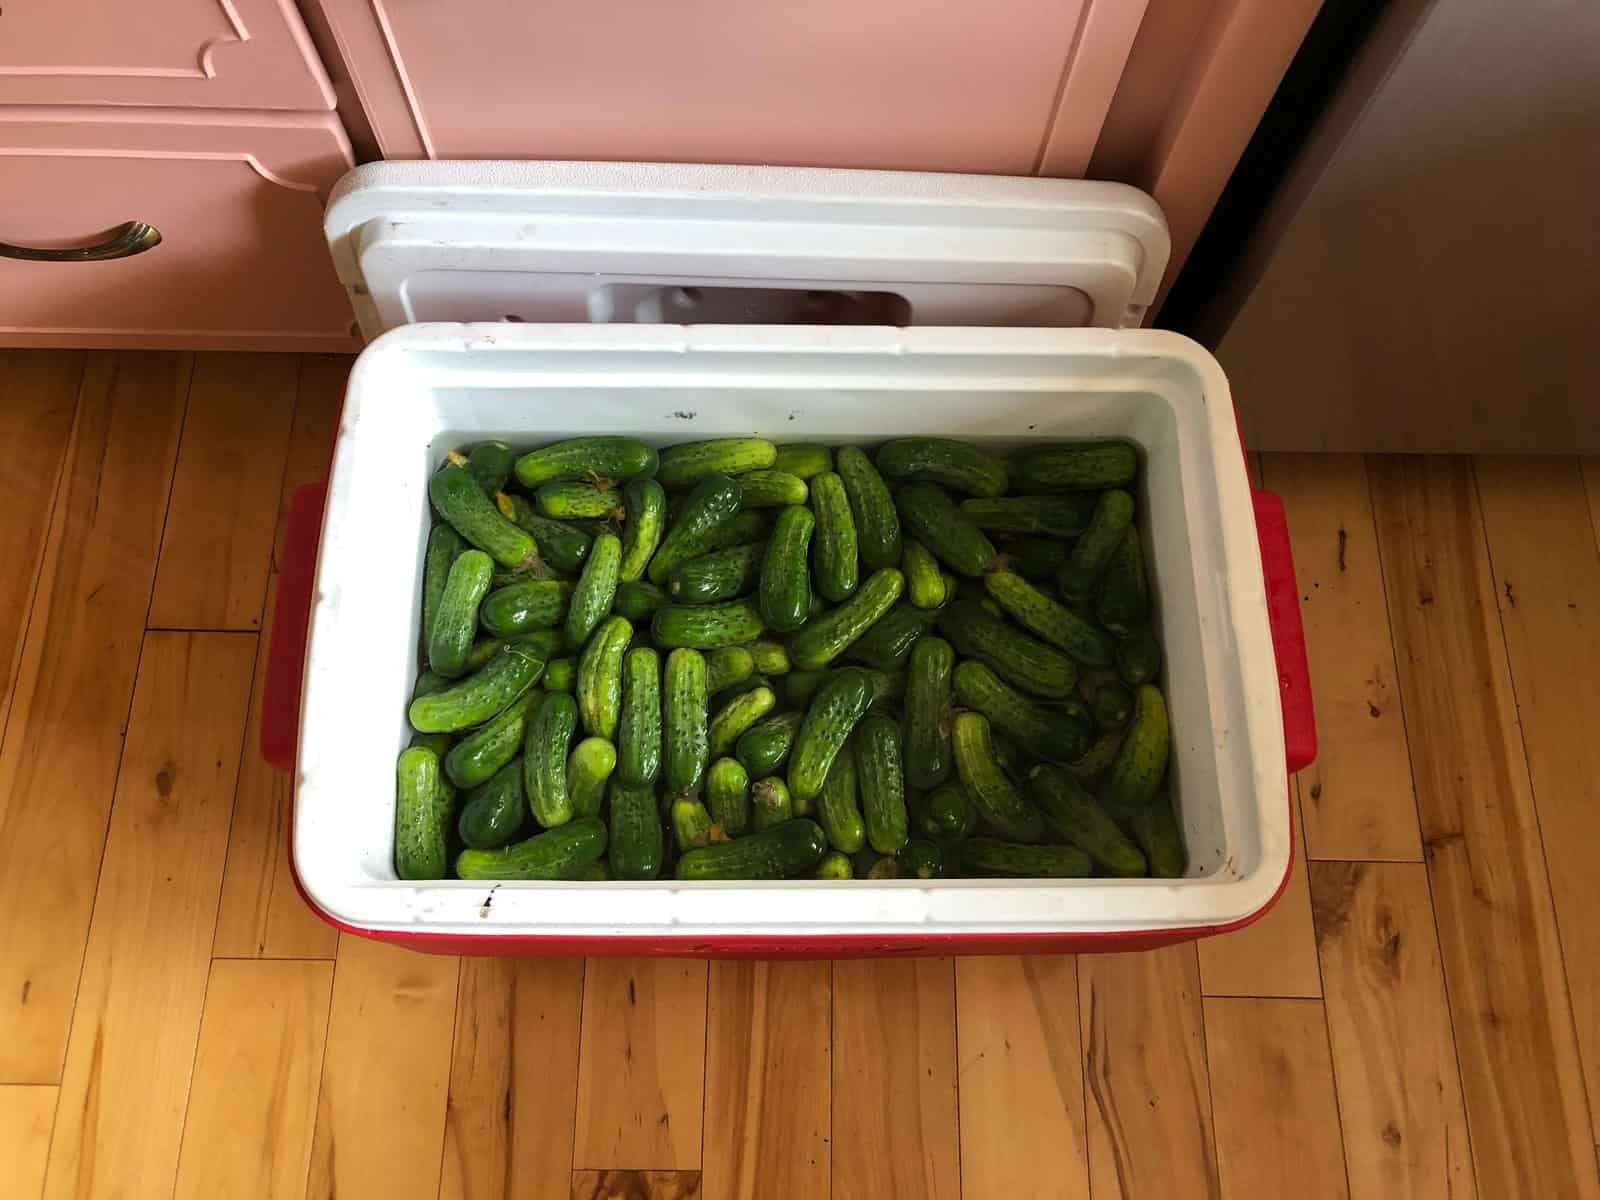
When I get my cucumbers home, I immediately transfer them to a cooler full of ice water. This is an important step, as it keeps them crisp so they don’t wilt.
I bought my cucumbers the day before so I soaked them overnight.
You’ll want them in an ice water bath for a minimum of 2 hours, but you don’t want them in there too long. Ideally you’d can them the same day, but I didn’t get home with them until evening, so I soaked them overnight and started canning in the morning.
Don’t go overboard with the ice either. You want your cukes cold, but you don’t want to freeze them!
2. Prep your kitchen
If you’ve never canned before, I’ll give you some basic tips.
Prep. Your. Kitchen.
Make sure all your dishes are washed and put away. Counters are clear. If you have anything taking up counter space, you’ll want to move it elsewhere. Counter space is your friend when you’re canning.
You’ll be moving quickly because everything has to stay hot, so you won’t want to be messing around with having stuff in your way.
If you have a family that demands regular meals (lol), I recommend starting canning immediately after you’ve finished a meal and cleaned up, so that no one will be in your kitchen trying to make food while you’re canning.
I actually prefer to can at night after supper, because it’s the last meal of the day and I don’t have to worry about how much time I have before it’s time to make the next meal.
However, this time I wanted to do it during the day, so I just put supper in the crock pot first, so that it would be ready to go by the time I was finished with my canning.
Basically, just prepare.
This will take longer than you think, especially if you’re new to canning.
3. Prepare your canning supplies
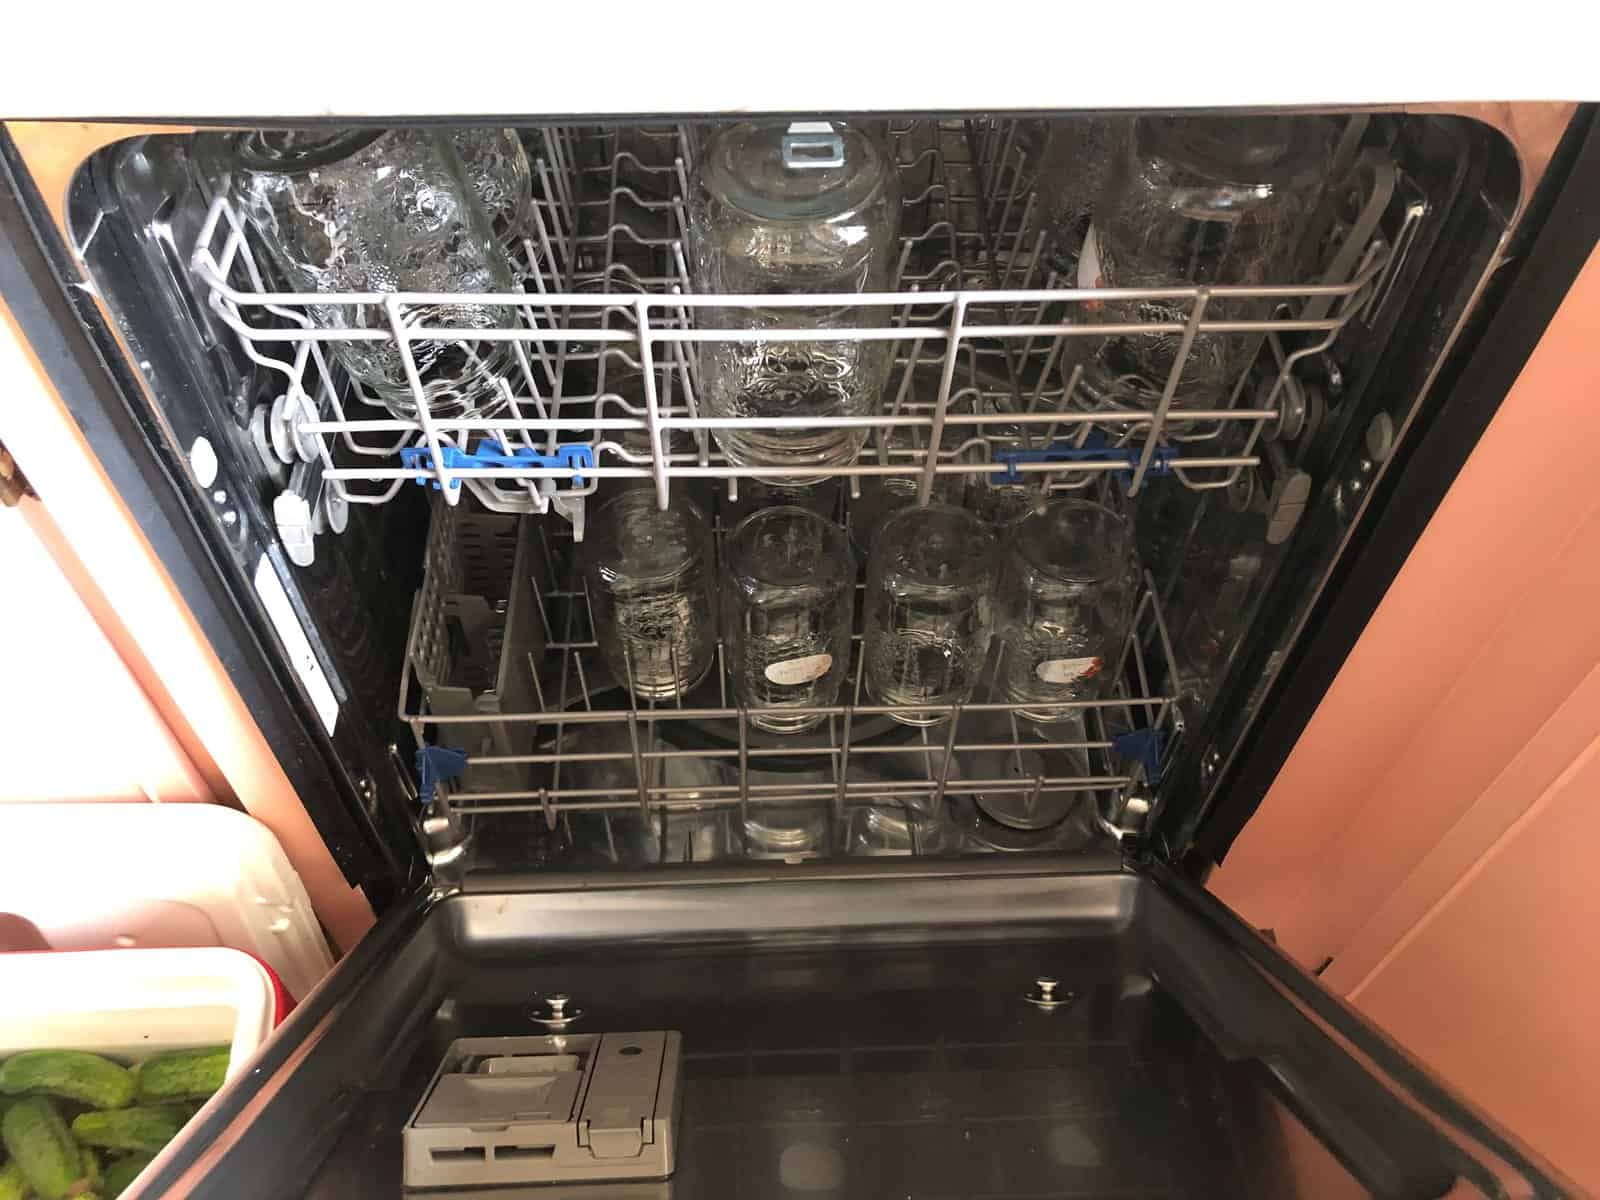
If your jars are brand new, remove the rings and lids and set them aside.
Sterilize your jars. If you have a dishwasher, you can use the sanitize cycle of your dishwasher. If you don’t have a dishwasher with a sanitize cycle, you’ll have to boil them.
Read your canning book for specific instructions on sterilizing.
4. Prepare your ingredients
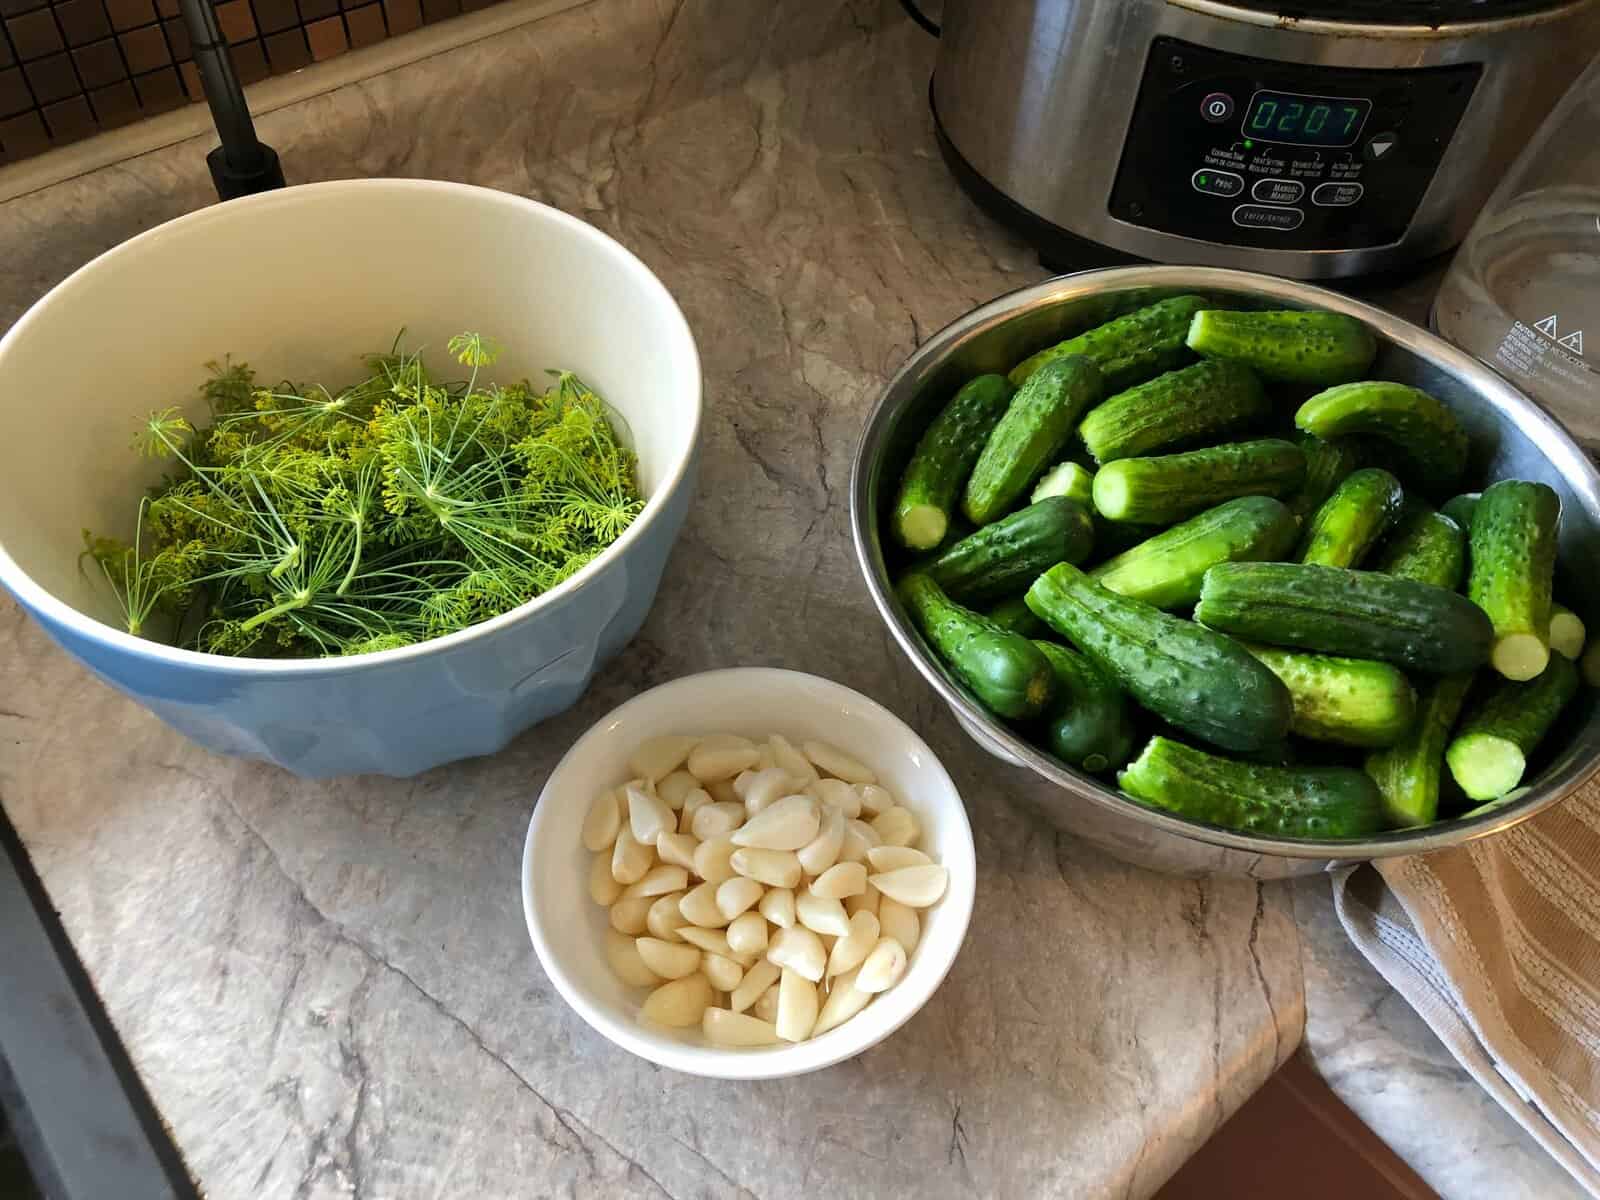
While your jars are sterilizing, prep the rest of your ingredients. I like to sit at the kitchen table to do this, because it takes awhile, so you might as well get comfy. I bring my laptop and put on some Netflix or Youtube to help pass the time.
Peel your garlic and cut large cloves in half (leave small ones whole). You’ll need a total of 96 cloves or pieces (round up to 100 just for fun).
Rip your dill florets into smaller pieces (or leave whole if they’re small). You’ll need a total of 48 pieces of florets.
Once that’s done, you can move onto your cucumbers. I do these in batches because they take up a lot of room. I can fit about 6 jars’ worth in a large bowl, so basically every 6 jars I clean and trim more, leaving the rest in the ice bath.
Using my hands, I grab a cucumber out of the cooler and clean it – rubbing it with my hands in the water to remove any dirt. Using a paring knife, I slice about 1/8″ off the blossom end of the cucumber.
(if you don’t grow cucumbers, they start off as flowers, then turn into a cucumber. The blossom end is the end where the flower was attached, which is opposite to the stem end).
The blossom end contains enzymes that can cause the cucumber to soften. If you want crunchy dill pickles, removing 1/8″ from the blossom end helps keep them crunchy. Keep doing this until you’ve filled up the bowl.
5. Make your brine
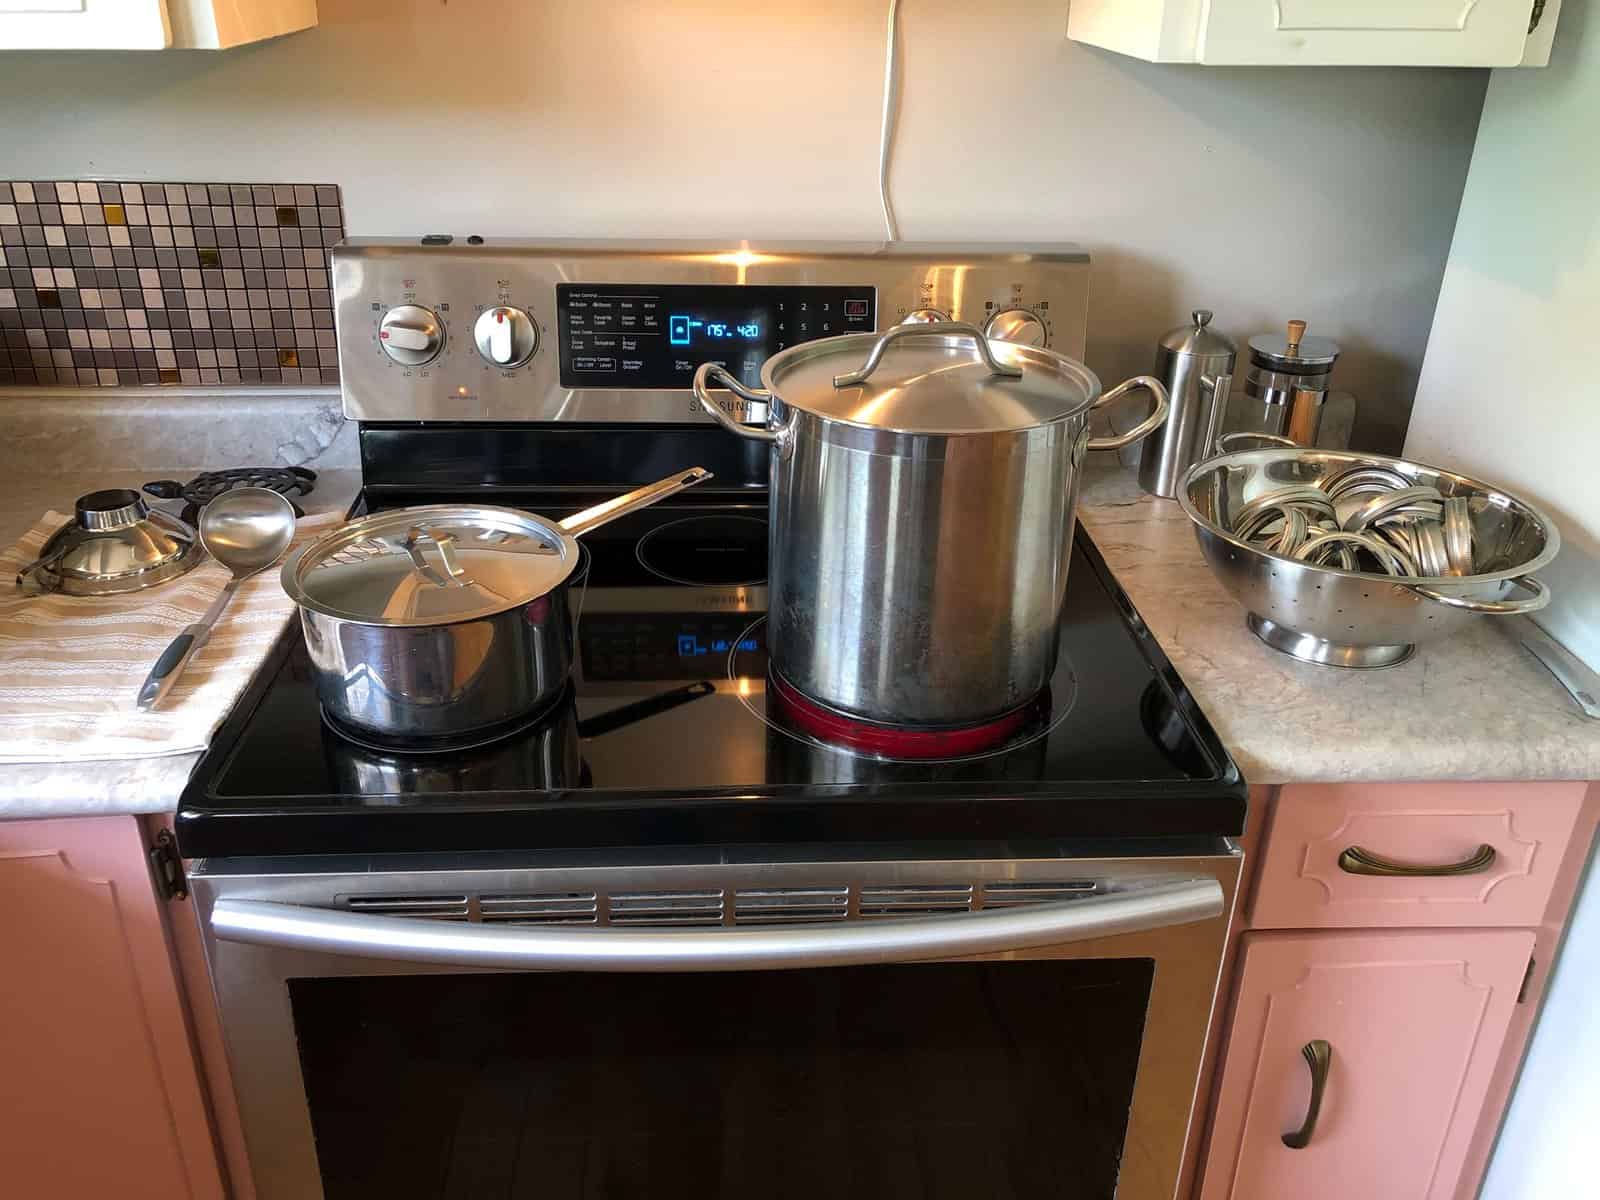
Next, you’ll need to make your brine. You’ll want to do it in as large a batch as fits in your stock pot, using the following ratio:
2 cups vinegar
6 cups water
1/3 cup pickling salt
What fits in my stock pot is 4x the above ratio:
8 cups vinegar
24 cups water
1 1/3 cups pickling salt
Once your jars are sterile and hot, bring your brine to a rolling boil.
6. Prepare your lids
Place your lids in a sauce pan on the stove, making sure they’re not stuck together.
I did 12 at a time, rather than all 24 at once. Bring them almost to a boil, then reduce to a simmer.
This keeps them nice and hot, which also softens the rubber seal, helping them seal to your jar.
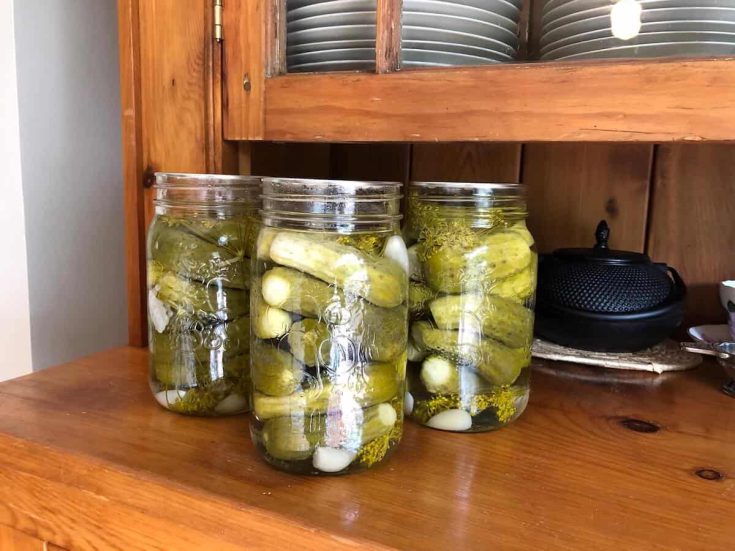
7. Fill your jars
When your jars are sterile and hot, your ingredients are prepped, and your brine is boiling, it’s time to pickle!
I recommend only doing 2 jars at a time so they stay hot. If your dishwasher keeps them really hot, you can remove them from your dishwasher 2 at a time.
If they start to cool down, transfer them to your oven and keep them at 175 degrees.
I add the ingredients in the following order:
2 garlic cloves
1 dill floret
cucumbers (as many as you can cram in there)
2 garlic cloves
1 dill floret
Using a metal funnel, pour in the boiling brine almost to the top (I leave about 1/2″ of head space).
Do this for both jars
Remove the funnel, and using a clean, damp towel, wipe the rim. This is important because if there is any brine on the rim, your lid won’t seal.
Using your tongs, place a clean, hot lid on top of the jar.
Add your jar ring and screw until finger tight. You don’t want these too tight as then air won’t be able to escape, and the lid won’t seal.
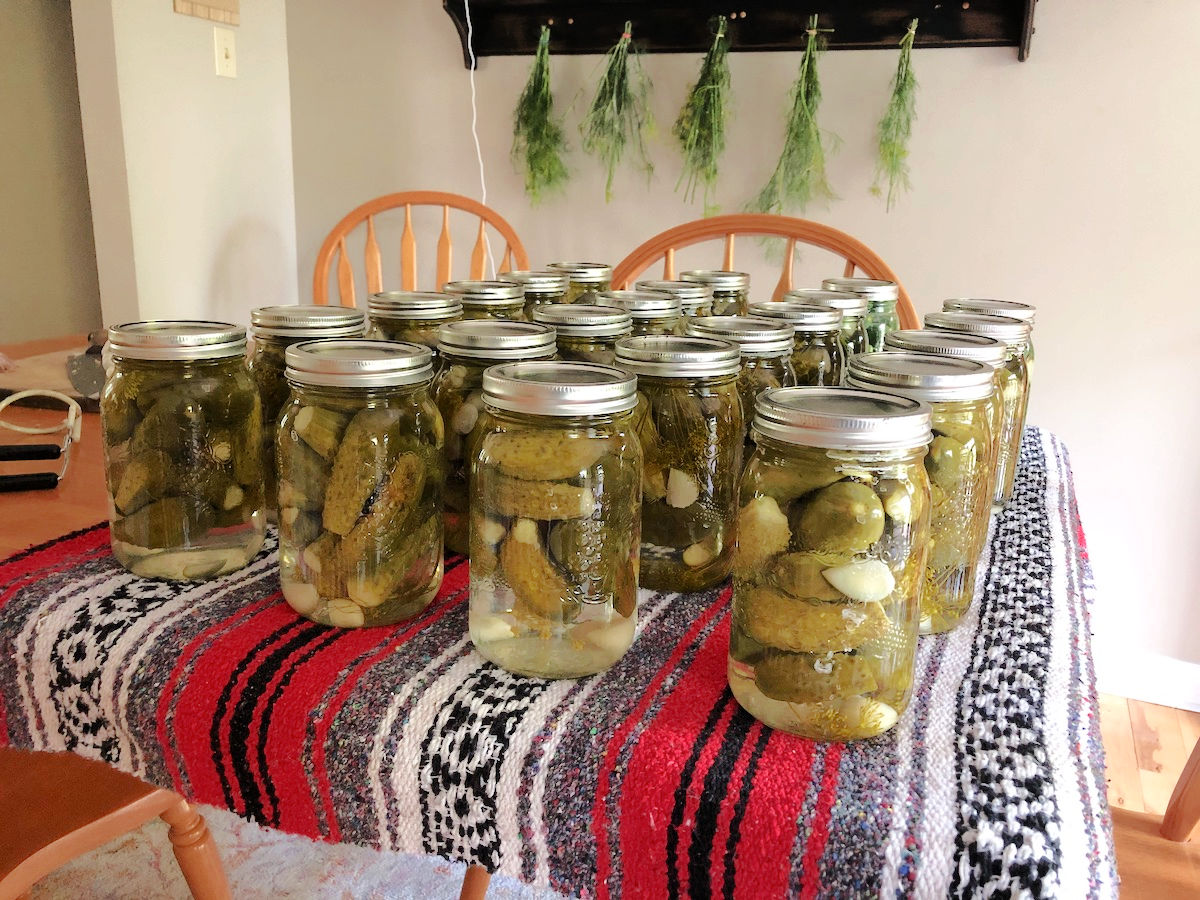
Carefully move your jars (I used oven mitts) to another location where they are out of your way and won’t be disturbed. I put a blanket on the kitchen table and set them on that.
Continue this process until you’ve used up all of your cucumbers, cleaning and slicing more cucumbers and re-making brine as needed.
I find that a half bushel of cucumbers yields me 24 jars. Depending on how many you stuff into the jar, you may end up with slightly more or less.
Let your jars sit out, undisturbed, overnight.
8. Check your seals
The next day, check your seals. The lids should all be sucked down (no little bubble sticking up on the top). If you see that the lid is not sucked down, they did not seal, and you’ll want to put those directly into the fridge.
(Do NOT push down on the bubble in an attempt to check them – you will end up creating a false seal and these will not be safe).
Remove the screw bands. I store mine without screw bands as they have a tendency to rust if left on. Plus, I think they look prettier without, and then I can re-use my screw bands when canning other things.
After I remove the screw bands, I pick up each jar by the lid to double check the seal. I give it a gentle tug to make sure it’s on there good.
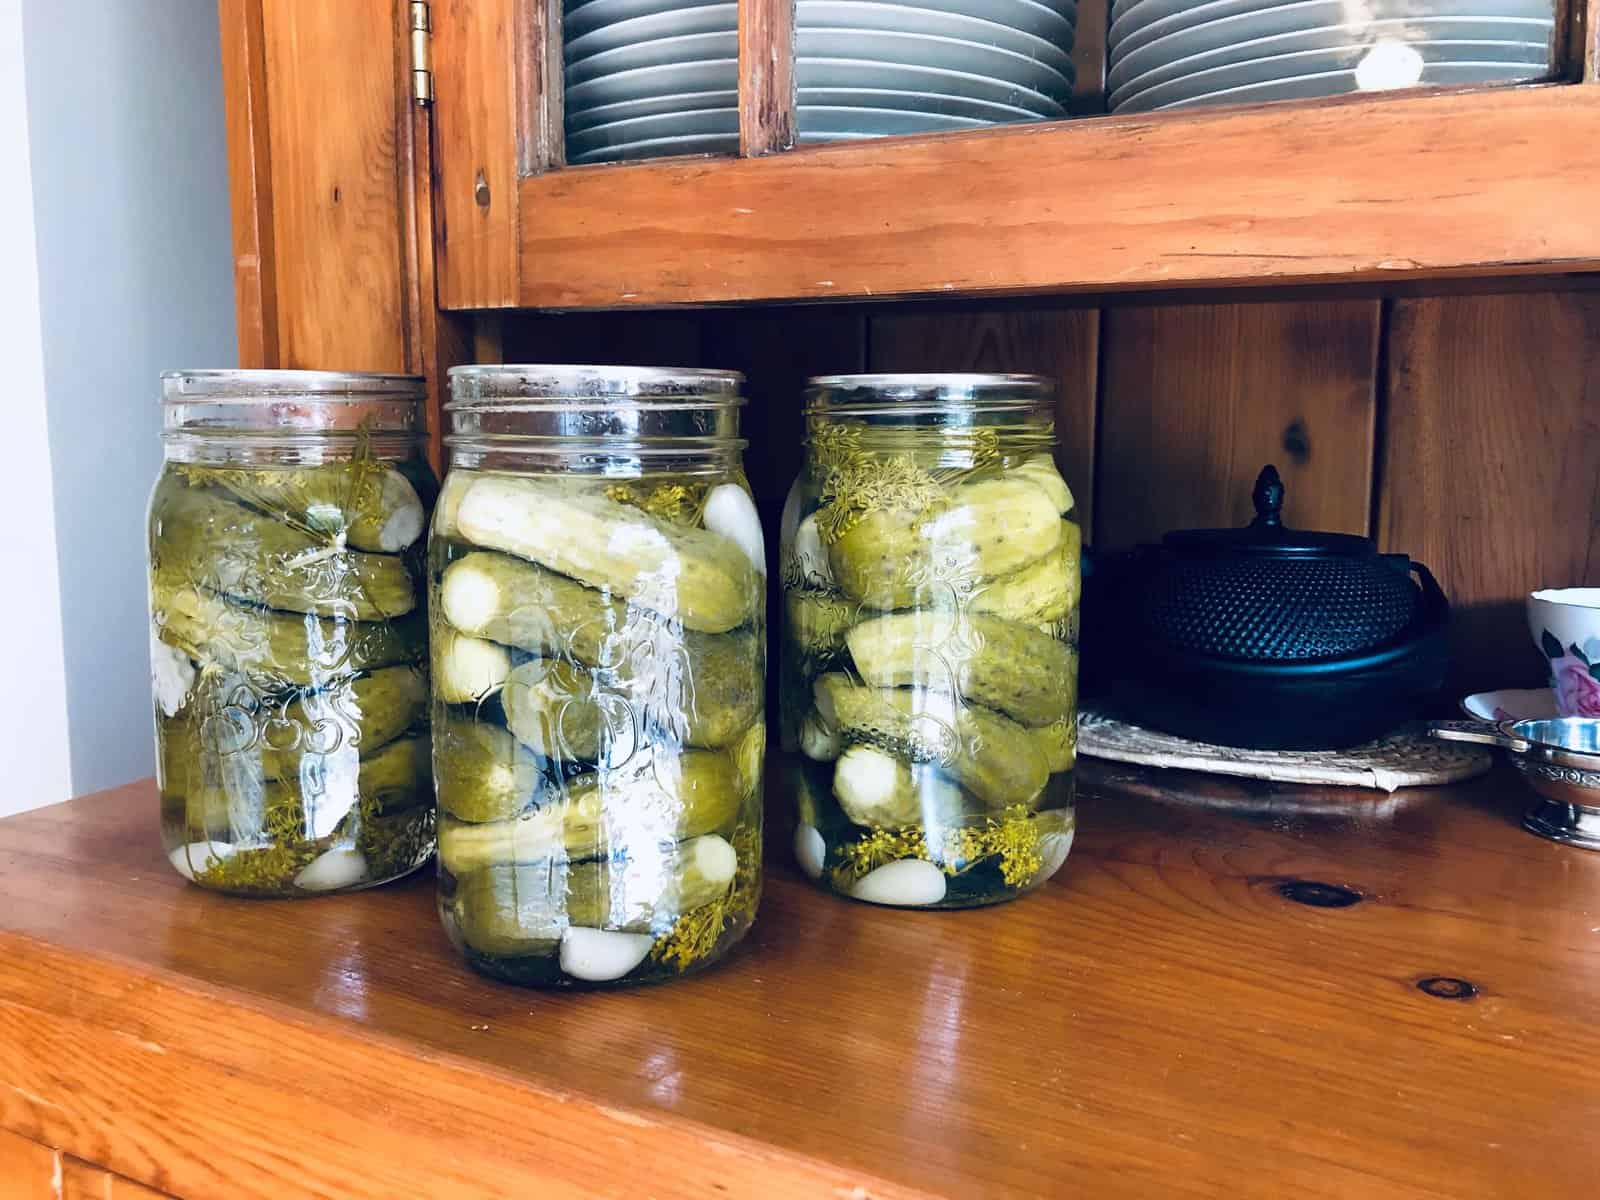
9. Put ’em up!
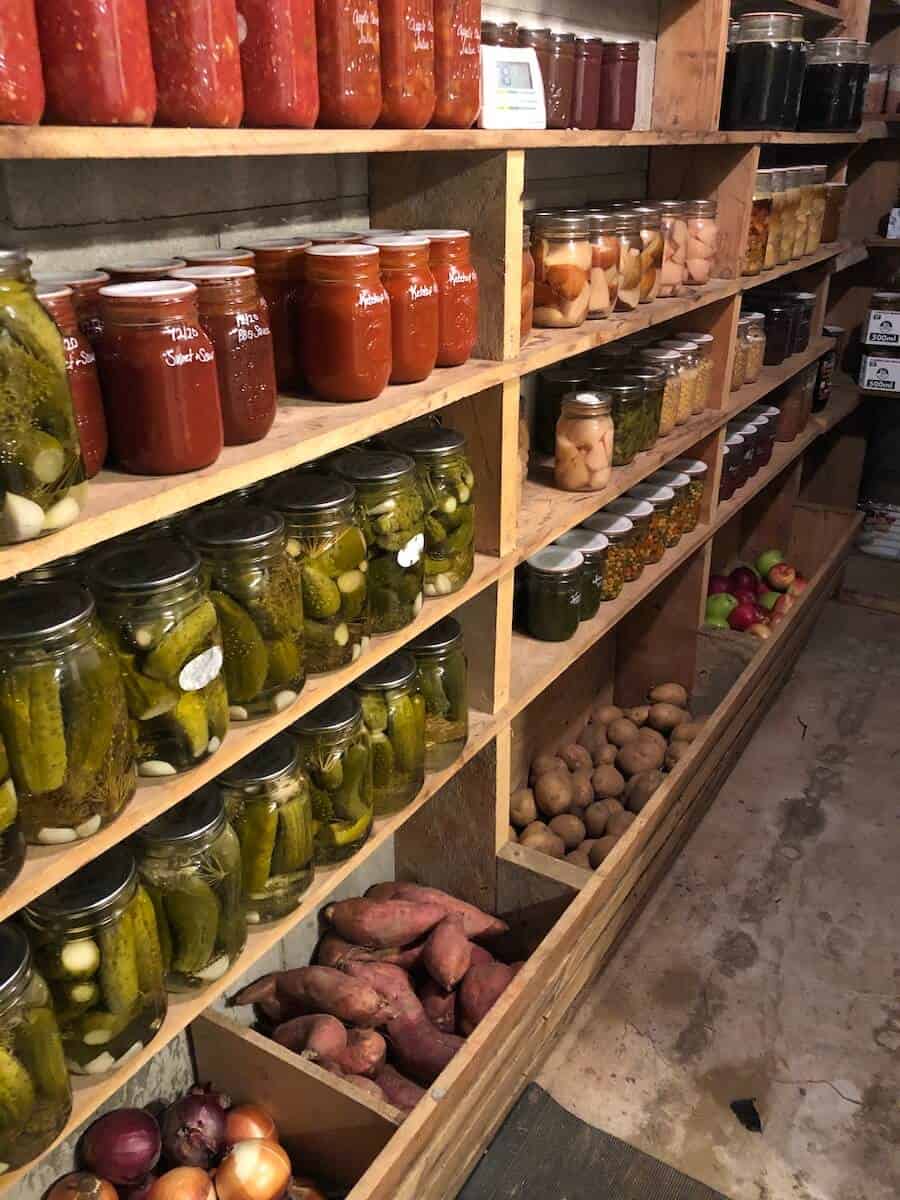
Wipe off the jars (the brine can leave a salty film on the jar if you spilled any), and store in a cool, dry place in your home.
I store ours in our basement cold room so they stay nice and cool.
If you’re new to keeping a home pantry, you may want to check out my post on Emergency Food Storage for Beginners.
Label your jars with the date. This will be important if you make this recipe every year (and you will!), as you will want to be rotating through your stock.
You’ll want to let them sit for a good 6-8 weeks before using them, so they are truly ‘pickled’! The longer, the better!
A Note About the ‘Open Kettle’ Method of Canning
You’ll notice that I didn’t put the jars in a boiling water bath after I canned them.
This is called the ‘open kettle’ method of canning, where you just make sure everything is REALLY hot and sterile when canning. You don’t boil the jars after they’re filled.
This is no longer considered an acceptable canning practise, but if you ask any old-timers, they would say they NEVER boiled their pickles. That’s because you’d end up with mushy pickles.
They probably didn’t boil their tomatoes either, and open-kettle canned those, too.
My old-timer farmer friend (he’s 87 years old) was so confused when I told him I boiled my jars of tomatoes! He’s canned his whole life and never heard of such a thing. And certainly would never dream of boiling his pickles!
The open kettle method is the KEY to getting crunchy dill pickles.
If you’re uncomfortable with this method, I’d recommend finding another recipe that uses a water bath.
Do NOT water bath this recipe, as the ratio of vinegar to water is not sufficient for water bathing – water bath recipes will use more like a 50/50 water to vinegar ratio (which is too sour of a pickle for my liking).
Your family’s safety is your responsibility when canning, so I’d recommend doing some research on open kettle canning, and then make the decision if you’re comfortable with it or not.
(My farmer friend would say it hasn’t killed him yet!)
My family LOVES this crunchy dill pickle recipe and we’ve never had any issues with the pickles going bad, or with anyone getting sick.
As with any other decisions you make for your own family, do your research and use your discretion.
Secret to Crunchy Dill Pickles
To summarize, the following is KEY to getting crunchy dill pickles:
- FRESH cucumbers (picked the same morning, or the day before)
- Soak in ice water for 2-8 hours
- Remove the blossom end
- Open Kettle (Do NOT water bath!)
Watch me make crunchy dill pickles:
Want to save this recipe for later? Pin it to your Canning & Pickling Pinterest board!
Other Recipes You Might Like:
Fermented Red Onions
Tattler Reusable Canning Lids
Wild Sumac Lemonade
Canning Butter with a Pressure Canner
Printable Recipe Card for Crunchy Dill Pickles
Crunchy Dill Pickles
Follow this recipe exactly, if you want crunchy dill pickles that your whole family will love. This recipe card is a brief summary of the recipe, but I highly recommend reading the entire blog post to fully understand the process. But you can print this recipe card for quick reference.
Ingredients
- 1/2 Bushel Cucumbers (3" long)
- 96 cloves of garlic (or less if you're cutting them in half)
- 48 dill florets (or less if ripping large florets into smaller pieces)
- 2 gallons white vinegar
- Filtered water
- 1 box pickling salt
Supplies
- 24 Quart Sized Wide Mouth Mason Jars
- 24 New Wide Mouth Canning Lids
- Stock Pot
- Funnel & Ladle
- Clean, damp cloth for wiping rims
- Blanket or towel to place hot jars on
- Cooler or other large container for soaking your cucumbers
- Assorted sized bowls for your ingredients
Instructions
- Soak cucumbers in ice water for no less than 2 hours, no more than 12 hours. (I soak mine in a cooler).
- Prepare & sterilize your jars. Run them through the dishwasher on the sanitize cycle and keep the door closed so they stay hot. Alternatively, sterilize them by boiling them in hot water and then place them in a 175 degree oven to keep them hot. Follow your Ball canning book for instructions.
- Prepare your ingredients: Peel and separate your garlic cloves, cutting large cloves in half. Wash your dill florets and if they are large, rip them into smaller pieces. Rub your cucumbers with your hands in the water to remove any dirt, then trim off 1/8" from the blossom end of the cucumber and place in a large bowl.
- Make your brine: The ratio is 2 cups vinegar, 6 cups water, 1/3 cup pickling salt. You will multiply this by as much as will fit in your stock pot (I can fit 4x this ratio in my stock pot). Bring it to a rolling boil. And re-make it as you use it up.
- Prepare your lids: In a sauce pan on the stove, bring your lids to a boil (make sure they're not stuck together), then reduce to a simmer and keep them hot.
- Fill your jars: Do 2 jars at a time and keep the rest hot. Everything hot is the key to your lids sealing. Add items in the following order: 2 garlic cloves, 1 dill floret, cucumbers (as many as will fit in the jar - squish them down, they will float once you add the brine), then 2 more garlic cloves & 1 dill floret on top).
- Add brine: Using a funnel & a ladle, fill your pickle jars to 1/2" headspace. De-bubble using a wooden bamboo skewer or a plastic utensil.
- Wipe your rims with a clean, damp cloth
- Apply your lids, then screw on your rings to fingertip tight.
- Move your jars to sit undisturbed while they cool and seal. I put a blanket or tea towels on my kitchen table and set them on that.
- Continue filling 2 jars at a time, as above, re-making your brine as necessary.
- Once you have filled all your jars, let them sit overnight, undisturbed.
- In the morning, remove your rings and check your seals by gently lifting up on the lid with your fingers. If the lid stays on, your jars are sealed, and are now shelf-stable. If you have any that didn't seal (it happens to the best of us!), place them in the refrigerator right away, and eat those ones first.
- Wipe off your jars and label them with the date, and store in a cool, dry location in your home.
- Re-make every year!
I loved the detail you included in this post, I never knew that little bit about the blossom end of the cucumber! I had one very successful batch of fermented pickles using cucumbers I grew but haven’t had the space or time to grow them again, and it doesn’t work to use store-bought (no doubt waxed) cucumbers – I tried. This will inspire me to look for pickling cukes at the farmer’s market and try again!
Thanks for your comment! Yes, I’m attempting a batch of fermented dills too… I do mostly pickled ones though, as I haven’t had great success with fermenting for long-term storage.
This is a great run down. I just went to a fermentation class yesterday and we made dill pickles too. We didn’t use vinegar in our brine. I’m guessing there are lots of different recipes.
That’s awesome! No, fermented dills wouldn’t have vinegar. I’ve started a batch of fermented dills too, using brine rather than vinegar – I love to have both, as the pickled ones will last pretty much indefinitely, even without refrigeration. But I love the health benefits of fermented foods, so I do some of those, too. 🙂
This is a great tutorial. Every year I say I’m going to make pickles and I never do. I’m pinning this one. Thanks!
The hardest part is just starting! Do it, you’ll be glad you did. 🙂
Love your tip on icing the cukes prior to pickling to maintain the crunchiness. Nice tutorial!!
It’s definitely a game-changer in terms of crunchiness!
Question – are the cukes dried before you place them in jars?
No, they are wet, which isn’t an issue since you will be pouring brine over top anyway.
I had no clue about cutting the end off. These sound great. You can never have too much garlic.
Is it okay to use pickle crisp in this recipe?
Hi there! I don’t see why you couldn’t, but I don’t think you’d need it. These pickles turn out nice and crisp without the extra additives!
How long are these pickles shelf safe?
We have had a batch that was on our shelf for 3 years and it tasted just as good (if not better!) as the current year’s batch. Although typically they don’t last that long at our house! As long as you make sure everything is hot, sterile, and sealed, they should last quite a long time. I will periodically check my jars to make sure they are still well sealed. I also remove the rings when I’m storing them to ensure I haven’t created a false seal.
I made mush pickles years ago. An old timer stayed to do it this way and am planning on doing a batch.
Let us know how you make out when you do them! We have made them this way for several years now, and I always get compliments on them! We even give them away as gifts.
Thanks so much for all the great tips. Since it’s just the two of us, I pared this WAY down :). I had 3 pounds of cucumbers that I sliced to make 5 pints of pickles. I also added a few sprinkles of red pepper flakes, 1/8 tsp onion powder and some dill seed since I was a little short on the heads of dill. It will be hard to wait six weeks to try them!!
That sounds perfect! I love that the recipe is flexible with spices etc., so you can use what you like. It will be well worth the wait!
All my jars sealed but one. I must have used the lid previously for jam. If I transfer this jar straight to the fridge will they stay for a while so they can soak up all the pickling brine and seasonings? I also added pickling spices.
Yes, this has happened to me as well and I just pop them in the fridge for a few weeks, and then eat those ones first. If you want them to soak up the brine even faster, you could remove them from the jar and slice them up, and then put them back in.
Can you use minced garlic in a jar instead of fresh garlic?
If the garlic is in oil then I wouldn’t, it will affect the safety of your pickles.
Can you cut your recipe in half or even down to a fourth of this. does it matter?
Absolutely, Just reduce the quantities accordingly! Our family likes to make a big batch, hence the larger quantities.
Hi there. I think I am going to try your recipe of your pickles. Another recipe I use calls for a bit of sugar in the brine. Will this hurt the sealing and preserving process or should I leave out totally. I have never done this method before but makes sense to avoid limp pickles.
I don’t see a problem with adding sugar, if that’s what you prefer!
I’m so thankful I stumbled onto this recipe. My pickles are way too vinegary, but I’ve never seen a recipe with this ratio before. I also like that they never see the inside of a canner, although I’m confused by why it’s called open canning. Regardless, this method makes way more sense than any I’ve seen. Thanks for posting it.
I get compliments on these pickles every single time! They are just the right amount of sour, and always crunchy. 🙂 Let us know if you make them!
I can’t wait to try this with my cukes! I have 2 questions…
1. Do I have to use my cucumbers the day or day after picking them, and
2. Can I store unused brine to use later in the week?
Hello! For the best quality and crunchy pickles, I’d recommend using your cukes asap (the day after at the latest). You can definitely store the brine for later use – it’s just salt, vinegar and water so there should be no issues with that. I usually store mine in the fridge just to be safe. Hope that helps!
Can I use dried dill instead of sprigs?
I personally wouldn’t – dried dill tends to go slimy in brine. Fresh dill flowers will give you the best results. 🙂
I made this recipe 2 years in a row, the first year a jar or two ended up with a thick white sediment type stuff on the bottom of the jar and when I popped the seal they bubbled and fizzed like crazy, last year every single jar did this. Do you have any insight where I may have gone wrong? I love the recipe but not sure about the white sediment?
Gosh, I have no idea! I’ve never experienced that. It sounds like they’ve gone bad. Did you make sure everything was sterile and VERY hot? (Jars, lids, brine). Any tools you use should be sterile too (ie – ladle and funnel). Did you make sure your vinegar was at least 5% acidity? And use the right ratio of vinegar to water for your brine?
I am so excited to try this recipe as I cannot stand mushy pickles, and have been avoiding canning them for that reason. But we have TONS of cucumbers haha. Would this recipe work for sliced cucumbers, either in rounds or spears? Want to use up our slightly larger cucumbers too. Thanks!
You could certainly try! They might not be as crunchy. I usually turn my larger cucumbers into relish.
Did you try with sliced cucumbers and did it work!?
I have done sliced! It worked fine. I still prefer the whole dills; they’re less work, and stay crunchier than the slices.
Can you eat these right after they seal?
I always let them sit for 4-6 weeks before opening (the longer the better!), if you eat them right away they’re not really pickled yet.
I plan to try making these this year. Quick question as the cucks are pickling does the brine go cloudy or does the brine stay clear? Thanks!
Hi Ashley! My brine stays pretty clear (not much different than what you see in the pics in the post – it basically stays that way). I think it might depend on what type of salt you are using. Avoid using iodized salt, which has anti-caking agents added to it. I would stick to either a kosher salt or a pickling salt. I used pickling salt for the batch pictured here, but if I use pink Himalayan salt (as I sometimes do), then the brine can get a little cloudy. Hope that helps! Best of luck with your pickling!
THANK YOU!!! I have been doing my pickles like this for a few years now. However, each year I second guess myself and go to the internet to double check and relieve my anxiety. Finally someone who tells the truth! I’m so thankful to have found your article. And I do believe I love your old timer neighbor, lol. What a gem. Thank you for sharing this and for your honesty. I will never waterbath a pickle (or tomato 🤫)!
You’re most welcome! Best pickles ever – I can’t eat anyone else’s pickles now. 😂
My farmer friend (Clifford) passed last year, at the age of 93 – canning his whole life, never boiling jars – so I’d say he did ok! 🙂 Thanks for visiting the blog.
I hava a question, I grow my cucmbers. I have them in the refrigerator, do I still need to soak them in ice water?
I find the ice water helps crisp them up – but you could always try it without and compare the difference!