Fermented Asparagus Pickles with Garlic
Whether you have your very own asparagus patch, or you’ve managed to pick up some deliciously fresh asparagus from a local farm stand, you may want to preserve some of that goodness just a little longer! This fermented asparagus recipe will allow you to enjoy the delicious taste of pickled asparagus, long after the spears in the garden have turned into ferns.

This post may contain affiliate links, which means if you make a purchase through one of these links, I make a small amount of commission at no extra cost to you. As an Amazon affiliate, I earn from qualifying purchases. See full disclosure here.
After a long winter of eating grocery store vegetables which taste like disappointment, I watch my asparagus patch like a hawk in early May, waiting for those first delightful spears to poke through the ground. My body and my taste buds are craving real vegetables – the ones that are loaded with nutrients because they’re so fresh.
Asparagus is the very first thing we harvest here on the homestead, only preceded by fiddleheads – but we have to forage off-property for those. Once the asparagus emerges, the lilacs typically bloom shortly thereafter, followed by rhubarb. I love the seasonal rhythm of food.
Once we start harvesting food here, I make it my mission to stop buying grocery store produce and eat only what grows on the homestead. Sometimes that means we eat the same thing every day for a week or two – but that’s the nature and the beauty of seasonal eating. We enjoy it while it’s fresh and in season, then move on to what’s next!
Asparagus is a funny thing. It seems to take ages to finally emerge, but once it does – you have to cut it every single day, or it gets huge! So before we know it, we have more asparagus in the fridge than we can possibly eat in a day. And then, before I’m ready, we need to start preserving the excess.

I was thinking about making pickled asparagus, but I love fermentation because of all its health benefits, so I decided to give fermented asparagus a try instead.
If you’re not familiar with fermentation, it’s very similar to pickling, except it uses salt and water instead of vinegar.
It’s an ancient food preservation method, where the salt suppresses the ‘bad’ bacteria, but allows the ‘good’ bacteria (lactobacillus) to multiply. This converts the sugars naturally present in vegetables to lactic acid, which is what gives fermented foods its tanginess.

The result is delicious, fizzy, tangy veggies that will stay good in the refrigerator far longer than fresh vegetables ever would.
I prefer fermentation over pickling, because during the fermentation process, nothing is heated – therefore, you preserve all those nutrients, and most of the crunchiness of fresh vegetables.
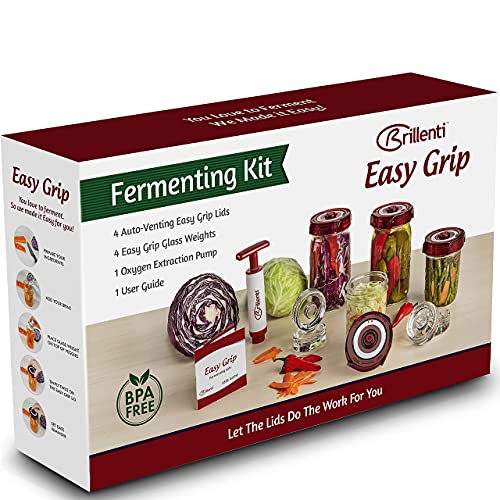
Fermentation Tools
- Two quart-sized mason jars (I prefer wide-mouth, as it’s easier to pack the food in).
- Cutting board
- Sharp knife
- Liquid measuring cup
- Tablespoon measuring spoon
- Glass weight
- Airlock fermentation lid, or a plastic mason jar lid (vegetable ferments prefer an anaerobic environment, so you want to prevent air from getting in as much as possible. A fermentation lid has a valve, which allow gasses to escape, while preventing air from entering. With a regular plastic lid, you’ll have to burp it periodically to releases the gasses, but that will also allow air in. I have the best results with a fermentation lid)
- Plastic mason jar lid for storing your ferment after it’s complete. (Metal reacts with the salt brine and can rust).
While you can get started with fermentation with just a plastic mason jar lid and a weight, having proper fermentation tools will make your life much easier.
You won’t have to remember to burp your jars, and you’ll have far less risk of mold.
This is my preferred type of fermentation kit:
It includes enough glass weights and fermentation lids to do 4 different jars of ferments at a time (which is plenty!).
I love that the lid has a date dial on it, to help you remember when you started your ferment.
The kit is inexpensive, and has everything you need to get started with fermenting, other than the wide mouth mason jar and the vegetables!
Ingredients for Fermented Asparagus

- Enough asparagus spears to fill your jar (This varies based on the size of your spears)
- Fresh garlic cloves
- Optional: fermented vegetable starter. If you have a previous ferment you’ve already made, adding a little of the brine to your new ferment will help speed up the fermentation process
- Additional seasonings if desired (mustard seeds, dried dill, and red pepper flakes are a nice addition!)
- Sea salt or kosher salt
- Filtered water
How to Make Fermented Asparagus
1. Prepare Your Equipment
Wash your jars, lid, weight, knife, and cutting board in hot soapy water. They don’t have to be sterile, but you do want them to be clean.
2. Prepare the Brine

In a quart sized/ 1 Litre mason jar, make your salt brine: Mix 1 1/2 to 2 Tbsp of salt to 2 cups of room temperature water.
Stir the brine until the salt has fully dissolved, then set aside.
3. Prepare the Asparagus
Rinse your asparagus spears if desired, but not too aggressively, as you want that natural bacteria and yeast on there for your fermentation. Be careful not to break off the tips.
Trim your asparagus so the spears are roughly the same length, and will fit in your jar. Be sure to leave enough room for your glass weight.
4. Pack Your Jar
Place your desired (optional) seasonings into the bottom of the jar.
Tightly pack asparagus into the jar. Be careful, the tips are fragile – you don’t want to accidentally snap them off, as they’re the prettiest part!

Shove your 3-5 peeled garlic cloves in between some of the asparagus.


Pour the brine over your asparagus, until the spears are completely covered, but you still have room for your weight and lid.

Apply your glass weight and check to make sure the asparagus tips are fully submerged.

Apply your fermentation lid, or your plastic lid if you don’t have a fermentation lid.

5. Ferment Your Asparagus
Let the jar sit out for 7-14 days at room temperature (ideally out of direct sunlight, but otherwise, on your countertop is fine).
If you’re using a regular plastic lid rather than a fermentation lid, burp the jar once a day by loosening and then re-tightening the lid.
After 7 days, taste one of your asparagus spears and see if it’s to your liking (Make sure you use a clean utensil so you don’t contaminate the brine). If it’s tangy enough for you, it’s done! If not, let it go a little longer.
If you added garlic and spices, the asparagus will get spicier and softer the longer it ferments.
(Note: The warmer your house is, the faster it will ferment. If your house is warm, 7 days should be enough time. If your house is cool, you may wish to let it ferment for an additional 1-2 weeks).

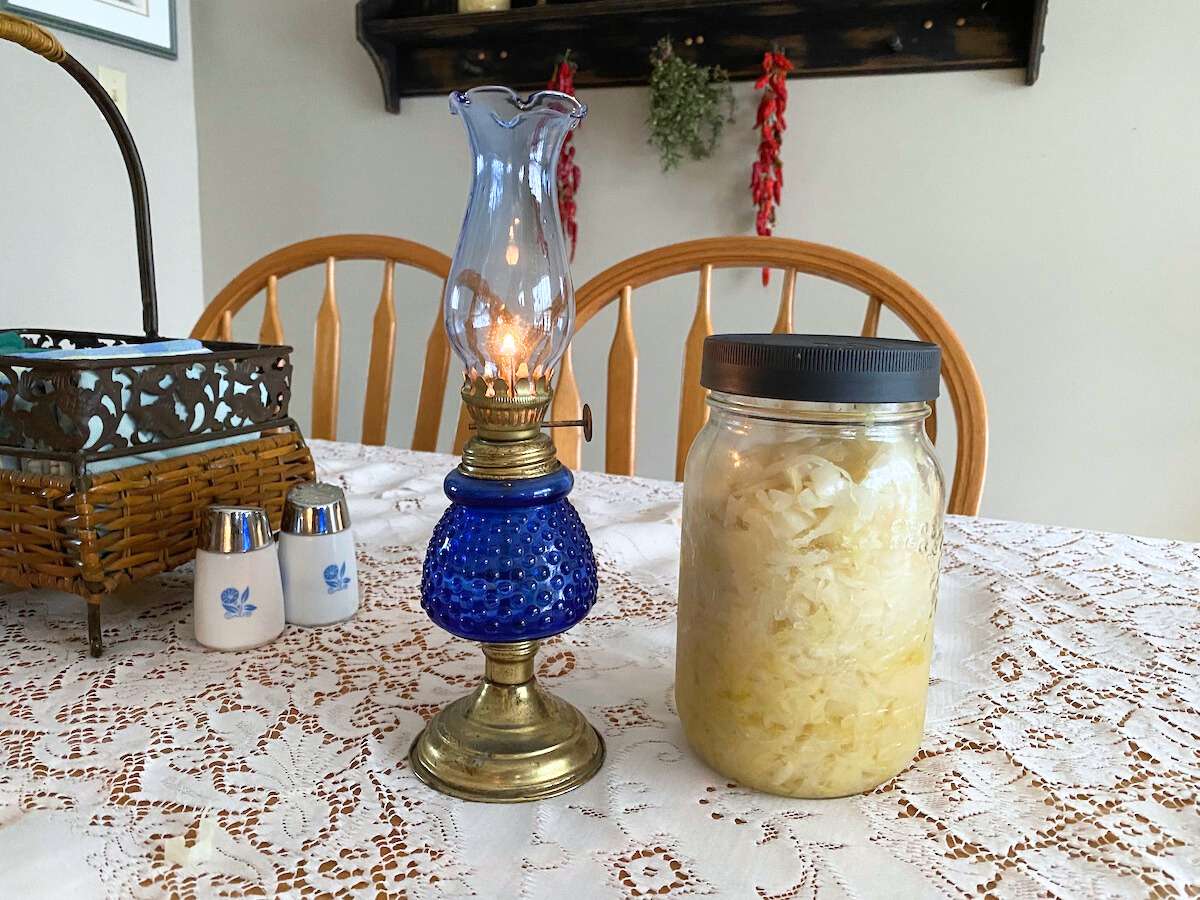
6. Store Your Fermented Asparagus
Once the asparagus is as fermented as you’d like, remove the fermentation lid and glass weight, and replace with a regular plastic lid. (I prefer not to use metal on my ferments as it reacts with the salt and creates rust – not harmful, but not particularly appetizing!)
The fermented asparagus will store in your refrigerator for 6-12 months, but I’m willing to bet it won’t last that long! These delicious pickled asparagus spears will get gobbled up in no time.

How to Eat Fermented Asparagus
- With poached eggs
- As a side dish with any meal
- Served with crackers and cheese, as you would pickles
Fermented Asparagus Tips & Notes
- Select fresh, firm asparagus, roughly uniform in diameter
- Use un-chlorinated water. (Berkey water filter is one of the few water filters that will remove chlorine. Alternately, you can use spring water, or let your tap water sit in a pot or large bowl for 24 hours until most of the chlorine has evaporated).
- If you notice a white film/scum developing over the surface of your ferment, don’t freak out! It is most likely kahm yeast, a harmless yeast that sometimes appears in ferments. (I find I seem to get it less often now that I use the Easy Fermenter lids). If you notice this yeast forming, you can simply scrape it off with a clean spoon. If you don’t remove it, it can sometimes give your ferments a yeasty taste, but is not harmful.
- If you do see mold, throw it out. Mold is easily distinguished from kahm yeast, as it’s usually thicker, and will appear in one spot rather than show up as a film over the surface. Once you see mold, the spores have distributed throughout your ferment, and it’s unsafe to eat. Toss it out and try again!
Other Fermentation Recipes
Homemade Sauerkraut in a Mason Jar
Fermented Cherry Tomatoes
Lacto-Fermented Salsa
Fermented Red Onions
Fermented Dilly Beans
Pin It for Later
Save it to your fermented foods Pinterest board!

Fermented Asparagus

This fermented asparagus recipe will allow you to enjoy the delicious crunch of asparagus, long after the spears in the garden have turned into ferns.
Ingredients
- 1 1/2-2 Tbsp Sea Salt
- 2 cups filtered water
- Asparagus (enough to pack your jar full)
- 3-5 Garlic Cloves
- Spices (optional): Mustard seeds, dried dill, red pepper flakes (to taste)
Instructions
- Wash your jar, weight, and fermentation lid in hot, soapy water.
- Rinse your asparagus spears if desired, but not too aggressively, as you want that natural bacteria and yeast on there for your fermentation.
- Trim your asparagus so the spears are roughly the same length, and will fit in your jar. Be sure to leave enough room for your glass weight.
- Place your desired (optional) seasonings into the bottom of the jar.
- Tightly pack asparagus into the jar. Be careful, the tips are fragile - you don't want to accidentally snap them off, as they're the prettiest part!
- Shove your 3-5 peeled garlic cloves in between some of the asparagus.
- In a separate jar, make your salt brine: Mix 1 1/2 to 2 Tbsp of salt to 2 cups of water.
- Stir the brine until the salt has fully dissolved, then pour it over your asparagus.
- Apply your glass weight and check to make sure the asparagus tips are fully submerged.
- Apply your fermentation lid, or plastic lid if you don't have a fermentation lid. (If not using a fermentation lid, burp once a day by loosening and re-tightening your lid).
- Let the jar sit out for approximately 7 days at room temperature (ideally out of direct sunlight, but otherwise, on your countertop is fine).
- Taste after 7 days to see if it's tangy enough for your liking. If not, you can ferment for an additional 1-2 weeks.
- Remove the fermentation lid and glass weight, and replace with a regular plastic lid.
- Store in refrigerator for 6-12 months.
Notes
- Use only good quality sea salt or kosher salt. (Do not use table salt).
- Use filtered water. Chlorinated water will kill the healthy bacteria you're trying to grow.
- Use a plastic lid rather than metal. Metal will react with the salt and rust.
- Fermented asparagus will store in your refrigerator for 6-12 months.
Recommended Products
As an Amazon Associate and member of other affiliate programs, I earn from qualifying purchases.


Thank you for sharing this recipe. I’m almost ready to embark on this process. And this recipe looks amazing.
You’re most welcome! Have fun with it!